Showing posts with label brown sugar / coconut sugar / maple syrup/ honey. Show all posts

Saturday, August 9, 2025

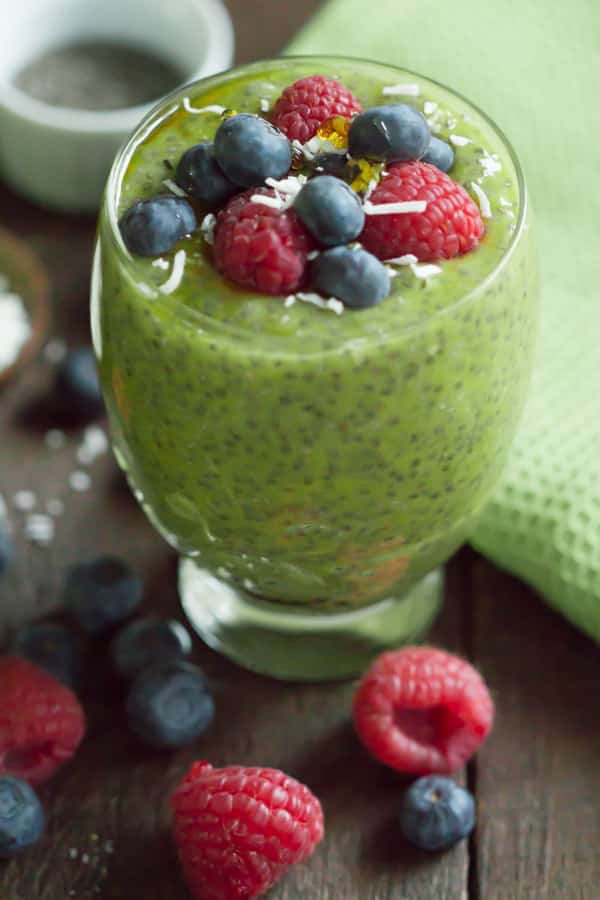
Kiwi-chia pudding

 Kiwi Chia Pudding Primavera Kitchen Recipe  

Ingredients

3 tbsp of chia seeds

1 cup of almond milk (or any milk of your choice)

2 ripe kiwis, peeled and chopped

1–2 tbsp of honey, maple syrup, or your preferred sweetener

Optional toppings: Fresh kiwi slices, roasted coconut, granola, or nuts


Preparations

Add the chia seeds to a medium-sized mixing bowl. Pour in the almond milk and whisk thoroughly to ensure the seeds are evenly distributed and don’t clump together.

Add 1–2 tablespoons of your preferred sweetener. Mix well until combined.  Cover the bowl and refrigerate for at least 2 hours, or ideally overnight. During this time, the chia seeds will absorb the milk, creating a thick, pudding-like texture.

Peel and chop your kiwis into chunks Peel and chop your kiwis into chunks.

Use a blender or food processor to puree the kiwi chunks until smooth. You can leave the puree slightly chunky if you prefer a bit of texture.

If the kiwi puree is too tart for your taste, you can add a small amount of sweetener to balance the flavour.

After chilling, give the chia pudding a good stir to ensure an even texture.

Take a serving glass or mason jar and start layering. Begin with a spoonful of kiwi puree at the bottom, followed by a layer of chia pudding. Repeat the process until the jar is full.

Add fresh slices of kiwi, a sprinkle of granola, a drizzle of honey, or your favourite toppings. Get creative and make it as colourful as you like!

Serve the Kiwi Chia Pudding immediately if you prefer it fresh, or store it in the refrigerator for up to 3 days. The flavours will meld together beautifully over time, making it even tastier.

Coconut milk will give a richer, creamier pudding, while oat milk offers a naturally sweet alternative.

Tips

Add a splash of vanilla extract, a pinch of cinnamon, or even a dollop of yogurt for added flavour and creaminess.

Health Benefits 

Both chia seeds and kiwis are excellent sources of dietary fiber, which aids digestion and promotes gut health.

The antioxidants in kiwi help combat free radicals in the body, while chia seeds contribute to overall cellular health.

Chia seeds are known for their energy-boosting properties, making this pudding a great pre-workout snack or breakfast option.

This recipe is naturally gluten-free and can be made dairy-free, making it suitable for those with dietary restrictions.


https://gscrochetdesigns.blogspot.com. one can see my crochet creations  

https://kneereplacement-stickclub.blogspot.com. for info on knee replacement

https://cancersupportindia.blogspot.com  for info on cancer and health related topics

https://GSiyers home remedies.blogspot.com   is the latest addition to my blogs


Monday, October 9, 2023

How to Make Baked Apples

baked apples 


1. Choose the Right Apples

My mom and I can never decide which is the best apple variety for making baked apples. Some varieties turn to mush so fast they explode out of their skins, while some stay weirdly firm. Either way they’re edible, but not ideal—a baked apple should stay intact but be soft enough to eat with a spoon. So I decided to make the dish with as many apples as I could find at the grocery store so I could set the record straight for my mama.

After making the dish in the exact same way with eight different varieties (Jonagold, Honeycrisp, Cortland, Granny Smith, Gala, Pink Lady, Fuji, and McIntosh), there were were two clear winners: Gala and Fuji apples, which both got nice and soft inside, but maintained their shape when baked.

You’ll need one apple per person. It doesn’t matter how many you bake at once—just choose a baking dish that’ll hold your desired amount of apples with not too much empty space around them. (Sometimes I just make one single baked apple in a very small baking dish all for myself.) 

baked apples 3.jpg


2. Hollow Out Those Apples

But don’t use an apple corer—it will slice all the way through the apple, which is not what we’re after. You want to remove the core and seeds while keeping the bottom of the apple intact so you have a nice little vessel in the middle to fill with sweet things and butter.

Start by using a paring knife to carefully slice around the top core of the apple, making sure not to go all the way through to the bottom. Then pull out what you cut, and use a spoon to scoop out the rest, making sure that all seeds are out. I find that the sharp edges of a 1/2 tsp. measuring spoon are ideal for scooping out the core, but any small sharp spoon or even a melon baller will do.

 Baked-Apples-03-01112018.jpg


3. Fill Them With Sweet Things

Place your hollowed-out apples in a baking dish that has sides that are at least 2 inches high and doesn’t leave too much empty room around the apples. Then fill each apple with something sweet, some spices, and some butter.

You want about 1 Tbsp. of sweetener per apple: it can be either a liquid or granulated sweetener, like brown sugar, coconut sugar, maple sugar, maple syrup, or honey. Add a pinch or two of your favorite baking spices to each apple too: cinnamon, nutmeg, allspice, clove, cardamom, and/or ginger. And don’t forget a pinch of salt too. A few little cubes of butter in each apple will help make them more saucy and delicious—add the butter along with the sweetener and seasonings. It doesn’t really matter what order everything goes in, since it will all melt together as it bakes.

baked apples 5.jpg


4. Pour Liquid Around Them and Bake

To keep the apple from charring and sticking to the baking dish as it bakes, but also to help soften it as it bakes, you want to pour about 1 inch of liquid around the apples. Water is the easiest choice and will get flavored with the spices and sweeteners and juices from the apples as it bakes. For a sweeter sauce, use fresh apple cider—and go ahead and add a splash of bourbon or brandy to that apple cider if you like. (You could also spike your water and it would be delicious.)

Bake the apples in a 350°F oven until they are very tender, about 40 to 45 minutes. Start checking at half an hour, and if the liquid has evaporated so much that the surface of the baking dish is dry, add more.

baked apples 6.jpg

I like my baked apples with cold heavy cream. Photo by Chelsea Kyle, Food Styling by Anna Stockwell

5. Serve Them Hot, Maybe With Cream

When you pull the baked apples out of the oven, let them sit for five to ten minutes before serving to avoid burning mouths. Scoop some of the liquid from the baking dish into each bowl along with each apple. Then add a splash of cold heavy cream if you like (I do) or a scoop of ice cream or yogurt—something cold and creamy next to a hot, sweet apple is always a very good thing.


https://gscrochetdesigns.blogspot.com. one can see my crochet creations  

https://cancersupportindia.blogspot.com. feel free to view for easy, simple and health tips  

https://kneereplacement-stickclub.blogspot.com. for info on knee replacement

https://GSiyers home remedies.blogspot.com     is the latest addition to my blogs.