Showing posts with label dry yeast. Show all posts

Saturday, April 25, 2026

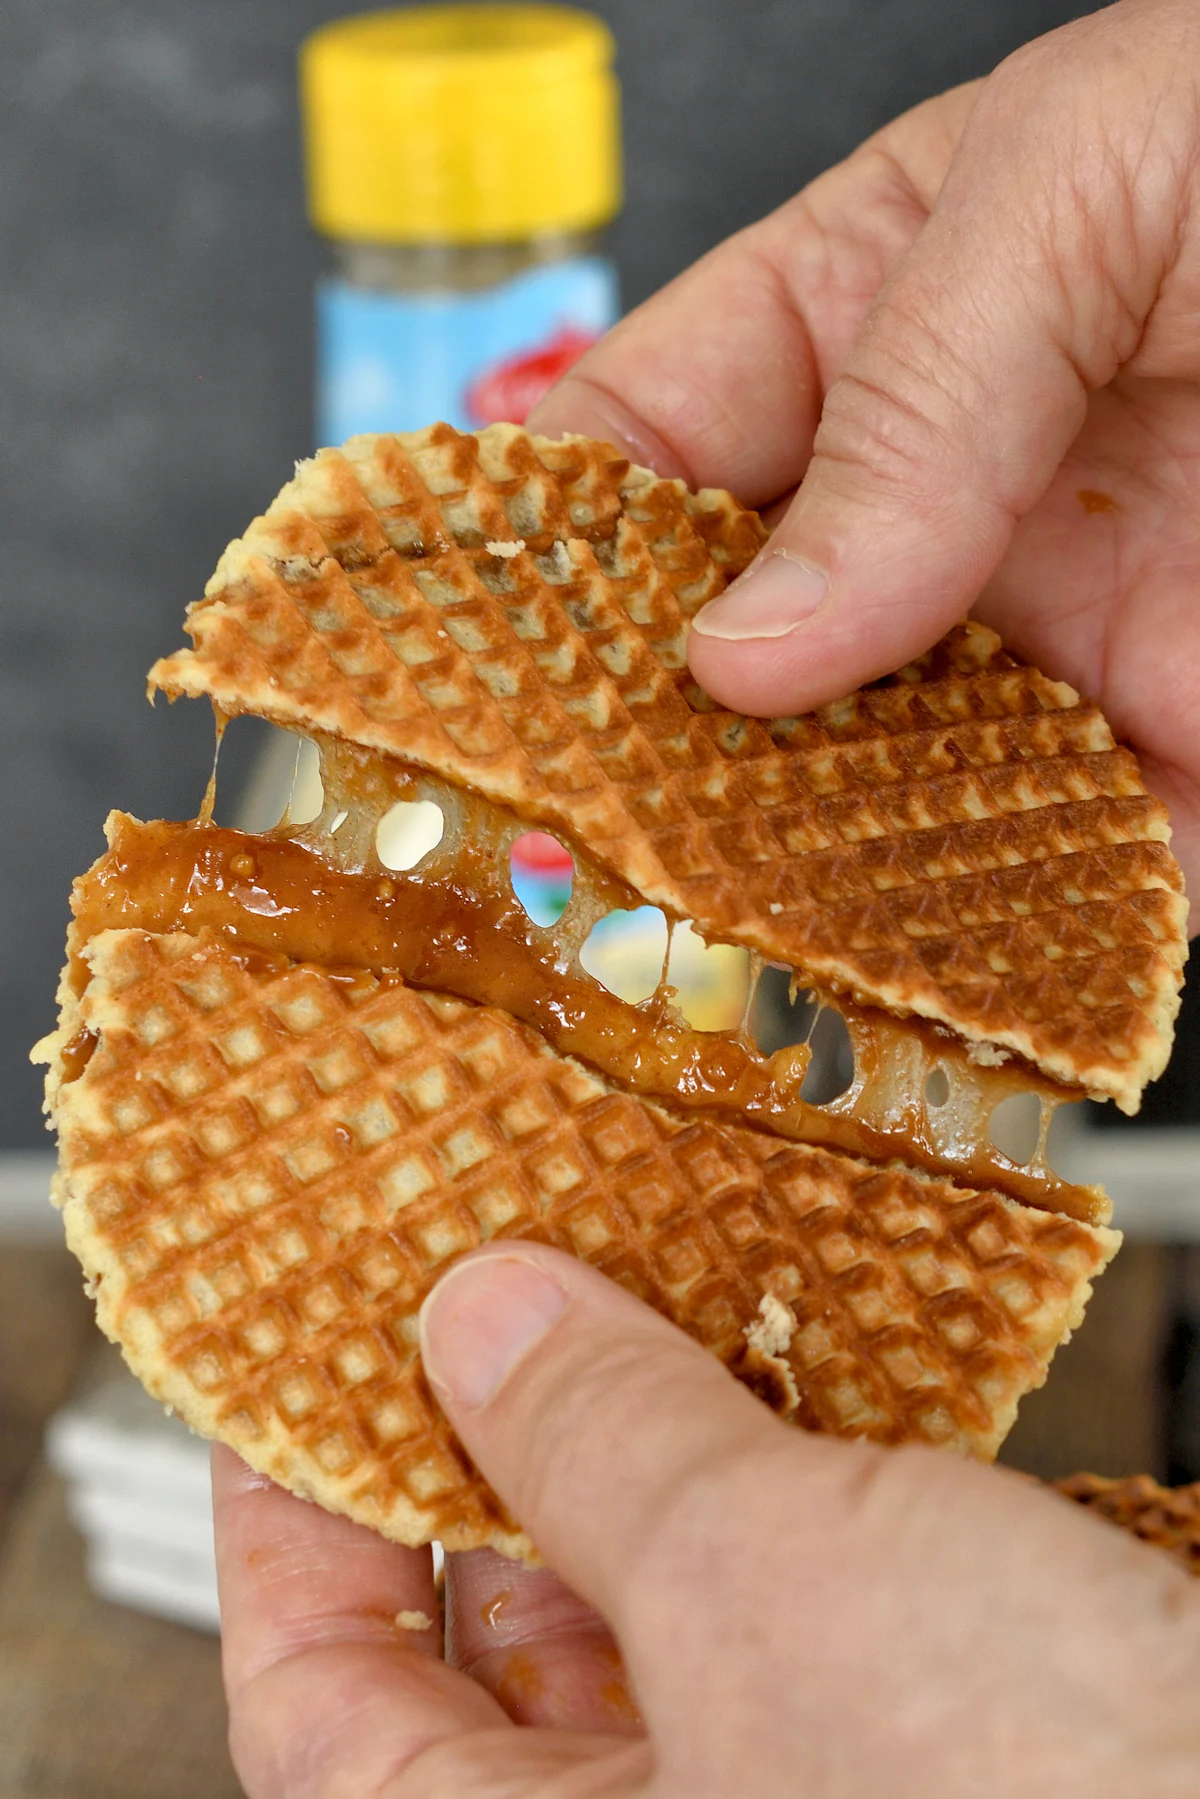
StroopWaffel


 Ingredients

Stroop filling

7oz Dutch Stroop( cup )*

4 oz brown sugar(½ cup)

3 oz unsalted butter 

1tsp cinnamon pdr

 tsp salt

*  If you can’t find Dutch stroop you can use half light corn syrup and half molasses.

Waffle Dough

oz whole milk(¼ cup, warm)

2 ¼ tsp dry yeast(7 g or 1 packet)

2  large eggs(room temperature)

 oz unsalted butter(melted)

oz granulated sugar( cup)

½ tsp cinnamon pdr

¼ tsp salt

1oz all purpose flour(3 cups)

Instructions

Combine 7 oz Dutch Stroop, 4 oz brown sugar, 3 oz unsalted butter, 1 teaspoon ground cinnamon and ⅛ teaspoon table salt in a small saucepan. Cook over medium heat until the sugar and butter are melted and the mix just comes to a boil. Transfer the filling to a bowl and set aside to cool. 

Combine 2 oz whole milk and 2 ¼ teaspoons dry yeast in the bowl of a stand mixer or in a large mixing bowl. Use the beater and mix until the yeast is dissolved. Add 2 large eggs, 6 oz unsalted butter(melted) and 5 oz granulated sugar. 

With the mixer running on low, add ½ teaspoon ground cinnamon and ¼ teaspoon table salt. Add 15 oz all purpose flour and mix until most of the flour is incorporated. Turn the dough out into a lightly floured surface and knead into a ball. The dough is quite soft. 

Divide the dough into 18 pieces, each piece should weigh about 50g. Roll each piece to a ball and line them up on a sheet pan. Cover with plastic wrap and set the dough aside for 1 hour.

Preheat the waffle iron. Take a ball of dough and flatten it to a disc. Place it on the waffle iron and close the iron. Bake until golden brown, about 2-3 minutes. Use a fork to lift the waffle off the iron. Immediately use a knife with a thin sharp blade to split and open up the waffle. Generously spread the inside of the waffle with stroop (about a tablespoon) and sandwich the two halves together. Continue with the remaining dough.


https://gscrochetdesigns.blogspot.com. one can see my crochet creations  

https://kneereplacement-stickclub.blogspot.com. for info on knee replacement

https://cancersupportindia.blogspot.com  for info on cancer and health related topics

https://GSiyers home remedies.blogspot.com   is the latest addition to my blogs


Tuesday, March 24, 2026

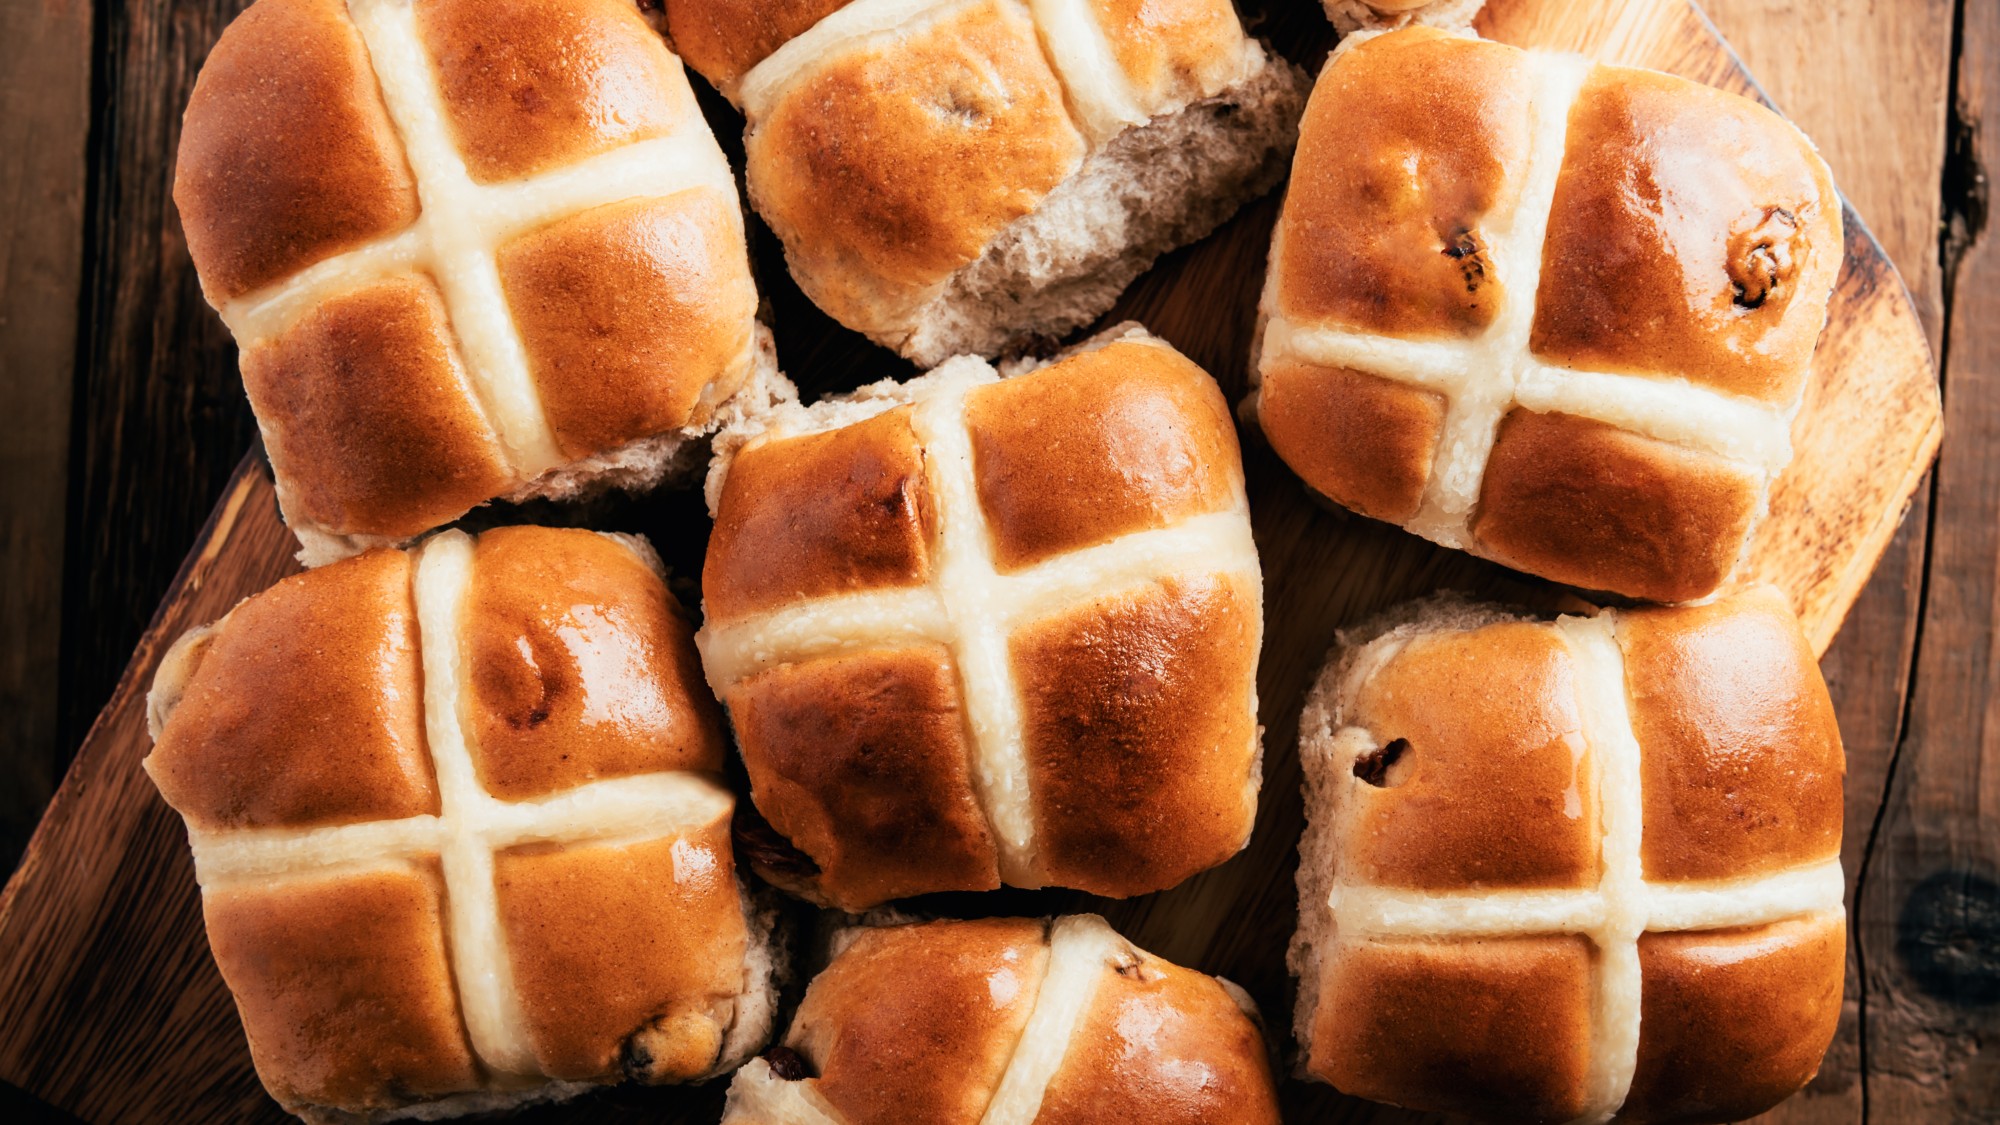
Best classic hot cross buns for Easter

hot cross buns on a wooden countertop  

Ingredients

3/4 cup (180ml) whole milk warmed to 110 F

 2 and 1/4 tsp active dry yeast or instant yeast (1 standard packet)

 1 tsp granulated sugar

1/2 cup (100g) packed light or dark brown sugar
 
5 tbsp (71g) unsalted butter, softened to room temperature and cut into 5 pieces 
 
1/2 tsp pure vanilla extract 
2 large eggs @ room temperature
1 tsp salt
1 1/4 tsp cinnamon pdr 
1/2 tsp nutmeg pdr
1/2 tsp ground all spice 
3 and 1/2 cups (438g) all-purpose flour or bread flour
1 cup (140g) raisins or currants* 

Flour Cross

 1/2 cup (63g) all-purpose flour or bread flour

68 tbsp (90-120ml) water 

Orange Icing

1 cup (120g) confectioners’ sugar 

3 tbsp (45ml) fresh or bottled orange juice (or use milk and a splash of vanilla extract for plain icing)


Preparations

  • Prepare the dough: Whisk the milk, yeast, and granulated sugar together in the bowl of your stand mixer. Cover and allow mixture to sit for about 5 minutes or until foamy on top. *If you do not own a mixer, you can do this in a large mixing bowl and in the next step, mix the dough together with a large wooden spoon or silicone spatula. It will take a bit of arm muscle. A hand mixer works, but the sticky dough repeatedly gets stuck in the beaters. Mixing by hand with a wooden spoon or silicone spatula is a better choice.* 
  • Add the brown sugar, butter, vanilla extract, eggs, salt, cinnamon, nutmeg, allspice, and 1 cup (125g) flour. Using the dough hook or paddle attachment, mix on low speed for 30 seconds, scrape down the sides of the bowl with a rubber spatula, then add the remaining flour and the raisins. Beat on low speed until the dough comes together and pulls away from the sides of the bowl, about 2 minutes. Dough should be a little sticky and soft. If it’s too sticky and not pulling away from the sides of the bowl, mix in additional flour 1 Tablespoon at a time.
  • Knead the dough: Keep the dough in the mixer and beat for an additional 5 full minutes, or knead by hand on a lightly floured surface for 5 full minutes. If the dough becomes too sticky during the kneading process, sprinkle 1 teaspoon of flour at a time on the dough or on the work surface/in the bowl to make a soft, slightly tacky dough. Do not add more flour than you need because you do not want a dry dough. After kneading, the dough should still feel a little soft. Poke it with your finger—if it slowly bounces back, your dough is ready to rise. You can also do a “windowpane test” to see if your dough has been kneaded long enough: tear off a small (roughly golfball-size) piece of dough and gently stretch it out until it’s thin enough for light to pass through it. Hold it up to a window or light. Does light pass through the stretched dough without the dough tearing first? If so, your dough has been kneaded long enough and is ready to rise. If not, keep kneading until it passes the windowpane test.
  • 1st Rise: Lightly grease a large bowl with oil or nonstick spray. Place the dough in the bowl, turning it to coat all sides in the oil. Cover the bowl with aluminum foil, plastic wrap, or a clean kitchen towel. Allow the dough to rise in a relatively warm environment for 1-2 hours or until double in size. (I always let it rise on the counter. Takes about 2 hours. 
  • Grease a 9×13-inch baking pan or two 9-inch square or round baking pans. You can also bake the rolls in a cast iron skillet or on a lined baking sheet.
  • Shape the rolls: When the dough is ready, punch it down to release the air. Divide the dough into 14-16 equal pieces. (Just eyeball it– doesn’t need to be perfect!) Shape each piece into a smooth ball, pinching it on the bottom to seal. I do this entirely in my hands and you can watch in the video above. Arrange in prepared baking pan.
  • 2nd Rise: Cover shaped rolls with aluminum foil, plastic wrap, or a clean kitchen towel. Allow to rise until puffy, about 1 hour.
  • Preheat oven to 350°F (177°C).
  • Add the cross: Whisk the cross ingredients together, starting with 6 Tablespoons of water. You want a thick paste that will pipe easily. Add remaining water if needed. Spoon paste into a piping bag or zipped-top bag. (No need to use a piping tip if using a piping bag.) Snip off a small piece at the corner. Pipe a line down the center of each row of buns, then repeat in the other direction to create crosses.
  • Bake the rolls: Bake for 20-25 minutes or until golden brown on top, rotating the pan halfway through. If you notice the tops browning too quickly, loosely tent the pan with aluminum foil. Remove from the oven and allow rolls to cool for a few minutes as you prepare the icing.
  • Make the icing: Whisk the icing ingredients together, then drizzle or brush on warm rolls. Serve immediately.
  • Cover leftover rolls tightly and store at room temperature for 1-2 days or in the refrigerator for up to 1 week.
  •  

    Notes

    1. Freezing Instructions: Prepare recipe through step 6. Place shaped buns in a greased baking pan, cover tightly, and freeze for up to 3 months. Once frozen, the dough balls won’t stick together anymore and you can place them in a freezer bag if needed. On the day you serve them, arrange the dough balls in a greased baking pan, cover tightly, then let them thaw and rise at room temperature for about 4-5 hours. Continue with step 8. You can also freeze the baked hot cross buns. Allow them to cool completely, then freeze without icing for up to 3 months. Thaw in the refrigerator or at room temperature, then reheat as desired and add icing.
    2. Overnight Instructions: Prepare the recipe through step 6. Cover the shaped buns tightly and refrigerate for up to about 15 hours. At least 3 hours before you need them the next day, remove the buns from the refrigerator, keep covered, and allow to rise on the counter for about 1-2 hours before baking. (Skip step 7.) Alternatively, you can let the dough have its 1st rise in the refrigerator overnight. Cover the dough tightly and place in the refrigerator for up to 12 hours. Remove from the refrigerator and allow the dough to fully rise for 2 more hours. Continue with step 5.

  • Optional Add-Ins: Instead of (or in addition to) raisins, try using dried cranberries, chopped pecans or walnuts, chopped candied citrus, or chopped dried apricots. Keep total add ins to about 1 and 3/4 cups total. Feel free to add the zest from 1 lemon or orange to the dough when you add the butter. Add 1/4 teaspoon ground cloves or cardamom, if desired. Feel free to adjust the spices to your liking. You can plump up the raisins, currants, or dried cranberries if desired. Soak in hot water for 5-10 minutes, drain, then pat dry before adding to dough.
  • Whole Milk: Lower fat or nondairy milks work in a pinch. The rolls will lose a little flavor and richness. I highly recommend whole milk or even buttermilk.
  • Cinnamon: Cinnamon can prohibit doughs from rising. We use 1 and 1/4 teaspoons in this dough to produce dense buns. If you want a fluffier roll-type hot cross bun, feel free to reduce the cinnamon down to 1/2 teaspoon or leave it out completely.
  • Yeast: Use instant yeast or active dry yeast. Rise times will be slightly longer using active dry yeast. 
  • Flour: You can use all-purpose flour or bread flour. All-purpose flour is convenient for most, but bread flour produces chewier hot cross buns. Either flour is fine and there are no other changes to the recipe if you use one or the other.
  • Icing Cross: If you prefer to make a cross from icing and pipe it onto the buns after baking, skip step 9 and skip the orange icing glaze on top. However, you can use the orange icing recipe to make the icing cross. Reduce orange juice to 1 Tablespoon to yield a very thick icing. Replace with milk and add a splash of vanilla extract, if desired. Feel free to also make the orange glaze for topping if you want double icing—a cross and glaze all over.
  •  


    https://gscrochetdesigns.blogspot.com. one can see my crochet creations  

    https://kneereplacement-stickclub.blogspot.com. for info on knee replacement

    https://cancersupportindia.blogspot.com  for info on cancer and health related topics

    https://GSiyers home remedies.blogspot.com   is the latest addition to my blogs
     

    Saturday, March 22, 2025

    Soya Methi Garlic Naan

     Ingredients 

    1/2 soya flour

    1 whole wheat flour

    3 tsp kasturi methi ( dried fenugreek leaves)

    2 tsp garlic, finely chopped

    1 tsp dry yeast

    1 tsp sugar

    salt to taste

    1/2 tsp oil

    luke warm water about 1/4 cup


    How to Make Soya Methi Garlic Naan


    Combine yeast and luke warm water with sugar in a bowl. Cover and keep aside for about 10 minutes till it swells up.

    Now make a smooth dough by combining whole wheat flour, soya flour, yeast, salt, oil, kasturi methi and garlic together using enough water.

    Cover the dough with a soft cloth and let it rest for about 20 minutes.

    Now divide the dough into equal parts. Press a part sprinkle dry flour and roll it flat.

    Heat a tawa and cook the naan till they turn golden brown from both sides. Repeat with all other portions. Serve hot


    https://gscrochetdesigns.blogspot.com. one can see my crochet creations  

    https://kneereplacement-stickclub.blogspot.com. for info on knee replacement

    https://cancersupportindia.blogspot.com  for info on cancer and health related topics

    https://GSiyers home remedies.blogspot.com   is the latest addition to my blogs

    Friday, March 21, 2025

    Elaneer ( Tender Coconut Water) Appam

     INGREDIENTS

    Method

    Take 2 cups of any fragrant rice and soak it with the fenugreek seeds for about 2 hours. Drain the rice after soaking. Now take the coconut water with pulp and add it to a blender, add the rice along with some salt and blend. Make sure to blend into a very fine paste. 
     
    Once the batter is ready, add some sugar and the yeast and mix well. Keep in a cool and dry place to ferment for a few hours. After about 4-5 hours, the batter will appear risen and frothy. Mix gently and make the batter slightly thinner than the dosa batter. 
     
    Heat the appam kadai and brush it lightly with oil, now gently pour some of the batters into the kadai and rotate it, so that it is thinly coated with the appam batter. Once cooked, do not flip the appam, but remove gently from the kadai using a spatula. Serve hot with delicious spicy  stew.

    see my next post for stew


    https://gscrochetdesigns.blogspot.com. one can see my crochet creations  

    https://kneereplacement-stickclub.blogspot.com. for info on knee replacement

    https://cancersupportindia.blogspot.com  for info on cancer and health related topics

    https://GSiyers home remedies.blogspot.com   is the latest addition to my blogs

     

    Tuesday, June 11, 2024

    Easy Breakfast Bread Cooked On A Skillet


    Ingredients: 

    1 cup warm water (200 ml) 

    1 tbsp yeast (10 grams) 

    4 tsp sugar 

    1/3 cup vegetable oil (60 ml) 

    1 cup warm milk (200 ml) 

    1/2 tsp salt 

    5 cups of flour (600 gr) + ~30-50 gr to work with dough 

    100 gr butter 


    Method

    In warm water add yeast, sugar and vegetable oil.

    Stir it well, cover the vessel with a lid for 10 minutes.

    In another vessel mix milk with salt, stir well, add to the well risen yeast mixture.

    Stir well, add sieved flour, stir the dough with a spoon.

    If the dough is sticky add more flour and knead with your hand,

    In the vessel dust some flour, keep the dough covered to rest for 45 minutes to prove.

    Transfer the dough to the table dusted with flour, knead well.

    Divide the dough into 12 parts. , knead them and roll into round balls.

    Cut 100gm butter into 8 parts and keep on 8 rolled balls.

    Spread the butter on one ball, keep another ball on top with butter spread it well, on top keep the ball without butter, press it well, flatten the dough, from the sides fold the dough, then roll into, flatten it, put the rolled ball on the hot skillet, the shape need not be perfect, when you put, try to spread it well. Press well with your hands all around, prick with a toothpick, to let the steam out.

    See that it doesn’t burn in 3-4 minutes, turn it carefully to cook on the other side till golden.

    repeat with the rest of the dough in the same way, you'll get 4 thick, soft butter bread to enjoy.


    https://GSiyers home remedies.blogspot.com     is the latest addition to my blogs.

    https://gscrochetdesigns.blogspot.com. one can see my crochet creations  

    https://cancersupportindia.blogspot.com. feel free to view for easy, simple and health tips 
     
     https://kneereplacement-stickclub.blogspot.com. for info on knee replacement

    Sunday, March 24, 2024

    POTATO BREAD

     This is slightly different from the stuffed paranthas that we make in India.


    In the recipe that I saw it was for 8 potatoes ( not too big) peeled and cooked, mashed well.

    then 200 ml milk was added and further mashed well, then 1 tbsp of dry yeast was added.

    to around 8 cups of flour was added, and salt. You can now decided how much you need and accordingly add potatoes, milk, flour, salt, maybe can add  spices of your choice. 

    After kneading the dough has to be rested at least for 30 minutes or till double in size. Then knead again,

    roughly divide dough into 8 portions, roll it out, cover again for another 10 minutes after dusting flour down. Then roll into thin rotis and cook like how we make rotis. This one will nicely puff up like phulka, apply ghee, when cooked on both sides till golden. Serve hot with gravy of your choice and pickle.


    https://gscrochetdesigns.blogspot.com. one can see my crochet creations  

    https://cancersupportindia.blogspot.com. feel free to view for easy, simple and health tips  

    https://kneereplacement-stickclub.blogspot.com. for info on knee replacement

    https://GSiyers home remedies.blogspot.com     is the latest addition to my blogs.


    Wednesday, March 20, 2024

    Vegan Walnuts Cinnamon Rolls

    Ingredients:
    17.6 oz/500g Sifted Flour/ maida
    1.8 oz/50g Sugar
    0.2 oz/7g Dry Yeast
    1.8 oz/50g Brown Sugar
    2.8 oz/ 80g Vegan plant melted Butter
    0.4 oz/10g Salt
    200 mL Cold Water

    2 Tbsp Vegan Egg Replacer
    2 Tbsp Water

    Filling:
    4.2 oz/120g Chopped Walnuts
    2.8 oz/80g Sugar
    0.5 oz/15g Cinnamon 


    Method

    1-Stir flour, sugar, dry yeast and brown sugar
    2-Gradually add water
    3-Add the vegan plant melted butter
    4-Add salt and mix until all ingredients are well combined
    5-Place the dough in an oiled bowl, oil brush and cover it
    6-Let it rest in the fridge for 1 hour
    7-Roll and spread the dough and shape it into a rectangular
    8-Brush with vegan plant butter
    9-Evenly spread the walnut mixture
    9-Roll the dough into a cylinder
    7-Slice the roll into 3/4 inch/ 2 cm a piece
    8-Unravel the edge of each piece and place it underneath and press it down
    9-Brush it with vegan plant butter
    10-Place it aside to proof for one hour
    11-Bake at 355°F /180°C for 25 minutes (Baking temperature may vary depending on the oven)
    11-Meanwhile prepare the syrup (100 mL Water- 5.3 oz/100 g Sugar, 1/4 Tsp Lemon juice)Bring to a boil water and sugar, add the lemon juice, reduce the heat and keep it for 3 minutes
    12-Brush with syrup


    ps- this isn't my recipe- I like them, saw being vegan all those vegans may love to try it. 


    https://gscrochetdesigns.blogspot.com. one can see my crochet creations  

    https://cancersupportindia.blogspot.com. feel free to view for easy, simple and health tips  

    https://kneereplacement-stickclub.blogspot.com. for info on knee replacement

    https://GSiyers home remedies.blogspot.com     is the latest addition to my blogs.


    Friday, July 29, 2022

    Easy Cinnamon Rolls

     Easy Cinnabon Rolls
    Ingredients for dough: 
     
    Active dry yeast - 2 1/2 tsp. 
     
    Milk - 1 cup (warm) 
     
    White sugar - 1/2 cup 
     
    Butter - 1/3 cup (softened) 
     
    Salt - 1 tsp. 
     
    Eggs - 2 (room temperature) 
     
    All-Purpose flour - 4 cups 
     
    Ingredients for filling:  
     
    Brown sugar - 1 cup 
     
    Ground cinnamon - 3 tbsp. 
     
    Butter - 1/3 cup (softened) 
     
    Ingredients for icing: 
     
    Butter - 6 tbsp. 
     
    Powdered sugar - 1 1/2 cup 
     
    Cream cheese - 1/4 cup 
     
    Vanilla Extract - 1/2 tsp. 
     
    Salt - a pinch 
     
    Method of preparing the dough: 
    Mix the yeast and warm milk with 1 tsp. sugar. Let sit for 5 minutes. 
     
    Combine the rest of the sugar, butter, salt, and eggs. Pour into an electric mixer bowl with the yeast mix. Using the kneading hook, mix until you have a dough. 
     
    Place the dough into an oiled bowl, cover and let rise in a warm place about 1 hour or until the dough has doubled in size. 
     
    Method of preparing the filling: 
     
    Combine the brown sugar and cinnamon in a bowl. Grease a 9×13 inch baking dish with cooking spray or butter. 
     
    Roll the dough out on a lightly floured surface, until it is approximately 16x12 inches. It should be approximately 1/4 inch in thickness. 
     
    Rub the dough with the butter and sprinkle with the sugar-cinnamon mix. Roll the dough, cut into slices and put onto the baking dish. 
     
    Cover with a clean kitchen towel or plastic wrap and let them rise for another 30 minutes, or until doubled in size. 
     
    Preheat oven to 350°F. Bake for 20 minutes or until golden brown 
     
    Method of preparing the icing: 
     
    Mix all the ingredients and beat until fluffy. Drizzle and serve. 
     
    https://gscrochetdesigns.blogspot.com. one can see my crochet creations  

    https://cancersupportindia.blogspot.com. feel free to view for easy, simple and health tips  
    https://kneereplacement-stickclub.blogspot.com. for info on knee replacement


    Source: Jo Cooks