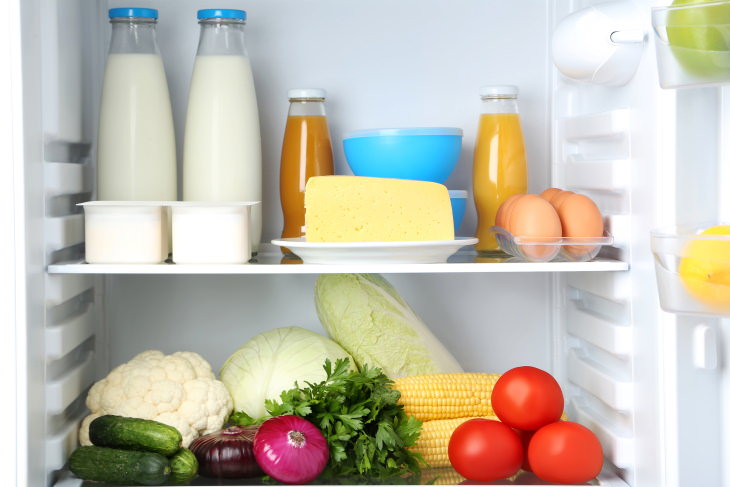
Showing posts with label fridge. Show all posts

Friday, August 8, 2025

Great Uses for Lemon Peels

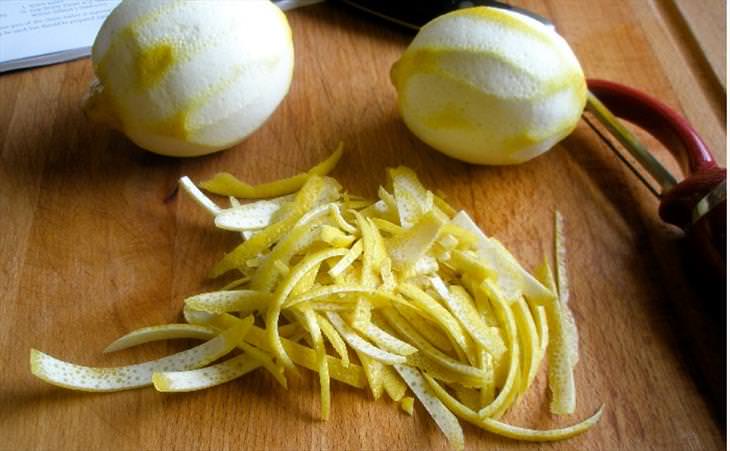
Lemons have a lot to offer: they’re delicious, refreshing and have an aroma that can upgrade many dishes. Adding a bit of fresh lemon juice to a cup of water in the morning can do wonders for our level of alertness throughout the rest of the day. But what about those lemon peels?
If you like to add lemon to your diet on a regular basis, you probably throw the peels in the trash. Did you know, however, that the peels are incredibly rich in vitamins, minerals, and fibers that can increase your food’s nutritional value, aid in house cleaning, and even be used to maintain your skin’s health? The following recipes will show you how you can add lemon peel to your day-to-day life with ease.

1. Homemade Lemon and Herbs ( see my next post for the recipe)
 uses for lemon peels
 
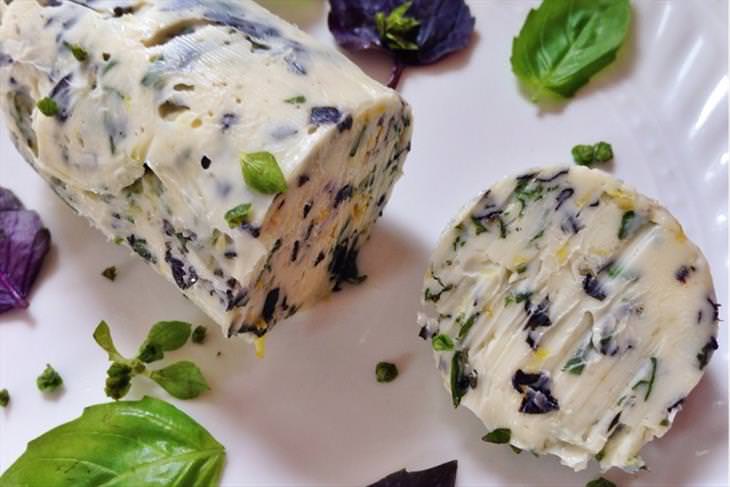
Butter Would you believe that you can enjoy this delicious butter without going to a fancy restaurant? Simply turn the plain butter you’ve got at home into a gorgeous and delicious lemon and herbs butter you can enjoy at every meal.


2. Candied Lemon Skins ( recipe in my post)
 uses for lemon peels
 
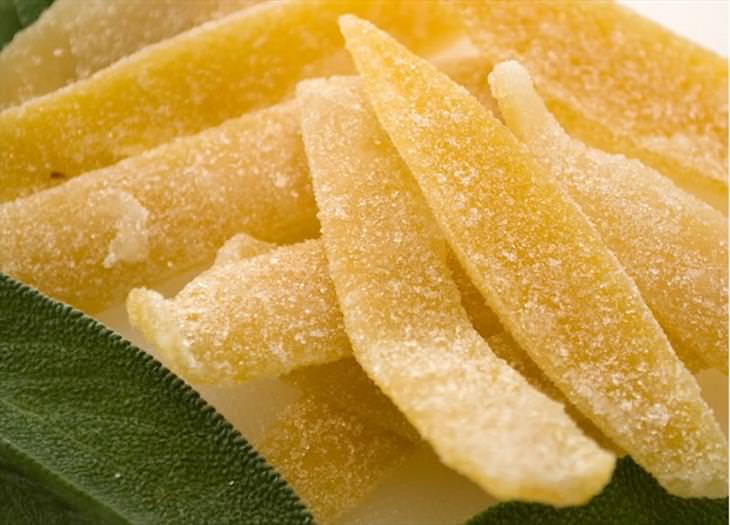
This is an unusual treat, and if you want to keep the peel's sour flavor, just use less sugar than called for in the recipe.


3. Add Some Zest to Your Olive Oil  ( view recipe in my blog)
 
Transform your plain olive oil into a delicious and nutritious lemon-oil. This upgrade will have your guests begging for the recipe.


4. Jazz Up Your Drinks with a Lemony Ice-Cube  
 uses for lemon peels
 
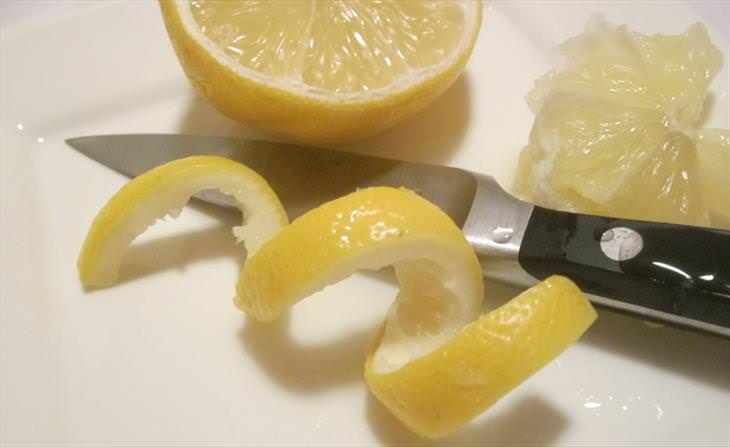
Add some extra flavor to any drink you serve this summer by adding a couple of fancy lemon ice-cubes. Cut the lemon peels into spirals and remove as much of the fruit as you can from them (this will make it less bitter). Cut the spirals to fit in an ice tray, fill the tray to the half-way point and put one spiral in each segment, making sure a small bit stays out of the water. After freezing, you’ll be left with fancy-looking ice cubes.


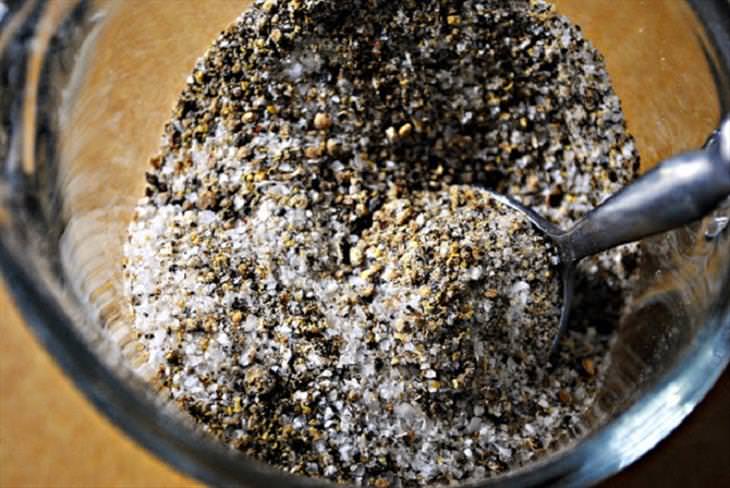
5. Make a Lemon-Pepper Seasoning Mix ( view recipe in my post)
 uses for lemon peels
 
This seasoning mix can work for almost any kind of dish whether it’s a salad, fish, or chicken. Preparation is very simple, and the ingredients are 100% natural.

 
6. All-Natural Ant and Pest Repellent 
Place small pieces of lemon peels along your windowsills, doors, and any other cracks and holes that ants use to sneak into your house. Ants hate the scent of lemon, so they’ll be reluctant to return to that area again. The peels are also particularly effective against fleas, making them an ideal solution for pet owners that want to protect their 4-legged companions from those nasty parasites.


7. Freshen Up Your Home 
 
The scent of fresh lemon can freshen up your home and get rid of unpleasant smells quickly and easily. 
 
Freshen up the fridge: Place a few small pieces of lemon peel in the fridge. The skin will absorb any unpleasant odors while setting off its own citrus scent.
 
Freshen up the trash bin: Put a few pieces of lemon peels at the bottom of the bin to absorb the bad odors. 
 
Freshen up closets: Sun-dry lemon peels and put them in small potpourri bags. Add spices such as cinnamon, cloves, nutmeg, and put it in your closets to keep them smelling fresh. 
 
8. Effectively Clean Surfaces and Utensils 
The lemon’s natural acidity is antibacterial and can help you clean many things in the kitchen. 
 
Clean plaque residue in kettles: Fill the kettle up with water, add a few thin slices of lemon peel, and boil the water. Allow the boiled water to sit for an hour, and then empty and wash the kettle.
 
Remove the smell of coffee: If your coffee maker’s pitcher is starting to smell like old coffee, empty it, put some lemon peels, a few pinches of salt and some ice-cubes. Shake well and wash the pitcher. 
 
Freshen up the dishwasher: If your dishes come out of the dishwasher smelling somewhat funky, add some lemon peel to the next load. This cleans both the machine and removes any foul-smelling residue. 
 
Clean and deodorize cutting boards: After washing your cutting board with water and dish soap, rub the surface with the outside of a lemon peel. Let it sit for 30 minutes and then rinse.

Clean your microwave: 
 uses for lemon peels
 
Fill a bowl halfway with water and add a few pieces of lemon peels. Pop it in the microwave and run it on high for 5 minutes. The heat will boil the water, and the lemon-infused steam will clean the sides and top of the microwave. Once it’s done, remove the bowl (Careful! It’s hot!) and wipe down the surfaces. 
 
Save your utensils: If you have old knives, pots, or any other metallic utensils that have lost their shine or have grime that simply won’t go away, there’s an effective solution you can use - sprinkle some sea salt on the utensils, then rub them with a lemon peel. Rinse and watch how all the dirt, grime, and stains wash away.

9. Foot Spa 
If you want to soften any hard skin on your soles, boil water with lemon peels and let it cool down. Add ¼ cup of milk (bovine or almond), 2 tablespoons of olive oil, and a few drops of essential oil of your choice. Pour the mixture into a tub and soak your feet in it for 20 minutes, then dab your feet dry. 
 
10. Polish and Brighten Your Skin with a Homemade Scrub ( see recipe in my Home remedies blog)
This homemade scrub will help to soften your skin, in addition to brightening any sun damage it may have experienced. Similar to other exfoliating agents, avoid using this scrub on wounds or sensitive and irritated skin, as well as skin riddled with acne. To make this scrub, you’ll need to extract the lemon’s natural oils.


11. Morning Face-Wash  
Many kinds of face washes contain alcohol and are thus not recommended for daily use, as the alcohol dries out and irritates your skin. You can rub the outside of a lemon peel onto your face before rinsing it. Avoid contact with the eyes. 
 
12. Pamper Your Hands 
Lemon peels can help you with most hand and arm-related issues, and can even help your fingernails shine.
 
Fingernail bleach – Clean stains from your fingernails by gently rubbing them with a lemon peel. 
 
Soften elbow skin – Sprinkle some baking soda on the outside of a lemon peel and place it against your elbow. Twist the peel as if you’re juicing it for a few minutes, then rinse your elbow. 
 
Lighten age spots – If you have age spots on your hands and arm, you can use lemon peels to lighten them by rubbing a small piece against the stain and leaving the juice on for an hour. Avoid sunlight until you wash yourself to prevent damage to your skin. 


https://gscrochetdesigns.blogspot.com. one can see my crochet creations  

https://kneereplacement-stickclub.blogspot.com. for info on knee replacement

https://cancersupportindia.blogspot.com  for info on cancer and health related topics

https://GSiyers home remedies.blogspot.com   is the latest addition to my blogs


Thursday, September 5, 2024

The juicest meat- Cooking tip from chef

 It takes time to fry chicken or pork properly, yet you can dry them out very easily. But European chefs use a simple trick to ensure that the meat gets cooked properly: they put the meat in a brine. To make a good brine, take 3 cups of water, add 1/4 cup of salt and 1/4 cup of sugar. Then pour the brine onto your meat, ensuring that the liquid covers it, putting it in the fridge. The time it takes to marinate will depend on the thickness of the chops. But roughly calculate about 1 hour for 1kg of meat. Just be sure to not let your meat marinate for more than 8 hours or less than half an hour. If preparing chicken wings, the time should be based on an average weight of one wing. Be sure to pat the chops dry before cooking.


https://gscrochetdesigns.blogspot.com. one can see my crochet creations  

 https://kneereplacement-stickclub.blogspot.com. for info on knee replacement

 https://cancersupportindia.blogspot.com  for info on cancer and health related topics

 https://GSiyers home remedies.blogspot.com   is the latest addition to my blogs.

Thursday, August 29, 2024

Use the ‘FIFO’ Method to Better Organize Your Pantry and Fridge

 A woman holding two jars in a sunny room  

Constantly unearthing expired food in the backs of your cupboards and corners of your fridge are signs that you have an inefficient kitchen setup. Luckily, there's an easy fix. Toss aside your prior methods for food storage—it's time to overhaul your kitchen organization. And there’s no better system than FIFO.

What is the FIFO method of food storage?

FIFO means "first in, first out" and it is exactly what it sounds like. In fact, you probably have memories of your mom yelling at you for not finishing the first box of cereal before starting the new one. It ensures older things get used before newer items. In order to keep this up, the older stuff has to be the first thing you see when you open the fridge or pantry. That’s why grocery stores put the oldest stock at the front of the shelf, and why everything in professional kitchens is dated and stored with the label facing out.

How do you store using FIFO?

For some home cooks, FIFO is synonymous with labeling everything in your fridge. While that's an excellent system for keeping track of leftovers and reducing food waste, there’s so much more to it than fridge management.

Your entire kitchen can and should be organized around the main FIFO principle: “If you can’t see it, you won’t use it.” Keeping this in mind when reorganizing makes the kitchen you have easier to use, no matter how cramped or inefficient it may be. And since FIFO is all about using what you have, you can do it without buying a single thing.

The specifics of a FIFO makeover will look different for every kitchen, but the end goal is universal: Arrange the stuff in your kitchen so that you can see as much of it as possible. There are four main ways to do this, starting with your container situation.


Streamline your pantry

Pantry clutter is the enemy of a FIFO system, so unfortunately, that’s where you should start. You might think the solution involves spending a ton of money on identical glass jars—what’s easier to see through than glass?—but it doesn’t have to. Organizing your pantry so that everything (or nearly everything) is visible at all times is easier with similarly shaped containers in a variety of sizes.

A chaotic jumble of misfit Tupperwares won’t work, either. Sort through your food containers, keep matching sets, and dispose of the one-offs. Next, fill in the gaps, starting with stuff you already have. Repurposed food packaging is fantastic for pantry storage, especially if you’re loyal to a certain brand and have a ton of the same containers. (There are a lot of glass jars that once held Adams peanut butter and Bonne Maman jam in my pantry.) If you need to buy new, soup containers are ideal for small-volume storage because they come in multiple sizes but have universal lids.

For bulk foods, skip the overpriced “bulk storage” bins on Amazon and go straight to the hardware or restaurant supply store. I buy flour 50 pounds at a time, and nothing beats a five-gallon plastic bucket with a twist-off lid. They cost less than $20 at the hardware store and last forever. Buckets do take up a lot of space, though, and aren’t exactly stackable. If you’re strapped for space, look for Cambro containers at restaurant supply stores. They’re smaller and more expensive than plastic utility buckets, but they come in both square and round sizes and stack securely. 


Label everything

Labeling your perishables is a signature element of any FIFO system, and with good reason. Clear labels tell you, at a glance, what’s inside a container and how old it is; FIFO wouldn’t exist without them.

If you’re already in the habit of labeling the contents of your fridge and freezer, awesome—but don’t stop there. Most items in your kitchen can and should be labeled. Bulk pantry items in opaque containers are the obvious use case, but slapping a label on DIY cleaning solutions, countertop fermentation projects, and even the shelves in your pantry will make your kitchen easier to use. No more losing track of sourdough starter feedings or wondering which shelf you put the coconut milk on; you can look at the label and get on with it. Just make sure those labels face out. Spring for a label-maker if you like, but masking tape and a Sharpie work just as well.

Consolidate, consolidate, consolidate

Labels are great, but they can’t help you if you can’t see them. This is especially an issue in the fridge: If last night’s takeout gets buried in a graveyard of half-empty soup containers, it’ll expire before you remember it’s there. 


Consolidation is the secret second step after labeling your food. It’s easy: Just transfer the contents of larger containers to smaller ones as you use them up. (Universal lids are especially clutch here, because you can downsize without getting a fresh lid.) Ruthlessly consolidating your leftovers and pantry items frees up precious storage space so you can actually see what you’re working with. It also makes it easy to know when opening a new package is actually necessary, and when certain items are running low.

Bonus round: Take inventory

The final boss of FIFO is taking inventory. To be honest, I don’t inventory my kitchen and have no plans to—but I cook for myself and one other adult. If you’re feeding a big family, keeping a detailed inventory can simplify your life.

Inventorying is all about tracking what you have so you know what to buy and when. If you’ve never done it before, start small. Pick one kitchen area—pantry, fridge, or freezer—and write down the name of every food item, how much of it you have, and its expiration date. (Spreadsheets, paper lists, dry erase boards, and even the notes app on your phone all have their pluses and minuses, so use whatever feels natural.) Update the list as things get used up. When you sit down to make a grocery list, consult your inventory to see what you actually need and what can wait. There’s no one perfect system, so play around until you find what works.

f all of this sounds like a lot of work, that’s because it is. Running a kitchen is an enormous job; doing it on top of your regular job gets old in a hurry, even if you love to cook. A FIFO setup won’t eliminate the relentless churn of daily cooking and cleaning, but it will make it easier to actually use your kitchen.  


https://gscrochetdesigns.blogspot.com. one can see my crochet creations  

 https://kneereplacement-stickclub.blogspot.com. for info on knee replacement

 https://cancersupportindia.blogspot.com  for info on cancer and health related topics

 https://GSiyers home remedies.blogspot.com   is the latest addition to my blogs.

Wednesday, January 13, 2021

14 Simple Rules to Always Have an Organized Fridge

A messy fridge is a common household issue we usually tend to underestimate. Keeping your fridge in order is essential if you’re trying to stock up at a grocery store only once a week and need to extend the shelf life of fresh produce. Apart from keeping the food fresh, a well-organized fridge also makes foods you use often easily accessible and ensures the risks of food contamination are brought don’t to a minimum, so yes, spending a few minutes to place foods strategically instead of just unloading all the food into the fridge as is pretty useful and important.
 
Here are 14 expert tips that can help you get your fridge in order. 
 
1. Separate the dairy products
Organized Fridge fridge open
What is the best place in the fridge to store dairy products?’ is a trick question, as in reality, different dairy products require different conditions to stay fresh as long as possible. Contrary to popular belief, for example, you shouldn’t keep milk on the shelves of the fridge door because it will make it spoil faster since the fridge door is the warmest place in the fridge. 
 
Instead, store it deep in the main middle shelf. This way, it will still be easily accessible, but the lower and steadier temperatures on the middle shelf of the fridge will preserve it better. Butter and hard cheeses like gouda and parmesan, on the other hand, don’t spoil as fast as milk and so they can safely be stored on the top door shelves. 
 
Lastly, soft cheeses like cottage and cream cheese, as well as yogurt, sour cream, and other dairy drinks, do need to be properly chilled, so either keep them next to the milk on the middle drawer, or in the deli meats section.

2. Transfer opened canned foods into food containers
Organized Fridge veggies in food containers
Very few people are aware of the fact that opened cans start to rust when they’re placed in the fridge, which can make the foods in those cans have a slight metallic aftertaste. So, if you’re wondering why the olives or corn you’ve opened just yesterday and kept in the fridge overnight changed in taste, now you know why it happens. 
 
Luckily, this can be easily prevented by simply transferring the contents of the open can into a plastic or glass container.
 
3. Keep herbs and salads away from the back of the fridge
Organized Fridge herbs
The gentle leaves of salads, herbs, and even some vegetables, particularly tomatoes and cucumbers can develop freezer burn or start to wilt if they touch the walls of the fridge, especially the back since it’s much colder there than in any other area of the refrigerator. Instead, store these delicate foods in the middle or towards the front of the shelf or in the high humidity drawers next to the vegetables. 
 
4. Be careful with cooked rice
Some foods are more likely to cause food poisoning than others. A significant percentage of uncooked rice contains Bacillus cereus, a pathogen that commonly causes food poisoning and can lead to complications in some individuals. So be vigilant and avoid eating rice that’s been in the fridge for more than 2 days. Also, try to keep the cooked rice in an area in your fridge with a steady cold temperature, such as the middle or back of the top shelf. 
 
5. Store and defrost meat and fish away from other foods
No matter how sanitary and clean the place where you purchased meat and fish is, you should always treat it as if it has contaminants and never store it next to foods you’re not planning to cook, such as fresh vegetables, dairy, cooked foods, or deli meat. This is because some microorganisms are naturally present in meat, poultry, and fish, but they’re typically eradicated during the cooking process.

However, if cross-contamination occurs and these germs do get on the foods we eat as is, this can lead to food poisoning. To avoid any drips or splatter, it’s recommended to store raw meat and fish on the bottom shelf of the refrigerator. It is also the coolest part of the fridge, so it will prevent raw meat and fish from spoiling. 
 
No need to unpack meat that comes in sealed packages before placing it in the fridge, but if the meat you purchase comes unpacked, place it on a plate and wrap it thoroughly using cling film. 
 
6. Fish needs special treatment
It’s always preferable to eat fresh fish the day you buy it, but if this isn’t possible, you have to make sure it’s sealed tight, dry, and properly chilled. As we’ve mentioned above, the best place to store fresh fish is the bottom shelf of the refrigerator, and you should make sure that the fish gets into the fridge as soon as you arrive home to prevent spoilage. 
 
To prepare the fish for the fridge, remove its packaging, blot it with a paper towel or a clean damp cloth, and put it on a large plate, subsequently wrapping it thoroughly with cling film. Place the fish in the back of the bottom shelf and ideally use it up within 24 hours.
 
7. The nuances of fruit storage
Organized Fridge fruit 
The general rule of thumb is - store fruit in its original packaging in the low humidity drawer, also marked as “crisper” in some refrigerators. Certain fruits, such as apples and citrus fruit need no packaging, so you can just unpack them and place them in the fruit drawer as is. 
 
The majority of fruit, however, especially delicate berries, do benefit from being double-packed in a plastic container or a bag in addition to the original basket in which they are sold. 
 
Lastly, also note that some fruit should not be stored with others, as they exude gases that will make other fruits go bad faster. Bananas, pears, nectarines, plums, peaches, avocados, and tomatoes are just some of these so-called ‘gas releasers’. It’s best to store these foods outside of the fridge altogether; in fact, most of them don’t require refrigeration anyway.

8. Deli meats need a dedicated drawer, too
Deli meats, sausage, sliced cheese, and cured fish should never be stored together with other foods, as they will make other foods smell bad. In addition, they do go bad after a few days, even if you don’t notice any funny smell or taste, so you must place them in separate containers once you opened the package to avoid cross-contamination. 
 
The best place for these foods is the top shelf, but these days most refrigerators have a dedicated top drawer for these foods. The only exclusion from this rule is raw bacon - experts say it should be stored together with raw meat and fish, and it’s recommended to use it up within a few days. 
 
9. Store vegetables in high humidity drawers
Organized Fridge vegetables in the fridge
While fruits require low-humidity conditions, vegetables are best preserved in a high-humidity environment. Most fridges have a dedicated salad drawer to store veggies and fresh herbs; roots like fresh ginger or turmeric will also benefit from the humid conditions of the salad drawer. 
 
Remember, however, that not all vegetables should be stored in the fridge in the first place. In fact, such veggies as potatoes, avocados, onions, and tomatoes are best stored outside of the fridge. R
 
10. Juices, jams, and condiments are not fussy when it comes to temperature changes
Organized Fridge Juice in the fridge
Which foods other than butter can be safely stored on the shelves of the fridge door? Condiments, jams, juices, soft drinks, and other preserved foods are all good candidates, as these foods usually contain preservatives that prevent them from going bad fast. Therefore, all these foods can handle fluctuating temperatures and can be easily stored in the warmest area of the fridge - the door. 
 
11. The first foods in should also be the first ones out
One of the main causes of food waste in residential homes is the lack of mindfulness about expiration dates. It’s true, many people just pile the same kinds of foods on top of each other, and as a result, there’s always a shriveled apple at the bottom of the fruit drawer or a few slices of spoiled cheese in the back of the deli section. 
 
Save yourself some money and learn to organize produce by date - the first foods to be in the fridge should also be the first ones to be used up. That means the milk carton you bought on Friday should not be placed in front of the one you bought on Monday. Intuitively, we just grab for the closest suitable thing, so we should always keep that in mind when we organize our fridge, too. 
 
Therefore, place that half-empty milk carton from Monday in front of the fresher one and avoid burying old fruit and veggies with new ones, for example. This is the system most grocery stores and pro kitchens use, and we say we can all take advantage of it, too! 
 
12. Avoid putting hot food into the fridge
Organized Fridge plate of hot green beans
It may be obvious to you, but we still see people make this mistake. Don’t put hot food into the refrigerator, as the extra warmth will increase the overall temperature in the fridge and may lead to unnecessary spoilage. In addition, it’s not good for the fridge either. 
 
13. Store eggs on the shelf, not the fridge door
Organized Fridge eggs

Contrary to popular belief, the refrigerator door is the last place where you want to store eggs. The shelf on the inside of your refrigerator door sees a constant flux of temperature, as you open and close the fridge to get your food. The shelf door is also the warmest place in the fridge, meaning that storing your eggs there will only make them rot faster. 

Instead, we recommend storing eggs on the middle shelf of the refrigerator together with other perishable foods like milk. 
 
14. Know the foods you don’t need to refrigerate
The best way to ensure that your fridge is always clean looking and organized is to avoid overloading it with foods that don’t need to be there. This includes things like bread, root vegetables, bananas, and other fruits, hot sauce, and many others. Save yourself some precious fridge storage space and keep them out of the fridge.


https://gscrochetdesigns.blogspot.com. one can see my crochet creations  

https://cancersupportindia.blogspot.com. feel free to view for easy, simple and health tips  
https://kneereplacement-stickclub.blogspot.com. for info on knee replacement


Thursday, December 26, 2019

Is It Safe to Eat Reheated Rice?

Some foods are more likely to cause food poisoning than others. We have listed the foods that are more likely to cause food poisoning previously in this article, but today, let’s focus on only one of these foods, rice. A significant percentage of uncooked rice contains Bacillus cereus, a pathogen that commonly causes food poisoning and can lead to complications in individuals with certain pre-existing conditions.
If stored at room temperature for long periods of time, the bacillus can multiply in cooked rice, increasing one’s risk of infection. Contrary to a popular misconception, however, reheating leftover rice in itself does not raise one’s risk of infection with Bacillus cereus, as long as you cook, store and reheat your rice correctly. This guide explains how to handle rice and leftover rice safely.


1. How to Cook Rice Properly
As we explained in greater detail in a previous article, you should always handle animal products and plant-based products separately while cooking, and wash your hands thoroughly before and between each stage of cooking. This is because animal products, such as meat and poultry, often contain pathogens that can spread to other foods aren’t typically exposed to temperatures as high as animal products are.
When it comes to cooking rice, high temperatures that kill germs are your best friend, so you should also keep an eye out on cooking temperatures and make sure to cook rice at a temperature above 60°C (140°F). Beware that lower cooking temperatures could do the opposite and urge bacterial growth, so we recommend making sure the temperature is high by using a kitchen thermometer.
Once cooked, serve the rice immediately and don’t let a bowl or rice sit at room temperature for more than an hour at any time.


2. Storage Tips for Cooked Rice
Since bacteria typically thrive in temperatures between 5-60°C (40-140°F), cooling the food as quickly as you can would prevent this from happening. It doesn’t matter if it’s plain rice, risotto, cabbage rolls filled with rice or any other rice dish, you should follow these tips to ensure the rice dish doesn’t harbor harmful microorganisms:


1. Freeze or refrigerate leftovers immediately after cooking. Side note: check the temperature in your refrigerator and make sure it’s below 5°C (40°F).

2. Don’t leave cooked rice at room temperature for over 1 hour.


3. Don’t store leftovers in the fridge for more than 3-4 days and in the freezer for more than 3 months.


4. Package your leftovers smartly: divide the rice into portions to avoid reheating and refreezing a dish several times.


3. How to Reheat Rice Properly
When reheating leftover rice, it’s important to make sure it has been heated up to a temperature of over 75°C (165°F) as quickly as possible and for at least 3-4 minutes irrespective of the way you’re reheating the rice (steaming, microwave or stir-frying).


This will ensure that the rice is piping hot and any bacteria potentially present in the food died off. Serve the rice immediately and try to avoid reheating for the second time. If you have a large quantity of leftover rice, we recommend dividing it into serving-size containers or bags.


links for my other 3 blogs-

https://gscrochetdesigns.blogspot.com. one can see my crochet creations  
https://cancersupportindia.blogspot.com. feel free to view for easy, simple and health tips  
https://kneereplacement-stickclub.blogspot.com. for info on knee replacement