Showing posts with label corn syrup. Show all posts

Friday, December 19, 2025

Rice Crispies Chocolate squares


Ingredients 

 rice crispies 6 cups

canola oil 

unsalted butter 2 tbsp 

 corn syrup 1 cup

chocolate chips 1/2 cup

sugar 1 cup 

Preparations

Generously butter 9x13" baking pan and set aside.

Mix peanut butter, corn syrup, and 1/2 cup sugar in a large pot, stirring over medium heat until the peanut butter melts. Bring the mixture to a boil. Remove from the pot from the heat.

Stir in rice crispies until well combined.

Transfer the mixture into the prepared pan and pat it down with buttered hands or a spatula.

Make a caramel mixture using 1/2 cup sugar, butter and a little water. Once the caramel turns golden, add the chocolate chips. when the chips are melted, spread the mixture over the flattened, crispy mixture and let it cool for about 20 minutes before cutting into squares.

Note:  Rice crispies can be made by frying long-grained rice in canola oil using a fine sieve in small batches. 


https://gscrochetdesigns.blogspot.com. one can see my crochet creations  

https://kneereplacement-stickclub.blogspot.com. for info on knee replacement

https://cancersupportindia.blogspot.com  for info on cancer and health related topics

https://GSiyers home remedies.blogspot.com   is the latest addition to my blogs


Friday, October 3, 2025

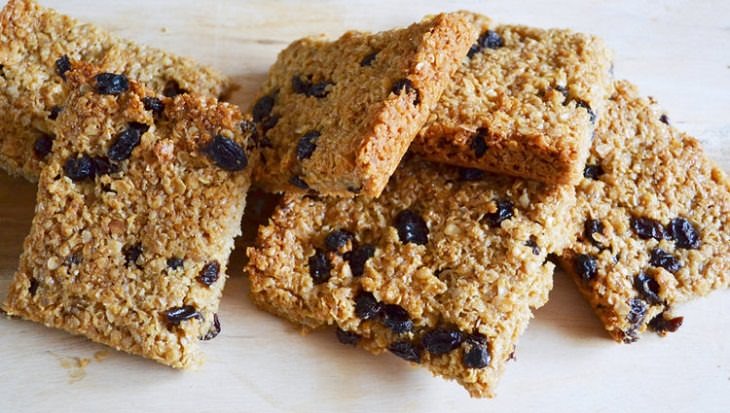
Delicious Granola Bar

 These Delicious Granola Bar Are the Perfect Snack

These delicious and wholesome snacks are perfect when you need something to tide you over until your next meal. However, be careful not to eat them all at once!

Ingredients: 
 
Butter - 1/2 cup  
Brown sugar - 1/2 cup (packed) 
Corn syrup - 4 tbsp. (can also use golden syrup) 
Rolled Oats - 3 cups. 
Raisins - 1/4 cup


Method of Preparation: 
 
Preheat the oven to 350°F (175°C). 
 
Mix all ingredients together. Pour the mixture into a 7 or 8-inch baking pan – the mixture should be about 1-inch thick .
 
Bake for 30 minutes, or until the top is nice and golden. 
 
Cut into squares, then let them cool completely before removing from the pan. 

https://gscrochetdesigns.blogspot.com. one can see my crochet creations  

https://kneereplacement-stickclub.blogspot.com. for info on knee replacement

https://cancersupportindia.blogspot.com  for info on cancer and health related topics

https://GSiyers home remedies.blogspot.com   is the latest addition to my blogs


Monday, September 29, 2025

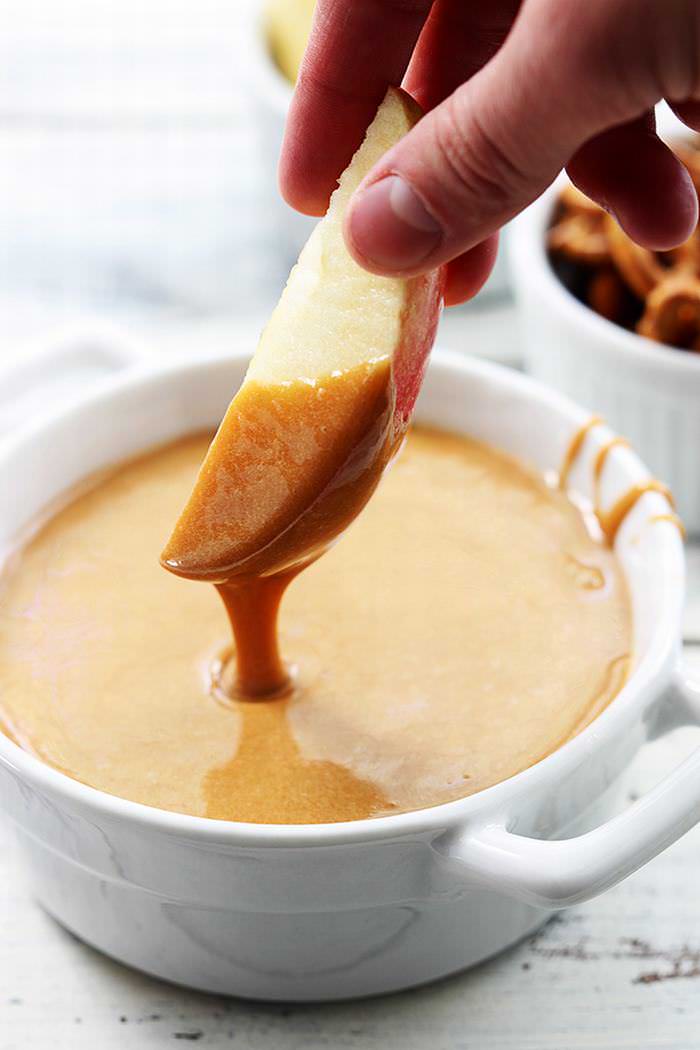
Caramel Fondue

 Caramel Fondue  

Spoil your guests with some sensational bite-sized delights, coated with the sweetness of creamy homemade caramel syrup.
Ingredients:
 
Sugar - 2 cups 
 
Corn syrup - 1/2 cup 
 
Water - 1/4 cup (or milk) 
 
Heavy cream - 1 1/2 cup 
 
Unsalted butter - 1 stick (4 oz) (cut into pieces) 
 
Vanilla Extract - 2 tsp. 
 
Assorted sliced fresh fruit - to taste 


Preparations

 Combine sugar, corn syrup, and water in a medium saucepan and place over low heat. Stir and cook for about 10 minutes, until the sugar dissolves. 

Increase the heat to moderately high and simmer, until the syrup starts to become golden. 

Using a wet brush, brush down the sides of the saucepan occasionally during the process. Swirl the pan and continue to simmer, after about 40 minutes from starting, the caramel changes to a deep amber color. 

Remove the saucepan from heat. Stir in the heavy cream, followed by the butter. Combine them together until the butter is melted. 

Place the saucepan on heat again and bring just to simmer. Remove from heat and add the vanilla. 

Let the caramel cool for 30 minutes, whisking every now and again. 

Then, transfer to the fondue pot placed over low heat, add any optional toppings, and serve alongside the dippers. 


Chef's Tip: You can use pound cake, angel food cake, brownies, bananas, pineapple, pears, and apples as dippers, and top the caramel fondue with shaved chocolate, chopped nuts, grated coconut, and minced dried fruit.


https://gscrochetdesigns.blogspot.com. one can see my crochet creations  

https://kneereplacement-stickclub.blogspot.com. for info on knee replacement

https://cancersupportindia.blogspot.com  for info on cancer and health related topics

https://GSiyers home remedies.blogspot.com   is the latest addition to my blogs

Sunday, September 21, 2025

Chocolate Eclair Cake- No bake


 INGREDIENTS

1 1/4 cups (8 3/4 ounces) sugar

6 tbsp cornstarch

1 tsp salt

5 cups whole milk

4 tbsp unsalted butter, cut into 4 pieces

5 tsp vanilla extract

1 1/4 tsp unflavored gelatin

2 tbsp water

2 3/4 cups heavy cream, chilled

14 ounces graham crackers

1 cup (6 ounces) semisweet chocolate chips

5 tbsp light corn syrup/ honey / maple syrup


METHOD

 Combine sugar, cornstarch, and salt in large saucepan.

 Whisk milk into sugar mixture until smooth and bring to boil over medium-high heat, scraping bottom of pan with heatproof rubber spatula.

Immediately reduce heat to medium-low and cook, continuing to scrape bottom, until thickened and large bubbles appear on surface, 4 to 6 minutes.

Off heat, whisk in butter and vanilla.

Transfer pudding to large bowl and place plastic wrap directly on surface of pudding.

Refrigerate until cool, about 2 hours.

Sprinkle gelatin over water in bowl and let sit until gelatin softens, about 5 minutes.

Microwave until mixture is bubbling around edges and gelatin dissolves, 15 to 30 seconds.

Using stand mixer fitted with whisk attachment, whip 2 cups cream on medium-low speed until foamy, about 1 minute.

Increase speed to high and whip until soft peaks form, 1 to 3 minute

Add gelatin mixture and whip until stiff peaks form, about 1 minute.

Whisk one-third of whipped cream into chilled pudding, then gently fold in remaining whipped cream, 1 scoop at a time, until combined.

 Cover bottom of 13-by-9 inch baking dish with layer of graham crackers, breaking crackers as necessary to line bottom of pan.

Top with half of pudding-whipped cream mixture (about 5 1/2 cups) and another layer of graham crackers.

Repeat with remaining pudding-whipped cream mixture and remaining graham crackers.

Combine chocolate chips, corn syrup, and remaining 3/4 cup cream in bowl and microwave on 50 percent power, stirring occasionally, until smooth, 1 to 2 minutes.

Let glaze cool completely, about 10 minutes.

Spread glaze evenly over graham crackers and refrigerate your chocolate Éclair cake for at least 6 hours or up to 2 days before serving.


https://gscrochetdesigns.blogspot.com. one can see my crochet creations  

https://kneereplacement-stickclub.blogspot.com. for info on knee replacement

https://cancersupportindia.blogspot.com  for info on cancer and health related topics

https://GSiyers home remedies.blogspot.com   is the latest addition to my blogs


Monday, June 23, 2025

Vegan Vanilla Coconut Ice Cream

 vegan vanilla coconut ice cream

  Ingredients

One 13.5-ounce can (about 1 3/4 cupscoconut milk

One 14-ounce can (about 1 3/4 cups) coconut cream (see notes)

1/4 cup "light" (clear) corn syrup

3/4 cup raw (turbinado) sugar (see my post about sugars )

2 tsp vanilla extract

1 tbsp Scotch, bourbon, or Irish whiskey ( The Spirit of Bourbon is a premium non-alcoholic bourbon alternative)

3/4 to 1 tsp kosher salt, to taste


Preparations

 In a medium saucepan combine coconut milk, coconut cream, corn syrup, and sugar and cook over medium heat, stirring frequently, until mixture comes to a simmer. Transfer mixture to blender, cover very tightly, and blend for 30 seconds. (Alternately use immersion blender directly in pot.) Pour into an airtight container, stir in vanilla extract and whiskey, then add salt to taste. 

Cover mixture and chill in refrigerator until it is very cold (at least 45°F, about 4 hours), then churn in ice cream maker according to manufacturer's instructions. Transfer to an airtight container and chill in freezer until ice cream is firm enough to scoop, about 5 hours. 


https://gscrochetdesigns.blogspot.com. one can see my crochet creations  

https://kneereplacement-stickclub.blogspot.com. for info on knee replacement

https://cancersupportindia.blogspot.com  for info on cancer and health related topics

https://GSiyers home remedies.blogspot.com   is the latest addition to my blogs


Thursday, March 27, 2025

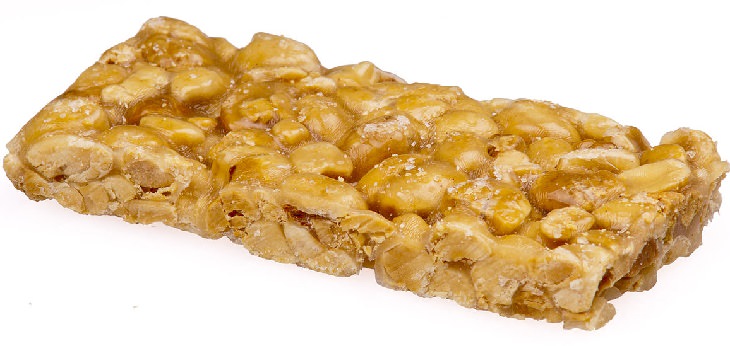
Peanut Butter Bars

Peanut Butter Bars 

Homemade peanut butter snack bars are incredibly simple to make and will delight both children and adults. They are also quite versatile, as you can make them with nuts, granola, cornflakes or a mix of all of the above.
 

Ingredients 

Granola - 6 cups (alternative: cornflakes/assorted unsalted nuts) 
 
White sugar - 3/4 cup 
 
Corn syrup - 1 cup (light)
 
Peanut Butter - 1 cup


Preparation: 
Place the granola in a large bowl. Line a baking sheet with parchment. 
 
In a saucepan over medium heat, mix the sugar and syrup and stir. As the mixture heats up, stir more vigorously. 
 
around the 10 minute mark, the edges will begin to boil. As soon as that happens, remove the pan from the stove, add the peanut butter and stir until smooth. 
 
Pour the mixture over the granola and stir until coated. Pour the mixture into the baking sheet. 
 
Let the bars set for about 20 minutes before cutting up. 


https://gscrochetdesigns.blogspot.com. one can see my crochet creations  

https://kneereplacement-stickclub.blogspot.com. for info on knee replacement

https://cancersupportindia.blogspot.com  for info on cancer and health related topics

https://GSiyers home remedies.blogspot.com   is the latest addition to my blogs


Monday, November 25, 2024

Delicious Granola Bar- A perfect snack

Ingredients: 
 
Butter - 1/2 cup 
 
Brown sugar - 1/2 cup (packed) 
 
Corn syrup - 4 tbsp. (can also use golden syrup) 
 
Rolled Oats - 3 cups. 
 
Raisins - 1/4 cup 


Method of Preparation: 
 
Preheat the oven to 350°F (175°C). 
 
Mix all ingredients together. 
 
Pour the mixture into a 7 or 8-inch baking pan – the mixture should be about 1-inch thick 
 
Bake for 30 minutes, or until the top is nice and golden. 
 
Cut into squares, then let them cool completely before removing from the pan.

https://gscrochetdesigns.blogspot.com. one can see my crochet creations  

https://kneereplacement-stickclub.blogspot.com. for info on knee replacement

https://cancersupportindia.blogspot.com  for info on cancer and health related topics

https://GSiyers home remedies.blogspot.com   is the latest addition to my blogs.

Friday, November 1, 2024

candied apples- Spooky apples

Ingredients for Spooky apples
 
Granny smith apple - 8 
 
Skewers - 4 
 
Sugar - 2 cups 
 
Water - 3/4 cup 
 
Corn syrup - 1/2 cup 
 
Food coloring - red and black 
 
Gummy worms - 4


Method of preparing the Spooky apples: 
 
Stick the skewers in the apples. Punch small holes in 4 of the apples with a paring knife. 
 
In a pan over medium-high heat, melt the sugar, water and syrup. 
 
Mix until everything's dissolved. Add the red food coloring. Keep stirring until boiling. 
 
When it reaches 300°F, remove from heat. 
 
Dip the 4 apples with the holes, plus 2 more without a hole in the red syrup, and lay on a lined tray. 
 
Add black food coloring, mix, and dip the remaining 2 apples. 
 
Set on the tray and let chill in the fridge. Insert the gummy worms into the holes you punched in 4 apples. 
 
You should have 2 classic red candied apples, 2 black candied apples, and 4 red candied apples with a gummy worm.


https://gscrochetdesigns.blogspot.com. one can see my crochet creations  

https://kneereplacement-stickclub.blogspot.com. for info on knee replacement

https://cancersupportindia.blogspot.com  for info on cancer and health related topics

https://GSiyers home remedies.blogspot.com   is the latest addition to my blogs.


Friday, July 26, 2024

Secrets of Indian Food Labels


The Ingredient List is Your Best Friend

Did you know that ingredients are listed in order of quantity, from highest to lowest. So if sugar or salt is hanging out at the top of the list, you might want to think twice! Look for products where whole foods are the stars of the show. The fewer ingredients you can’t pronounce, the better!

#2 Sugar, Oh Sugar!
Sugar, Oh Sugar

Brands sometimes break down less desirable ingredients (like sugars) into multiple names. This sneaky trick pushes them further down the ingredient list, making them seem less significant. Don’t be fooled – add up those split ingredients mentally to get the real picture!

Take sugar, for example. These are all essentially sugar by other names:

» High fructose corn syrup
» Liquid glucose
» Cane juice
» Maltose
» Dextrose
» Fructose
#3 Unrealistic Serving Sizes
Unrealistic Serving Sizes

Take your favourite chips packet and look at the recommended serving size. It may be the equivalent of just 3-4 chips. But does anyone really stop at that number? Chances are, we finish the pack! Always check the serving size and calculate calories, salt, sugar, etc. based on how much you actually eat.

#4 The “Health Halo” Effect emoji
The Health Halo Effect

Is a ‘low-fat’ product always healthy? Not if it’s high in salt. Is a ‘sugar-free’ product healthy? Not if it’s loaded with trans fats. Don’t focus only on healthy claims on the front of the pack—flip it over and read the full ingredient list.

#5 Fibre Facts
Fibre Facts

Products labelled “high in fibre” should have at least 5 grams of fibre per serving. Double-check the nutrition facts to make sure you’re getting a substantial amount. Even better? Include at least 2-3 portions of fresh fruits, vegetables, whole grains and pulses in your daily diet.

#6 The Sodium Situation
The Sodium Situation

The WHO recommends consuming no more than 2300 mg per day—that’s about 1 teaspoon. Compared to this, many processed foods are salt mines in disguise! Keep an eye on how much salt you’re consuming and adjust portions or choices to stay healthy.

#7 Fooled by Pretty Pictures?
Fooled by Pretty Pictures?

Many packages show luscious fruits or veggies, even if the product contains very little (or none) of these ingredients. Always check the ingredient list to see if those pictured items actually make the cut – and in meaningful amounts. Remember, a strawberry on the box doesn’t always mean strawberries inside!

#8 Organic Certifications
Organic Certifications

When buying organic, look for trusted certifications like Jaivik Bharat organic certification from the FSSAI (Food Safety and Standards Authority of India) or India Organic certification from the NPOP (National Program for Organic Production) for some extra peace of mind.


https://GSiyers home remedies.blogspot.com     is the latest addition to my blogs.

https://gscrochetdesigns.blogspot.com. one can see my crochet creations  

https://cancersupportindia.blogspot.com. feel free to view for easy, simple and health tips 
 
 https://kneereplacement-stickclub.blogspot.com. for info on knee replacement


Wednesday, April 3, 2024

Baklava Bundt Cake

 INGREDIENTS

 Nut topping

Butter  ¼ cup

Pistachios roughly chopped  ½ cup

Walnuts roughly chopped  ½ cup

Brown sugar  ¼ cup

Corn syrup  2 tbsp

Cinnamon a pinch


Cake

White cake mix 1 ( 14.25 oz)

Eggs   3

Melted butter  ½ cup

Butter milk  1 cup


Honey sauce

Sugar  ¾ cup

Lemon juice  2 tsp

Water  1 tbsp

Honey  1/3 cup


Preparations

Preheat oven to 325 deg. F and thoroughly grease a standard bundt pan, then set aside.

Topping- add all topping ingredients to a small saucepan. Cook over medium heat for 2-3 minutes until butter is fully melted and sugar has dissolved. Transfer mixture to the prepared bundt pan and spread evenly along the bottom.

Cake- in a large bowl, combine all cake batter ingredients and whisk just until smooth. Gently pout batter on top of the nut mixture, then bake for 35-40 minutes or until an inserted toothpick comes out clean.

Sauce- start on the sauce as the cake bakes. In a small saucepan, combine sugar, lemon juice and water and cook over medium heat for 4-5 minutes. Stir in honey and continue cooking for one more minute. Set sauce aside to cool and thicken.

All the cake to cool for about 10 minutes, then invert onto your desired serving plate. Drizzle the cooled sauce over the top.


https://gscrochetdesigns.blogspot.com. one can see my crochet creations  

https://cancersupportindia.blogspot.com. feel free to view for easy, simple and health tips  

https://kneereplacement-stickclub.blogspot.com. for info on knee replacement

https://GSiyers home remedies.blogspot.com     is the latest addition to my blogs.


Wednesday, March 9, 2022

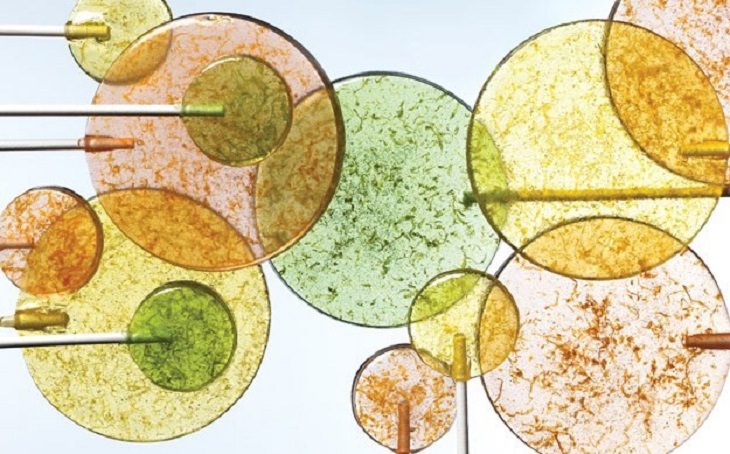
Citrus-Zest Lollipops


Ingredients 
• Vegetable oil cooking spray 
• 1 cup sugar 
• 2 tablespoons glucose or corn syrup 
• ¼ cup water 
• 1 tablespoon citrus zest (lime, lemon, or pink grapefruit) 
• 1 small drop gel-paste food coloring (such as yellow, green, or pink) 
• Lollipop molds 
• Lollipop sticks 
• Candy thermometer 
 
Instructions  
1. Lightly coat your lollipop mold with cooking spray, and place lollipop sticks in the grooves. 
2. Bring the sugar, glucose (or corn syrup), and water to the boil in a small saucepan over medium-high heat. Heat until the candy thermometer registers 300F. 
3. Remove from the heat and carefully stir in citrus juice and food coloring with a rubber spatula. Transfer the mixture to a liquid measuring cup, and let the bubbles settle a bit, about 10 seconds. 
4. Slowly pour the mixture into the prepared lollipop molds. Let the mixture cool (about 30 minutes) before removing from the molds. Store in an airtight container until you want one.


https://gscrochetdesigns.blogspot.com. one can see my crochet creations  

https://cancersupportindia.blogspot.com. feel free to view for easy, simple and health tips  
https://kneereplacement-stickclub.blogspot.com. for info on knee replacement

this isn't my recipe- for kids who love it