Showing posts with label nigella. Show all posts

Friday, August 1, 2025

Moong Dal Paratha

 Moong Dal Paratha Recipe 

Ingredients

1 cup green gram split and dehusked (moong dhuli dal)
2 cups whole wheat flour
2 tsp salt or to taste
2 tsp red chili powder / finely chopped green chilies to taste
1 tsp asafetida
1 tsp turmeric pdr
2 tsp fennel seeds
1 tsp nigella seeds (kalonji)
2 tbsp oil
2 tbsp coriander leaves
¼ cup water
Wheat flour for dusting
5-6 tsp oil/ghee 


Instructions 

Rinse the moong dal with water at least 4-5 times and soak for 4-5 hours in 3- 4 cups water.

Drain off the excess water and strain the dal using a colander.

 Drain off the excess water from the soaked dal.

In a bowl mix together flour, soaked drained dal, salt, red chilli powder, fennel seeds, nigella seeds, turmeric powder and asafetida.

Add the coriander leaves and gradually add water to knead into a soft dough. I used approximately ¼ cup of water while kneading.

Cover the dough and let it rest for at least half an hour.

After resting the dough, brush some oil/ghee on the dough and knead for 2-3 minutes until smooth and elastic.

Divide the dough into 14-15 equally sized balls. Lightly flour your work surface and roll each ball out into a disc around 2–3mm thick and 5-6 inch in diameter. Repeat with each of the dough balls.

Heat a tawa/ frying pan over a medium heat and, once hot, place a paratha in the tawa/pan. Dry fry on each side until small blisters form on the surface, then brush each side with oil and fry until cooked evenly and crispy.

Serve hot with raita and/or a pickle of your choice.

Tips 

Kneading the dough well is the key in making soft paratha. The dough can be made in food processor too, just make sure to add water slowly while kneading to get the dough of right consistency.

The dough should be pliable, not dry. While kneading the dough, remember that the quantity of water can be adjusted according to the flour. After kneading the dough, cover it with a wet cloth/cling film and allow it to rest.

Always rest the dough for at least 30 min as it helps in gluten formation.

You can also use leftover dal to make these parathas. Just add the dal and spices to the flour and knead the dough.If you want, you can pulse the soaked dal for few seconds before adding it to the flour.

You can make these parathas and store them in the fridge for 10-15 days

https://gscrochetdesigns.blogspot.com. one can see my crochet creations  

https://kneereplacement-stickclub.blogspot.com. for info on knee replacement

https://cancersupportindia.blogspot.com  for info on cancer and health related topics

https://GSiyers home remedies.blogspot.com   is the latest addition to my blogs


Wednesday, July 30, 2025

Garlic Pickle

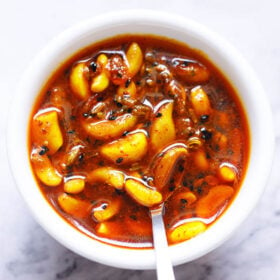
 overhead shot of Indian garlic pickle recipe in a white bowl with a sliver spoon 

Ingredients

  • ¼ cup mustard oil
  • 1 cup peeled garlic cloves – 130 grams
  • 1 tsp mustard seeds – black or yellow
  • 1 tsp fenugreek seeds / methi
  • 2 tsp fennel seeds
  • 2 tsp nigella seeds (kalonji)
  • ½ tsp turmeric pdr
  • ⅛ tsp asafoetida (hing) or about 2 to 3 pinches – optional
  • 2 tsp  Kashmir Chili pdr
  • 2 tsp rock salt  or pink salt or white salt 
  • 2 tbsp apple cider vinegar or white vinegar
  • 3 tbsp mustard oil at room temperature, added later to cover the pickle
  •  

    Preparations

  • Peel about 1 cup of garlic, approximately 3 to 4 heads worth.

  • Easy peeling, separate the cloves, spread them on the micro safe plate, micro high for 10-20 seconds
  •  If the garlic cloves are large, chop them in half, otherwise you can keep them whole.
  •  Ensure that your use the garlic cloves which do not have any fungal spots on them and are clean. 

  • Coarsely Powder Spices

    In a smaller mixer or spice grinder take the mustard seeds (black or yellow) and fenugreek seeds. Crush the seeds to a coarse or semi-fine mixture. Do not make a fine powder. Set aside.  Fry Garlic Once you are sure the garlic is well dried, heat mustard oil in a frying pan or skillet on medium heat. When oil is medium-hot, reduce the heat to lowest setting. Add the peeled and dried garlic cloves. Stir, mix and fry them in the oil for 3 to 4 minutes or until pale golden. Do not brown garlic, as the cloves become dense and chewy when pickled. They should only be partially cooked. Place pan on countertop. The oil will stop sizzling gradually.   Add spices and salt  First add the coarsely ground mustard seeds and fenugreek seeds. Add fennel seeds and nigella seeds (kalonji). Then add the turmeric powder, asafoetida (hing), Kashmiri red chili powder and edible food grade rock salt or pink salt. TIP: If using red chili powder or cayenne start by adding 1 to 1.5 teaspoons as it can make for a spicy pickle. Instead of Kashmiri red chili powder, you can also use sweet paprika.  For the salt, start with 1 teaspoon. Mix well and check taste. If needed, add ½ to 1 teaspoon more salt. TIP: If using regular white salt, you will need to add less – about 1 to 1.5 teaspoons total.  Add 2 tablespoons apple cider vinegar or white vinegar. Mix well. Check taste and, if needed, add more salt or red chili powder.   Pickled Garlic Transfer pickle to a clean, dry, sterilized glass or ceramic jar. Lastly, cover the top layer of pickle with 3 tablespoons mustard oil. The oil should be at room temperature. Tightly cover garlic pickles with lid and place in sunlight for 2 to 3 days. Lightly shake the jar everyday without opening the lid. I keep the jar on a window sill which gets plenty of sunlight. If you do not get sunlight, place it in a dry place in your kitchen, though the flavor will not be as intense as the sunlight steeped pickle.  Storage After the pickling process is over, place the jar in a dark, dry place. At room temperature, this garlic pickle stays good for about 2 weeks. If you have any pickle remaining after 2 weeks, refrigerate it. Or you could keep it in the refrigerator all the time. It stays good in the refrigerated for about a month. If the top oil layer is removed as you eat the pickles, add 1 to 2 tablespoons of mustard oil again to cover the top layer. This will prevent the cloves from coming into contact with air and spoiling.

    https://gscrochetdesigns.blogspot.com. one can see my crochet creations  

    https://kneereplacement-stickclub.blogspot.com. for info on knee replacement

    https://cancersupportindia.blogspot.com  for info on cancer and health related topics

    https://GSiyers home remedies.blogspot.com   is the latest addition to my blogs