Showing posts with label coffee grounds. Show all posts

Tuesday, June 8, 2021

Start Saving Food Scraps - They’re Super Useful!

Have you ever tried to estimate how much perfectly good food you’re throwing out every time you cook? Fruit and vegetable peels, animal bones, leftover herbs, overripe fruit, used coffee grounds - these are just a few common ingredients that end up in the trash because we don’t realize their potential.

It doesn’t matter if you’re cooking with produce you grew yourself or using store-bought foods, you can maximize the utility of food ingredients by using them up completely. With these 11 tips, you’ll be able to reuse so-called food scraps and save yourself lots of money and food at the same time. 
 
1. Prepare homemade bone broth
How to Reuse Food Scraps bone broth
Bone broth is an excellent alternative to vegetable stock in soups, gravies, and sauces. In many ways, it is the superior choice. Namely, bone broth has numerous proven health benefits, including improved digestion, sleep, cognition, and joint health. Bone is made of just three simple ingredients - water, bones, and vinegar. You can use any bones, including leftovers from meals like bone-on chicken or steak. Raw bones, skin, and cartilage scraps also work. Instead of discarding all of these leftovers and scraps, store them in the freezer and reserve for bone broth. The bigger the variety of bones, the better. To prepare the bone broth, combine 2-4 lbs of animal bones with 1 gallon of water and 2 tablespoons of vinegar in a large stockpot and simmer for 12-23 hours on low heat. Strain the broth and refrigerate for up to 5 days. 
 
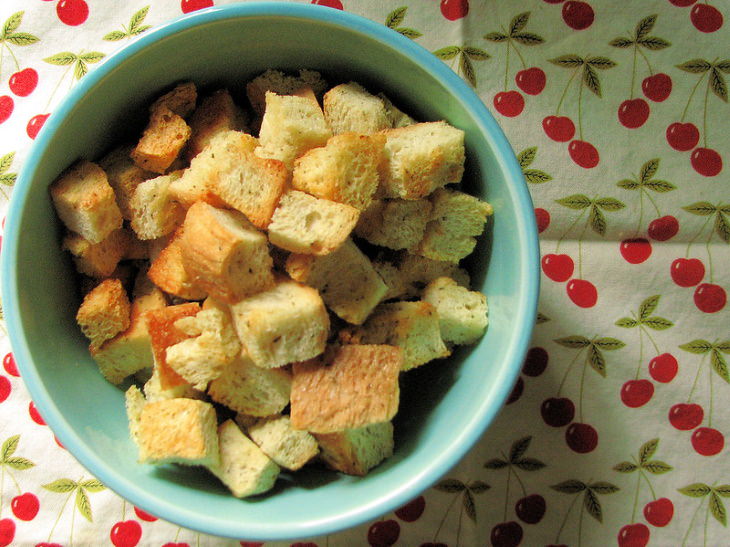
2. Stale bread makes delicious croutons
How to Reuse Food Scraps croutons
Why would you ever buy croutons at the store if you can make your own by reusing stale bread? Truth be told, fresh homemade croutons are much tastier than store-bought ones, and they’re so simple to make that it a crime not to make them. This method also works great with bread ends. 
 
To make croutons, cut the bread into bite-sized cubes and place them into a bowl. Drizzle with any oil of your choice and season with black pepper, garlic powder, onion powder, or any seasoning of your choice. Spread the croutons on a baking sheet pan and crisp them up in the oven at 200°C (400°F) until golden. Use immediately or store in an airtight container. These homemade croutons will add crunch and flavor to any dish, be it a soup, a salad, or any other savory dish. 
 
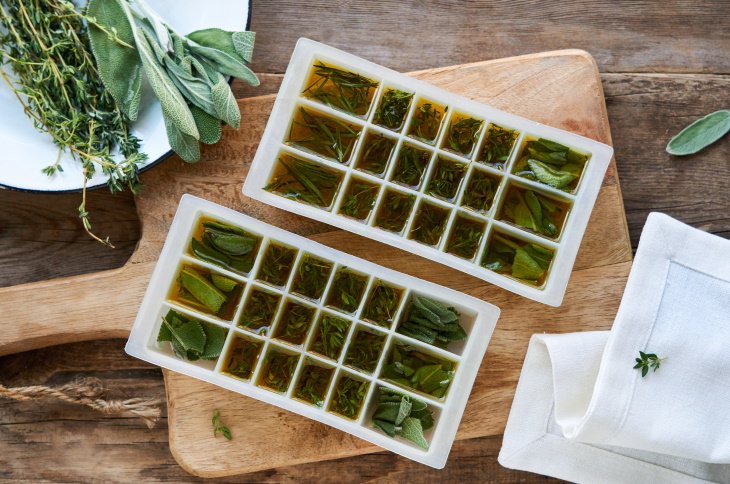
3. Freeze leftover herbs 
How to Reuse Food Scraps herbs
For some reason, herbs always come in huge bunches at the store. One bunch of parsley, dill, or basil is usually more than enough for a whole month worth of cooking. But even if you store fresh herbs in an airtight container in the fridge, they will wilt and turn black in about a week. 
 
For a long time, this discouraged me from buying fresh herbs, as I always ended up throwing out most of them. Then I started freezing them, and I never looked back. To freeze fresh herbs, chop them up and transfer them to an ice cube tray. Depending on how you prefer to cook with herbs, you can pour either water or oil into the tray. Wait until the ice cubes are completely frozen, and then pop them out of the ice cube tray and store them in a zip bag in the freezer. Freezing will wilt the herbs a little, so these frozen herbs work best in cooked dishes like soups, roasts, sauces, and stews.
 
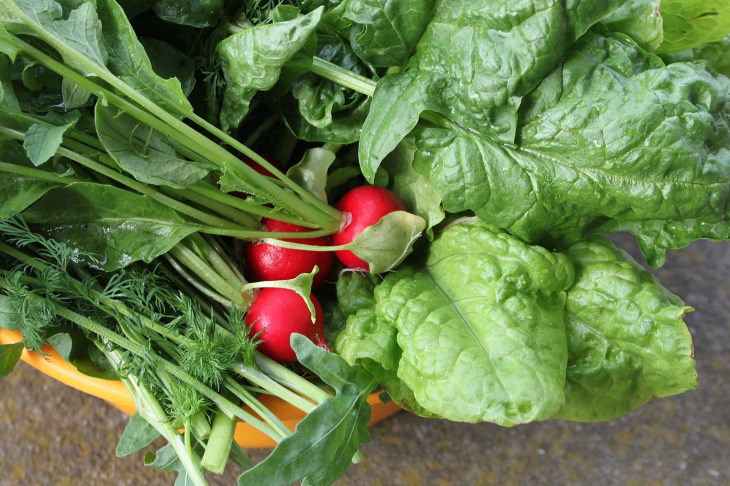
4. Save carrot-tops and radish greens
How to Reuse Food Scraps radish greens
If you grow your own carrots, beets, and radishes, save the leaves when harvesting these root vegetables. Most people throw away these healthy greens, which is a real shame. Instead, de-stem and tear them up into bite-sized pieces, and confidently add them into any salad or soup in place of lettuce or spinach. Alternatively, you can sautee these leafy greens with some seasoning, et voila, you have an extra side dish for your dinner. 
 
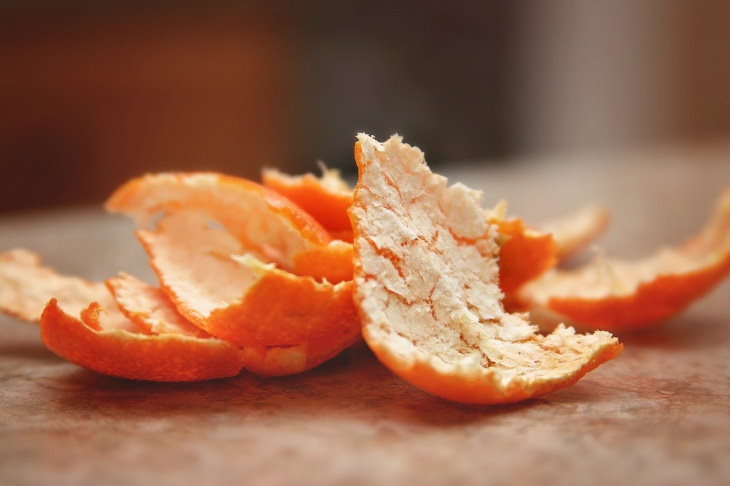
5. Citrus peels are so versatile
How to Reuse Food Scraps  Citrus peels
There are so many ways to reuse lemon peels that we have an entire article on the topic - Great Uses for Lemon Peels. But before you check it out, we’d like to show you one more way to reuse citrus peels that we didn’t mention in that article. Thanks to its natural deodorizing properties, any citrus fruit - be it orange, a lemon, or a tangerine - can be used to make a natural all-purpose cleaner. 
 
Simply pack the leftover citrus peels into a jar and cover them with vinegar. Let the peels soak for 5-7 days, and then dilute it with water and use the liquid to clean any suitable surface in your home. Unlike other vinegar-based cleaners, this one actually smells pleasant and will deodorize your home.
 
6. Coffee grounds make a great fertilizer
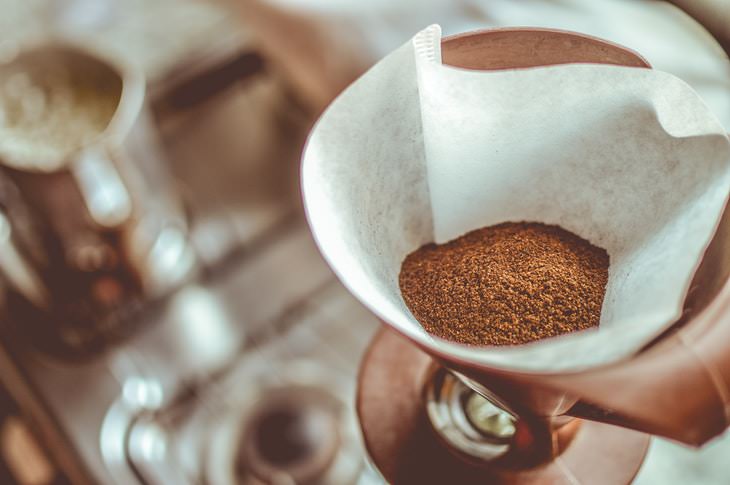
How to Reuse Food Scraps Coffee
Coffee is quite pricy, so it’s only natural for you to want to get the most out of it even after you had your morning cup of java. This means not disposing of used coffee grounds and reusing them around your home and garden. Fortunately, this is quite easy. For one, coffee grounds are a terrific natural fertilizer in your garden that also increases the soil’s ability to retain water.
 
Simply sprinkle a thin layer of coffee grounds onto the area you wish to fertilize and mix with the top of the soil. Coffee grounds attract ground worms, so this method works best for plants that require well-drained soil.

7. Overripe bananas
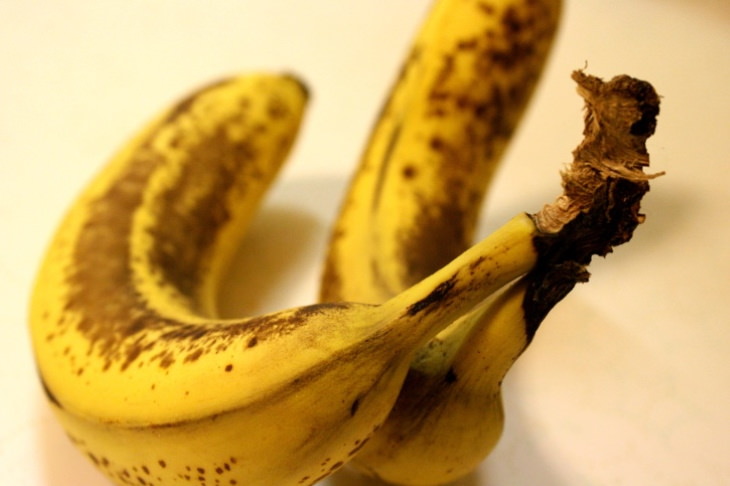
How to Reuse Food Scraps bananas
Before you toss brown bananas into the trash can, consider these ways you could reuse them. Ripe bananas may not taste too well as a stand-alone snack, but they are full of flavor and natural sugars. This actually makes them the superior choice for recipes, be it banana bread or banoffee pie. But even if you’re not keen on making a dessert right then and there, you can always cut your overripe bananas into pieces and freeze them. Frozen ripe bananas are the absolute best ingredient to use in smoothies. 
 
8. A great way to reuse bacon grease
Bacon grease is difficult to reuse or even dispose of. If you let it go down the drain, it can clog your sink or lead to a fatberg in your local sewage system. But there is one way you can save your sewage system and help your local bird population by saving bacon grease. 
 
Animal fat cakes called suet help birds to stay warm in the winter. You can make your own suet by straining any leftover fat drippings through a mesh sieve or cloth and mixing them with any type of seeds, nuts, or dried fruit. Refrigerate the mixture and shape it into suet cakes, which you can then place in your local bird feeders in the winter.

9. Make pickled watermelon rinds
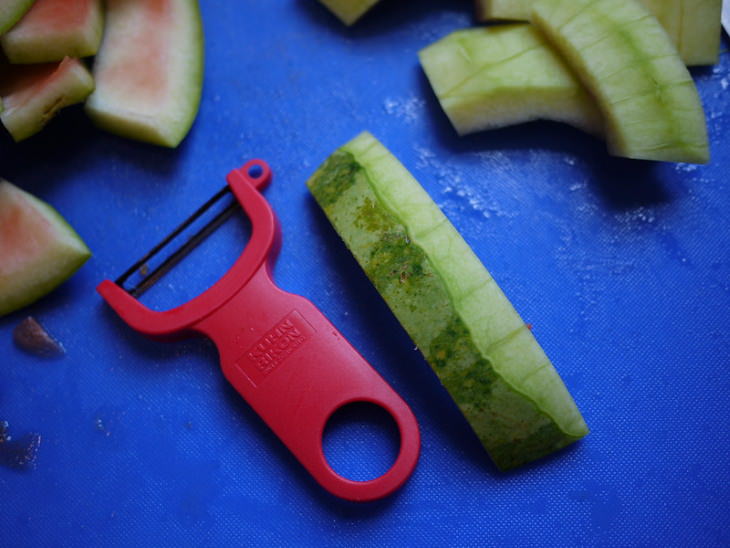
How to Reuse Food Scraps watermelon rinds
Did you know that preserved watermelon rinds make a delicious snack? As outrageous as it sounds, it’s very true, so the next time you buy a watermelon, save those rinds too and follow these steps. First and foremost, peel the watermelon rinds and cut them up into smaller chunks. 
 
Then, the process is identical to pickling other fruits and vegetables: simmer the watermelon rinds in a brine made of 6 parts water, 4 parts sugar, 2 parts white vinegar, and 1 part salt until they soften, and then store in the fridge. You can also add a few cloves, cinnamon, or black peppercorns, or ginger to the brine.
 
10. Freeze tomato paste
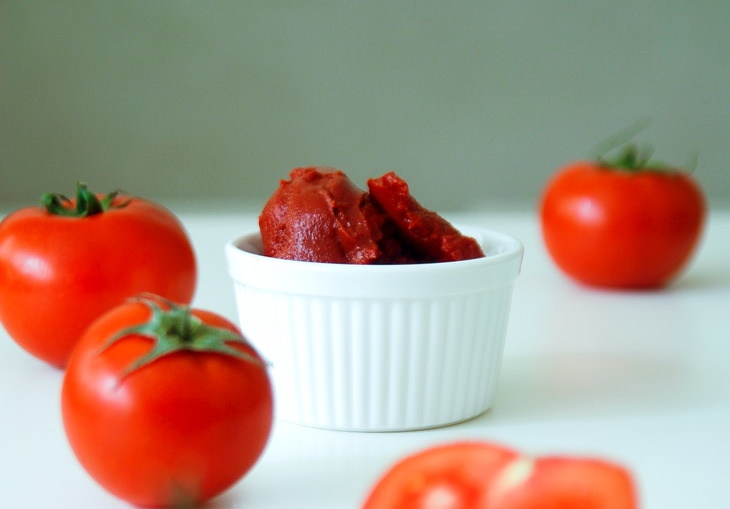
How to Reuse Food Scraps tomato paste
Most recipes call for a very small amount of tomato paste and you’ll have a lot of it leftover in the can. Instead of waiting for it to dry out in the fridge and throwing it out, you can try freezing it and extend its shelf life. This requires a bit of preparation, but it’s definitely worth the little extra hassle in the end. 
 
Line a baking sheet and place dollops of tomato paste on the sheet. Once frozen (this usually takes a few hours), place the tomato paste scoops into a plastic bag, and freeze for up to 3 months. 
 
11. Make flavored water with fruit and vegetable peels

How to Reuse Food Scraps peeling apples
Who doesn’t like to infuse water with a little flavor? Not only is it a healthy treat, but it’s also a great way to reuse fruit and vegetable scraps. To do so, just drop a few cucumber, lemon, or apple peels into a bottle of water and let them sit for an hour or so. The longer you leave the fruit or veggie peels in the water, the more pronounced the taste. You can experiment with adding some leftover herbs to mix with the fruit or cucumber infusion, too. The possible combinations are endless!


https://gscrochetdesigns.blogspot.com. one can see my crochet creations  

https://cancersupportindia.blogspot.com. feel free to view for easy, simple and health tips  
https://kneereplacement-stickclub.blogspot.com. for info on knee replacement


Saturday, May 22, 2021

Do’s and Don’ts of Coffee Storage

True coffee enthusiasts tend to have clear and strong preferences about how they take their coffee, from the best way to prepare it to the most efficient way to store it. It’s the latter we want to talk about today. The way you store your coffee matters a lot. Even the most high-quality bag of beans will end up tasting bitter and stale if the coffee was stored incorrectly. So what can you do to ensure a great-tasting cup of java?

In most cases, choose the cupboard over the freezer 
Ground coffee loses its freshness faster than whole beans because it has more surface area that’s exposed to oxygen. You may have heard that keeping ground coffee or whole beans in the freezer is the best way to preserve the flavor. However, that can actually do more harm than good. According to the National Coffee Association, the best way to store your coffee in an airtight container. Coffee grounds are often sold in tins that aren’t built for long-term storage, so it’s best to transfer the coffee into a canister with an air-tight lid.

What about whole beans? They, too, lose their freshness over time. In fact, the process starts almost as soon as the beans are done roasting, so they could benefit from proper storage as well. If you have a bag of beans, the best way to go would be to secure it and store it in a resealable plastic bag. 


To protect the coffee from light make sure your container is opaque, and store it in a cool spot, like a cupboard that isn’t too close to the stove. Avoid leaving it on a countertop spot that gets a lot of sunlight, because it may be too warm. As we already mentioned, the freezer should be avoided too, at least for the coffee you drink every day. The fluctuating temperatures create moisture in the bag or container, which can leave your morning cup tasting like cardboard. 
 
When to freeze? 
It’s fine to freeze whole beans for up to a month to keep them fresh for later use, provided you don’t take them out during that period. For a larger amount of coffee, first, divide it into smaller portions, then freeze then in airtight bags, as per the recommendation of Robert Nelson, president, and chief executive officer of the National Coffee Association. 
 
When you want to use the frozen beans, let them thaw on the shelf before grinding them. Brew within two weeks to get the most out of your coffee.


https://gscrochetdesigns.blogspot.com. one can see my crochet creations  

https://cancersupportindia.blogspot.com. feel free to view for easy, simple and health tips  
https://kneereplacement-stickclub.blogspot.com. for info on knee replacement


Sunday, September 13, 2020

20 Great and Helpful Kitchen Tips

Throughout my life, I have learned quite a few kitchen tricks that have saved me a lot of money and time. I think these 20 tricks are the best among them, and some of them might change your kitchen experience forever.

1. Wrap celery and broccoli in aluminum foil

21 Kitchen Tricks that Will Save You Time & Money

Wrapping celery and broccoli in aluminum foil and keeping it as airtight as possible can preserve them for up to a month. The reason is that fresh celery/broccoli has the right amount of moisture inside, and by keeping it in the airtight foil, it keeps it fresh and crisp for longer.


2. Fix stale chips and crackers in the microwave

21 Kitchen Tricks that Will Save You Time & Money
Don’t throw away stale chips or crackers. Instead – put them in the microwave, but be sure to consume them quickly after, since the staling process accelerates once they cool down.

3. Turn a finished jar of spreadable chocolate into hot cocoa

21 Kitchen Tricks that Will Save You Time & Money

That “empty” jar of Nutella is not really empty, is it? Those leftover bits of delicious chocolaty goodness can be turned into amazing chocolate milk with ease – simply pour hot milk into the spent jar, close the lid and give it a good shake until the residue all mixes with the milk, then pour in a glass and enjoy!


4. Store pineapples upside-down

21 Kitchen Tricks that Will Save You Time & Money

Ever bought a fresh pineapple and cut it up, only to discover that the top is deliciously sweet, but the bottom is very tart? This happens because naturally, the ripening process begins at the top of the pineapple and slowly moves down. To get the pineapple to ripen faster and be fully sweet, cut off the leafy part and store it upside down, the sugars will travel from the old top to the “new” top and hasten the ripening, leaving you with a sweet and delicious pineapple quickly.

5.Store apples with potatoes

21 Kitchen Tricks that Will Save You Time & Money

Apples produce Ethylene gas, which is effective at preventing the potatoes from sprouting.

6. Keep onions and garlic in ventilated paper bags

21 Kitchen Tricks that Will Save You Time & Money

Keeping onions and garlic cloves in a ventilated bag will keep them fresh and free of mold for 2-3 months longer.

7. Store lettuce with a paper towel

21 Kitchen Tricks that Will Save You Time & Money

When it comes to lettuce, as opposed to the celery, moisture is the enemy. Keeping it in a sealed bag with a paper towel will keep moisture away from lettuce, leaving it crisp and delicious.

8. Store natural nut spread upside down

21 Kitchen Tricks that Will Save You Time & Money

The common way to store natural nut spread leads to the natural 

oils in the nuts to float upwards, leaving the bottom hard and drier. 

By flipping the container for a couple of days, you help the oils 

return to the whole of the spread, making stirring much easier and helping you avoid that terrible, hard bottom layer.

9. Avoid empty spaces in the fridge

21 Kitchen Tricks that Will Save You Time & Money

Every time you open the fridge door, you let the cool air inside seep

 out while allowing the warmer room temperature to get in. This

 forces the fridge to work harder to restore the temperature and can

 lead to fungus and bacteria to propagate faster (the cold

 temperature slows this process down considerably). If your fridge 

isn’t full, keep a few containers full of water in the empty spaces. 

Water cools down slower than air, helping maintain the surrounding ambient temperature down.

10. Turn leftover mayo into salad dressing

21 Kitchen Tricks that Will Save You Time & Money

Every time you finish a jar of mayo, don’t throw it away. The leftover mayo in the jar that you can’t be bothered to scrape out can be turned into fantastic salad dressing: pour in some olive oil, vinegar, and add your choice of herbs, then shake it until the residue is all mixed with the liquids, leaving you with an easy, delicious and free dressing.


11. Before you squeeze citrus, microwave it for 15 seconds

21 Kitchen Tricks that Will Save You Time & Money

It might sound weird, but warm fruit releases juice more easily than a cold one.

12. Wrap banana crowns in cling-film

21 Kitchen Tricks that Will Save You Time & Money

Bananas release Ethylene gas, similarly to apples. The only problem with that is that it hastens ripening and then – rotting. Once harvested, this process begins and cannot be stopped. You can, however, slow it down by wrapping the crowns in cling-film, minimizing the amount of ethylene released. (For even better results, separate all the bananas from the bunch and wrap each crown individually)


13. Fertilize potted plants with spent coffee grounds

21 Kitchen Tricks that Will Save You Time & Money

Used coffee grounds are still rich in nutrients, making them wonderful fertilizer for potted plants, and their acidity also helps to keep snails and slugs away. You can sprinkle the grounds on the soil, mix it in the first 2 inches or brew it a-little, and pour the concoction into the flower-pot.

14. Use huggers to preserve cut fruits and veggies 

21 Kitchen Tricks that Will Save You Time & Money

Cut vegetables and fruit rot faster due to the exposure to air. Use the huggers to keep them fresh for longer.

15. Make ready-for-use herbal butter

21 Kitchen Tricks that Will Save You Time & Money

Chop fresh herbs and place them in an ice tray, then fill with softened butter or oil. This will prevent the herbs from spoiling and give you individual portions of your choice of herb-butter! YUM!

16. Regrow leftovers

21 Kitchen Tricks that Will Save You Time & Money

The bottom of various green leafy veggies can be regrown. Celery, green onions, lettuce and more can be regrown from the leftover bottoms, using a small container and keeping them watered.


17. Leftover cheese wrappers can be used for storage

21 Kitchen Tricks that Will Save You Time & Money

Cut the first part of the cheese along with the wrapper, remove the cheese and use the wrapper to seal the rest of the cheese. No more dry ends on your cheese!

18. Get all the mango while keeping your hands clean

21 Kitchen Tricks that Will Save You Time & Money

Cut the mango in halves, grab a glass and use it as a scooper to separate the flesh from the skin. No more wasting mango or getting

your hands sticky!

19. Keep your avocado with an onion

21 Kitchen Tricks that Will Save You Time & Money

The sulfur in the onion fumes will prevent the avocado from 

oxidizing and turning brown. A splash of apple cider vinegar or

 lemon juice will work similarly.


20. Make leftover pizza crispy again

21 Kitchen Tricks that Will Save You Time & Money

There are 2 ways to get that leftover pizza crispy again: Put it in a skillet and let the oil in the crust return it into crispy goodness. Alternatively, put it in the microwave with a glass of water. While it’s not as efficient, it’s faster…

https://gscrochetdesigns.blogspot.com. one can see my crochet creations  

https://cancersupportindia.blogspot.com. feel free to view for easy, simple and health tips  
https://kneereplacement-stickclub.blogspot.com. for info on knee replacement


Monday, November 25, 2019

Amazing uses of coffee powder

Coffee provides us with a quick boost of energy to start the day, or to stay up late at night. Most of us, however, discard old coffee grounds, but you may want to hold on to them after reading about their many practical uses here. There is also a bonus video at the end you won't want to miss.

1. Exfoliate Your Pores with a Homemade Mocha Mask

Here is the recipe for a homemade Mocha-Frappuccino Mask:

What You Will Need:

    2 tbsp. of freshly ground coffee (use the finer grind if possible)
    2 tbsp. of cocoa powder
    3 tbsp. of whole milk, heavy cream, or yogurt
    1 tbsp. of honey

Directions:

    Mix all the ingredients together.
    Apply the mask to your face in the morning.
    Allow it to dry for 15-20 minutes.
    Wash the mask off in the shower, scrubbing very gently over the skin surface while rinsing.

2. Create an Aromatic Soap

Here is the easy-to-make recipe for an aromatic bar of soap:

What You Will Need:

    8 ounces glycerin soap
    1/4 cup used coffee grounds
    1 teaspoon vanilla
    1 teaspoon powdered milk (optional)
    Small saucepan
    Small metal or glass bowl
    Muffin tin
    Ladle
    Butter knife

Directions:

    Gather all the ingredients together.
    Fill a small saucepan with 1 cup of water, topping the metal or glass edges of the bowl to create a double boiler.
    Place over medium heat.
    Mix the soap into the bowl and let it melt completely with the aid of the steam from the boiling water below. This process should take you a few minutes
    Lightly grease 4 rounds of a muffin tin while the soap is melting.
    Pour a small spoonful of coffee grounds at the base of each muffin tin.
    Turn off the heat as soon as the soap becomes liquid.
    Add the vanilla, and add 1 teaspoon of the coffee grounds.
    Stir in the powdered milk.
    Carefully pour the soapy mixture into the muffin tin, filling each round to the top.
    Allow it to cool for several hours, and then scoop them out with a butter knife.
    Wrap in parchment paper and enjoy your wonderful-smelling soaps.

3. Homemade Coffee Salt Scrub

Here is the recipe for a homemade salt scrub:

What You Will Need:

    1 cup coffee grounds (dried)
    1 ½ cup coarse sea salt
    1 cup oil (your preference)
    5-15 drops of essential oils (your preference)

Directions:

    Fill a large bowl with 1 cup of coffee grounds and 1½ cups of coarse sea salt, and then stir.
    Stir in the cup of oil and about 5-15 drops of essential oils into a bowl. You can use cinnamon, lemon or Eucalyptus for the essential oils. They all work very well.
    Store the mixture in an airtight jar, and use the scrub as needed.

4. Keep Your Pots and Pans Sparkling Clean
The high acidity level contained in coffee acts as a natural cleaning abrasive, ideal for scrubbing dirty pots and pans. A couple of teaspoons of coffee grounds and a rag is all it takes to eliminate the unwanted grease stains. 


5. Wash Your Hands After Chopping Onions and Garlic
Use coffee grounds to wash your hands after you've been dicing up onions or chopping garlic cloves. The grounds absorb all the strong odors in no time at all. 


6. Give Your Dog a Flea Bath
Mix a tablespoon of used coffee grounds with your dog's shampoo during the bath. It will help keep those pesky little insects off your beloved pet. 


7. Coffee Ground Garbage Disposal Cleaners

Here are the instructions for a coffee grounds garbage disposal cleaner:

What You Will Need:

    1 cup dry used coffee grounds
    1/2 cup Epsom salts
    1/2 cup baking soda
    3 tbsp vinegar
    1/2 teaspoon vanilla (optional)
    Small mixing bowl
    Rounded measuring spoon or small melon baller
    Sheet pan
    Parchment paper

Directions:

    Measure and add the coffee grounds, Epsom salts, and baking soda to the mixing bowl.
    Slowly add the vinegar, which will bubble once it interacts with the baking soda.
    Add a little bit at a time until the mixture resembles wet sand.
    Add a little vanilla to the tiny garbage disposal cleaners for a pleasant smell.
    Cover a sheet pan with parchment paper, and use a rounded measuring spoon or melon baller to create the cleaners.
    Scoop the mixture and then press against the side of the bowl, packing the coffee ground filter together, and then tap onto the parchment-covered sheet pan.
    Let the cleaners dry overnight and then place in a coffee cup next to your sink.
    Drop one down your drain, turn on your garbage disposal and then the faucet. 
    You should have about 30 mini garbage disposal cleaners in total.

8. Alter the Color of Your Hydrangeas
The pH balance of the soil can negatively affect your precious Hydrangeas. Not to worry, a few old coffee grounds should help do the trick. Coffee grounds reduce the pH balance of the soil and transform pink flowers into blue ones.


9. Snack on a Few Coffee Energy Bites
Snack on a few bite-sized coffee energy treats to give you a boost during the day. Peanut butter may be substituted for almond butter, but it must be the creamy variety. Here is the delicious recipe:

What You Will Need:

    1 cup dry whole grain oatmeal
    1/2 cup ground flaxseed
    2 tbsp fresh ground unbrewed coffee beans
    1/2 cup creamy almond butter
    1/4 cup of honey
    1 tsp vanilla
    1/4 cup chocolate chips
    1/4 cup dried cranberries

Directions:

    Stir the oatmeal, flax seed, and coffee granules together in a medium bowl until thoroughly mixed.
    Add the almond butter, honey, and vanilla.
    Fold in the chocolate chips and cranberries once everything is combined, and stir well. 
    Allow the mixture to chill in the fridge for 20 minutes. 
    Roll them into tiny balls after they've finished chilling.
    Store in an airtight container in the fridge for no more than 1 week.

10. Enjoy a Coffee-Rubbed Pork Roast for Dinner

Did you know that you can cook your favorite pork meal with coffee grounds? Here is the mouth-watering recipe:

What You Will Need:

    3.5 lbs. Boston Butt or Pork Shoulder
    1 oz. (approx 3 tbsp) coffee beans
    ½ cup brown sugar
    ½ tbsp. cayenne pepper
    ½ tbsp. salt
    15-20 cranks cracked black pepper
    1 tsp. minced garlic
    ½ tsp. smoked paprika 

Directions:

    Begin by grinding the coffee beans to powder. Select the “espresso grind” if possible.
    Combine all the ingredients in a bowl.
    Gently pat the mixed dry rub on all sides of the pork roast.
    Put the pork roast into a slow cooker, gather up any coffee grounds that might have fallen off, and sprinkle them into the slow cooker.
    Set the heat to low, tighten the lid of the cooker, and let it cook for 8 hours.
    The roast should be nice and tender afterward and should shred easily with a fork.
    Use a bit of caution when lifting the roast out of the slow cooker and onto a serving platter. Enjoy your meal. 

11. Use Them to Make Homemade Coffee Candles

Here are the instructions on how to make a few wonderfully smelling homemade coffee candles:

What You Will Need:

    Small paper coffee cup
    1-2 tbsp. used coffee grounds
    Paper towel
    1 cup wax candle remnants
    Candlewick
    Scissors
    Small saucepan
    Small metal or glass mixing bowl

Directions:

    In order to create the base of the candle, add 1 cup of wax candle remnants to a small metal or heat-safe glass bowl.
    Place the remnants over the top of a small saucepan, and fill it halfway with water. This should give you a double boiler.
    Allow the water to simmer and observe carefully until the wax has completely melted. The process should take about 5 minutes or so.
    Clean the paper coffee cup thoroughly and wipe it down to make sure it's dry.
    Place the coffee grounds in a paper towel, and squeeze to release any extra liquid.
    Place the wick in the center of the cup, and sprinkle a layer of the coffee grounds at the base.
    Gently pour in half of the melted wax over the coffee grounds, while saving the rest of the wax for the top of the candle.
    Allow the wax to harden for 20 minutes.
    Add the cooled wax with extra spoonfuls of coffee grounds to create the second layer of the candle.
    Reheat the wax in the double boiler, and top off the candle.
    Allow the candle to cool off for about an hour.
    Cut away to reveal the finished candle.
    Smooth the edges with a paper towel if needed, and trim the end of the wick to fit the candle. Enjoy.

12. A Natural Way to Dye Fabrics


Here is a simple step-by-step guide to dying out fabrics using old coffee grounds:

Instructions:

    Wash and dry the fabric to remove any excess dirt and oil, which can keep the dye from penetrating evenly. This step is especially important on brand new fabrics that are coated with a finishing spray.
    Place a large pot on your cooktop. You will need a pot that is large enough to submerge your fabric. A regular stockpot will do just fine. 
    Prepare several pots of coffee and pour into a larger pot, one cup at a time. You will need a large amount of coffee to cover the fabric completely once it is placed in the pot.
    You can achieve darker color fabrics with a stronger coffee brew.
    If you plan on preparing several batches of coffee, you will need to fill the stockpot with water and allow the instant coffee to dissolve inside.
    Bring to a boil after pouring all of your freshly prepared coffee into the pot.
    Turn the heat off once the coffee reaches a full boil.
    Add the fabric to the stockpot.
    Submerge the fabric into the stockpot after you've turned the heat off and the coffee has stopped bubbling.
    Get rid of any air pockets by stirring the coffee grounds with a wooden spoon for a few seconds or so.
    Allow the fabric to steep for about a half hour, and longer if you desire a deeper tint.
    Rinse the dyed fabric under cold water in the sink. Once the water runs clear, the excess dye has been removed.
    Alternatively, if you still want the fabric to be a darker color after rinsing it, you can bring your coffee dye back to a boil and steep the fabric again.
    Beware, the coffee dye may stain your pot if you don't drain it and wash immediately after the dyeing process is finished.
    Gently wash the fabric.
    Wash the fabric infrequently and use a mild detergent such as Woolite to protect against fading.

13. Get Rid of Foul Odors in Shoes
Just put a few old coffee grounds into the shoes and allow them to work their magic. The unpleasant smell should leave right away. 


14. Polish Unfinished Wood Flooring 

Transform old unfinished wood with wet coffee grounds and steel wool. Here's how to do it:

What You Will Need:

    Steel wool
    1 tbsp. coffee grounds
    White vinegar
    A sealable container
Directions:
    Place the steel wool and coffee grounds in the container, and fill it with the vinegar.
    Allow it to sit for 24 hours.
    The vinegar should begin to dissolve the steel wool at this point.
    The coffee grounds will give the stain a bit of a brownish color.
    Take a plastic glove, and fish the steel wool out of the container.
    Rub the steel wool all over the piece of wood, dipping it back into the container for more liquid as necessary.
    Coffee grounds will be all over the floor but don't worry about the mess, you can just wipe it after it dries.
    Allow the first coat to dry for about 1 hour and then do a second layer.

15. Cover Unwanted Scratches with Coffee Grounds

Use coffee grounds to cover up scratches or dark stains on wooden furniture. You can make a thick paste out of the coffee grounds and water and then rub the paste into the scratch. Your furniture should look brand new afterward.


16. Wash Your Hair with Coffee Grounds
You can add old coffee grounds to your shampoo or conditioner to get rid of oil and build-up. Beware that it turns light-colored hair darker. 


17. Create a Non-Toxic Playdough for Kids

Here are the instructions for turning old coffee grounds into a mud-like, non-toxic Playdough for kids:
What You Will Need:

    2 cups of flour
    1/2 cup of coffee grounds
    1 tbsp of instant coffee (if it isn't dark enough)
    1 cup of salt
    2 teaspoons of cream of tartar
    1 cup of boiling water
    2 tbsp of oil

Directions:

    Add all the dry ingredients together, followed by 1 cup of boiling water, and stir. 
    Allow the mixture to sit for a while so it thickens.
    Stir some more, and presto, you now have a pleasant smelling, non-toxic Playdough substance.

18. They Can Be Used as a Fertilizer Mist for Your Garden
Fill a spray bottle with half a cup of coffee grounds and warm water. Spray your flowers and plants with the mist to keep your garden chemical-free.  


19. Prevent Stray Cats from Entering Your Garden

Cats do not like the smell of coffee at all. Once they pick up the strong scent, they will leave the premises right away. You can sprinkle a few coffee grounds around your garden to keep cats from destroying your beautiful plants and flower beds.

for crochet designs, my blog, those who like a particular design are free to mail me

those interested in cancer & health related topics are free to see my blog- 

https://cancersupportindia.blogspot.com/ 

https://gscrochet designs.blogspot.com  

For info. about knee replacement, be free to view my blog- 

https://knee replacement-stick club.blogspot.com