Showing posts with label chili pdr.. Show all posts

Monday, August 4, 2025

Beet roti

roti ready to eat with garlic pickle and spinach-paneer sabzi


beet dough              
 
Ingredients 
 beet coarsely crushed in mixer with green chili 1 tbsp
wheat flour + salt as needed to make dough with beet, adding little water to make a smooth dough.
roll out the dough as thin as possible, heat a tawa/ pan, once hot, put the roti to cook on one side, then flip to cook on the other side, only till small brown dots appear, then cook over direct flame on both sides.
Serve hot with whatever sabzi you prefer, pickle and curd to make a complete meal.
 
I wanted to try my garlic pickle with roti, had some spinach, cooked it with onion, tomato, little paneer. Had it hot for my lunch today, with curd.
To know the health benefits of beets, kindly see my cancer and home remedies blog- good for hear, BP, blood circulation.


https://gscrochetdesigns.blogspot.com. one can see my crochet creations  

https://kneereplacement-stickclub.blogspot.com. for info on knee replacement

https://cancersupportindia.blogspot.com  for info on cancer and health related topics

https://GSiyers home remedies.blogspot.com   is the latest addition to my blogs


Thursday, May 29, 2025

Vegetarian Omelette

 Ingredients

1 cup besan ((chickpea flour))

1/4 cup rice flour (optional but it helps crisp up the pancakes)

1/2 cup spinach (can substitute grated carrots, peas, boiled potatoes, grated beets, squash, or zucchini)

green chilies chopped to taste

spring onions finely chopped as needed 

1 tsp cumin / jeera

1/2 tsp turmeric pdr

1/2 tsp chili powder- to taste

salt to taste

hing little 

water  as needed

oil / ghee to cook


 Preparations

1.     Mix all the ingredients and add water  until you get a batter like consistency.

2.     Heat a non-stick skillet on medium high with a little oil.

3.     Add the batter when the pan is nice and hot and spread as thin as you can with the back of a spoon or ladle. Work fast before it sets.

4.     Let it cook on one side for about 2 minutes and flip.

5.     Let cook for an additional minute and serve.


https://gscrochetdesigns.blogspot.com. one can see my crochet creations  

https://kneereplacement-stickclub.blogspot.com. for info on knee replacement

https://cancersupportindia.blogspot.com  for info on cancer and health related topics

https://GSiyers home remedies.blogspot.com   is the latest addition to my blogs


Tuesday, May 20, 2025

Enhance the Flavor of Peanuts by Roasting & Seasoning Them

Peanuts are such a delicious and crunchy snack, aren’t they? You can literally have them at any time of the day – for breakfast, before a meal, or even as an evening snack. Moreover, peanuts have great nutritional benefits and are loaded with protein and healthy fats, while being also rich in energy (567 calories per 100 g) and nutrients, minerals, antioxidants, and vitamins.
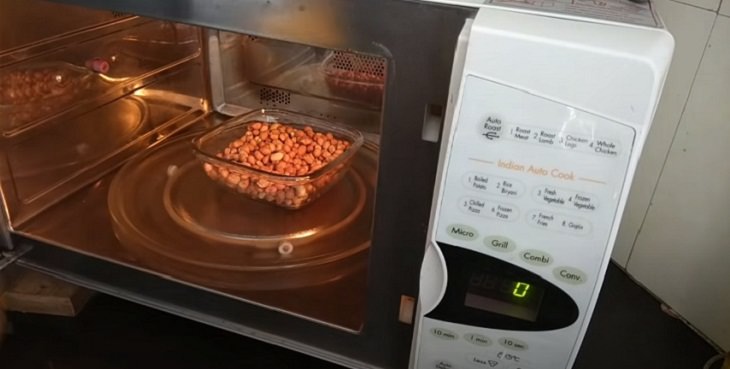
While having raw peanuts is, of course, a healthy and tasty option, you can also make a variety of lip-smacking recipes with these nuts. No, we're not talking about a peanut butter sandwich. Today, we will show you how to microwave roasted peanuts and then how to make them taste better with some yummy seasoning choices. 
 
How to roast peanuts in a microwave 
Microwaving peanuts gives them a crunchier, crispier, and tastier texture. Many of you might have made roasted peanuts previously on the stove-top. However, roasting peanuts in a microwave is a quicker and easier alternative.
Microwave Roasted Peanuts Recipe in the oven
1. First, collect your peanuts (250 g or 8.81 oz) in a microwave-safe bowl. If you can find some pre-shelled raw peanuts from the local grocery store it would be better. 
 
2. Use a measuring spoon to measure out 2 tbsp (30 ml) of water and drizzle it over the peanuts in the bowl. 
 
3. Keep stirring the peanuts with the spoon and make sure they are well coated with the water. Stir well until they are moist. 
 
4. Now, you put the dish inside the microwave and set the power on the highest temperature for 3 minutes. 
 
5. Take the dish out from the microwave and stir the peanuts around with a spoon. Once you’ve stirred the peanuts for about a minute, place the dish back inside the microwave. Set the temperature to the highest power and microwave again for 1 minute. If you want your peanuts roasted longer, then extend the time by another minute. 
 
6. Take the dish out from the microwave and keep the peanuts on a tray to cool down. Spread the nuts with a spoon and wait for a couple of minutes.


How to season the roasted peanuts? 
 
3 delicious options: Now that your peanuts are nicely roasted and crispy, the next step is to add seasoning to them. This is the best part as you can pick and choose your seasoning from a variety of options. Here are a few of them. 
 
* Sprinkle salt over the peanuts to make a nice cup of traditional salted peanuts. Stir the peanuts well by hand once you have sprinkled the salt. You can also experiment with the salt and use normal table salt or sea salt. Half a tablespoon of salt should be enough but you can adjust it according to your taste.

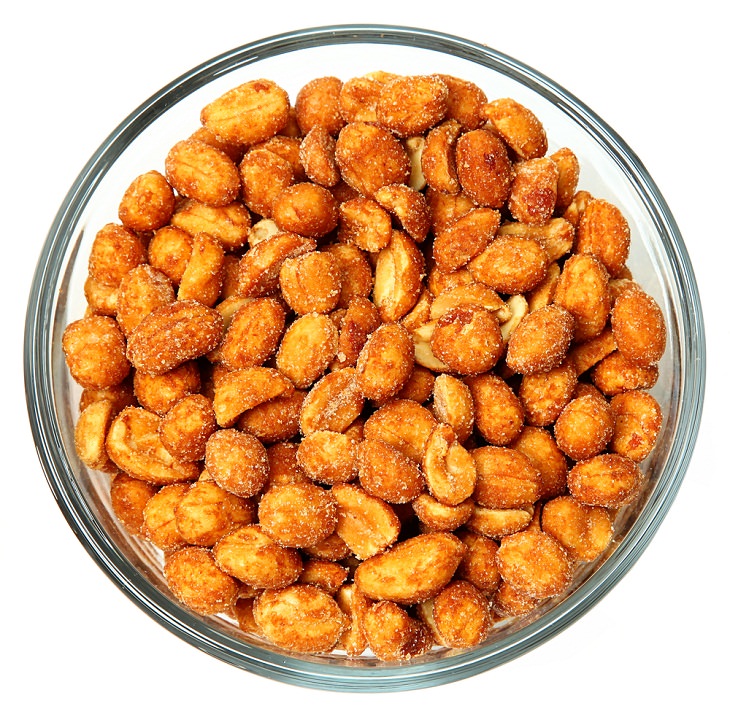
* Another delicious alternative is coating the peanuts with honey before roasting them. What you would need to do is to use 2 US tbsp (30 ml) of honey over 250 g (8.81 oz) peanuts before you put them in the microwave. Then stir them and put them in the microwave on high power for 4 minutes. This will give you a nice bowl of honey-roasted peanuts. 
 Microwave Roasted Peanuts Recipe, spicy salted
* Our last seasoning option is spicy salted peanuts. For this, you need to mix 2 tsp (8.2 g) of chili powder, 1/4 tsp (1 g) of cayenne, and 1/2 tsp (2 g) of garlic salt over the roasted peanuts. Toss the spices properly so that all the peanuts are well coated with them. You can even add 2 tbsp of chopped onions and some coriander leaves for garnishing purposes. They will certainly improve the taste.


So, there you have it. Now, you can easily roast peanuts in the microwave and add a variety of seasoning to them to enhance their taste. Try out these options right away and see which ones you like the most.


https://gscrochetdesigns.blogspot.com. one can see my crochet creations  

https://kneereplacement-stickclub.blogspot.com. for info on knee replacement

https://cancersupportindia.blogspot.com  for info on cancer and health related topics

https://GSiyers home remedies.blogspot.com   is the latest addition to my blogs

Monday, May 19, 2025

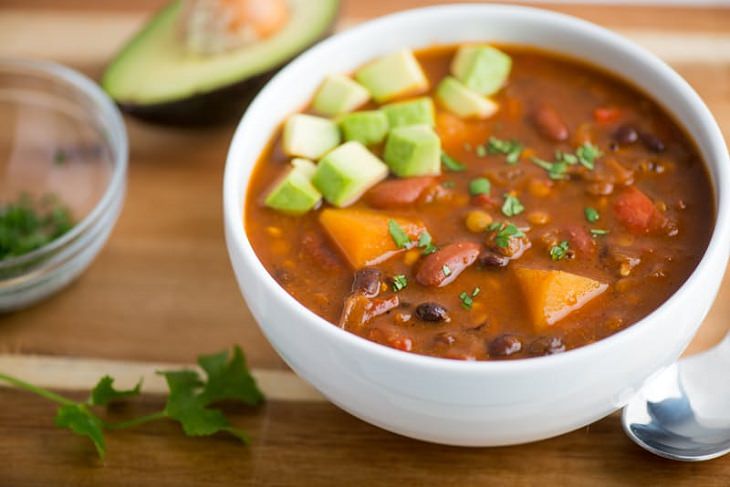
Slow-Cooker Vegan Lentil Chili

 Recipe - Vegan - Chili

Ingredients 
• 1 pound large butternut squash cubes (about 1 1/4 inches) 
• 1 medium yellow onion, finely chopped 
• 1 medium red bell pepper, diced 
• 2 cloves garlic, finely chopped 
• 2 1/2 cups water 
• 1 (14.5-ounce) can crushed tomatoes 
• 1 (15-ounce) can black beans, drained and rinsed 
• 1 (15-ounce) can kidney beans, drained and rinsed 
• 3/4 cup dried lentils 
• 2 tablespoons chili powder 
• 1 tablespoon cumin pdr
• 1 tablespoon olive oil 
• 2 teaspoons kosher salt 
• 1/4 teaspoon freshly black pepper pdr
• Coarsely chopped fresh cilantro and diced avocado, for serving


Method  
 
1. Place all ingredients (except the cilantro and avocado) in a 6-quart or larger slow cooker and stir to combine.
 
2. Cover and cook until the lentils are tender - 6 to 8 hours on the LOW setting. 
 
3. Stir again and serve topped with cilantro and avocado. 
 
Notes: Storage: Leftovers can be stored in an airtight container in the fridge for up to 5 days. It can be frozen for up to 3 months.


https://gscrochetdesigns.blogspot.com. one can see my crochet creations  

https://kneereplacement-stickclub.blogspot.com. for info on knee replacement

https://cancersupportindia.blogspot.com  for info on cancer and health related topics

https://GSiyers home remedies.blogspot.com   is the latest addition to my blogs

Wednesday, April 23, 2025

Rasawala Dhokla- Dhoklas in tamarid gravy

Ingredients

For Rasawala Dhokla

For The Garnish

    2 tbsp chopped coriander leaves

Method

For rasawala dhokla
 

  1. To make rasawala dhokla, heat the oil in a broad pan, add the mustard seeds, asafoetida, red chilies, chili powder and turmeric powder and sauté on a medium flame for 30 seconds.
  2. Add 4 cups of water, jaggery, tamarind pulp and salt, mix well and boil for 5 to 6 minutes.
  3. Add the dhoklas and allow them to simmer in the rasa for 5 minutes.
  4. Serve the rasawala dhokla immediately garnished with coriander

https://gscrochetdesigns.blogspot.com. one can see my crochet creations  

https://kneereplacement-stickclub.blogspot.com. for info on knee replacement

https://cancersupportindia.blogspot.com  for info on cancer and health related topics

https://GSiyers home remedies.blogspot.com   is the latest addition to my blogs


Khatta Dhokla

Ingredients

For Khatta Dhokla

For Serving With Khatta Dhokla

Method
For khatta dhokla
  1. To make khatta dhokla, combine the urad dal and rice in a deep bowl with enough water and keep aside to soak for 3 hours. Drain well.
  2. Blend in a mixer using 1½ cups of water till smooth.
  3. Transfer the mixture into a deep bowl, add the salt and mix very well.
  4. Cover it with a lid and keep aside to ferment in a warm place for 12 hours.
  5. After fermentation, mix the batter well and add all the other ingredients and mix.
  6. Divide the batter into 4 equal portions.
  7. Pour a portion of the batter into a greased 175 mm. (7”) diameter plate and shake the plate clockwise to spread it evenly to make an even layer.
  8. Sprinkle ½ tsp of chili powder or black pepper evenly over it and steam in a steamer for 8 to 10 minutes or till the dhoklas are cooked.
  9. Smear ½ tsp of oil on top, cool slightly and cut into square or diamond shaped equal pieces using a sharp knife.
  10. Repeat steps 7 to 9 to make 3 more thalis.
  11. Serve the khatta dhokla immediately with green chutney.         


    https://gscrochetdesigns.blogspot.com. one can see my crochet creations  

    https://kneereplacement-stickclub.blogspot.com. for info on knee replacement

    https://cancersupportindia.blogspot.com  for info on cancer and health related topics

    https://GSiyers home remedies.blogspot.com   is the latest addition to my blogs

Monday, March 3, 2025

Roasted Carrots with Farro/ barley, Chickpeas/ kabuli chana & Herbed Crème Fraîche / tahini

Farro is known as "Khapli" in India. It's an ancient grain that dates back to the Indus Valley Civilization. 

What is farro?

  • Farro is a type of wheat that's high in protein and fiber. 

·  ·  It has a chewy texture and nutty flavor. 

·  ·  Farro is popular in Europe and the Middle East. 

·  ·  It's also used to make the national dishes of Lebanon, Lybia, and other Middle Eastern countries. 

Farro contains more carbohydrates than quinoa, but it also has more calcium. Both are nutritious choices, but of the two, farro provides more vitamins and nutrients. However, unlike farro, quinoa is gluten free .

What can I use instead of farro? The best substitute for farro is pearl barley or freekeh/ green wheat.

Crème Fraîche Notes

Crème fraîche is basically a French version of sour cream. It’s a thick, cultured cream that offers lovely, rich flavor and a light tang.

You can use crème fraîche in recipes that call for sour cream or heavy cream, whether savory or sweet. It’s a great addition to soups because, unlike sour cream, it won’t curdle at high temperatures.

Crème fraîche is available at well-stocked grocery stores near the cheese. Vermont Creamery is the most common brand available. If you can’t find it, try my tahini option in the recipe notes, or you could likely substitute labneh, sour cream or even Greek yogurt.


Ingredients

Farro and chickpeas

1 cup dried farro, rinsed

1 tsp extra virgin olive oil

1 tsp lemon juice

1 clove garlic, pressed or minced

½ tsp salt

1 can (15 ounces) chickpeas, rinsed and drained, or 1 ½ cups cooked chickpeas

Roasted carrots

1 pound slender heirloom carrots, scrubbed clean and patted dry ( no need to peel carrots, when they're fresh and without any black/ brown spots)

1 tbsp extra virgin olive oil

¼ tsp ground cumin

Salt and pepper to taste

Spiced pepitas

3 tbsp pepitas (green pumpkin seeds)

½ tsp extra virgin olive oil

Pinch of cumin

Pinch of chili powder

Pinch of salt

Herbed crème fraîche

⅓ cup crème fraîche

1 tbsp chopped fresh parsley or Coriander leaves

2 tsp water

Salt and pepper, to taste

Garnish

1 more tbsp chopped fresh parsley


Instructions

 To cook the farro: In a medium saucepan, combine the rinsed farro with at least three cups water (enough water to cover the farro by a couple of inches). Bring the water to a boil, then reduce heat to a gentle simmer. Cook, stirring occasionally, until the farro is tender to the bite but still pleasantly chewy (pearled farro will take around 15 minutes; unprocessed farro will take 25 to 40 minutes). 

Drain off the excess water and return the farro to the pot. Add 1 teaspoon olive oil, the lemon juice, garlic and ½ teaspoon salt. Mix well, then add the chickpeas and stir to combine. Set aside, covered, until you’re ready to assemble.

 To roast the carrots: 

Preheat the oven to 425 degrees Fahrenheit. Line a large, rimmed baking sheet with parchment paper and add the carrots. Drizzle them with 1 tablespoon olive oil and sprinkle with cumin, salt and pepper. Use your fingers to make sure the carrots are lightly and evenly coated in oil and spices. Roast for 20 to 35 minutes, until the carrots are easily pierced by a fork near the top of their stems. Roasting time will depend entirely on the size of your carrots. I removed some of the more slender carrots at 20 minutes and checked them at 5 minute intervals thereafter, removing the carrots as they were done.

To toast the pepitas:

In a small skillet over medium heat, warm ½ teaspoon olive oil until shimmering. Add the pepitas and generous pinches of cumin, chili powder and salt. Cook, stirring frequently, until the pepitas are turning golden on the edges and starting to make little popping noises. Remove from heat to cool.

To make the herbed crème fraîche, combine the crème fraîche, 1 tablespoon chopped parsley, water, and a few dashes of salt and pepper in a small bowl. Stir to combine and set aside.

To assemble the dish, pour the farro and chickpea mixture onto a large serving platter. Arrange the carrots in a single layer over the mixture. Drizzle herbed crème fraîche generously over the carrots, then sprinkle them with pepitas and one tablespoon chopped fresh parsley. Serve immediately or let the dish cool to room temperature (it’s good either way!).

Notes

Make it gluten free: Substitute brown rice and/or wild rice for the farro, adjusting the cooking method/time accordingly.

Make it dairy free/vegan: Lemony tahini sauce with parsley is great here, too. Mix together ⅓ cup tahini, 2 tablespoons chopped parsley and 2 tablespoons lemon juice, then thin it out with 3 to 4 tablespoons water. Season to taste with salt, pepper and additional lemon juice.


https://gscrochetdesigns.blogspot.com. one can see my crochet creations  

https://kneereplacement-stickclub.blogspot.com. for info on knee replacement

https://cancersupportindia.blogspot.com  for info on cancer and health related topics

https://GSiyers home remedies.blogspot.com   is the latest addition to my blogs