Showing posts with label hard boiled eggs. Show all posts

Tuesday, June 2, 2026

Try This High-Protein Chocolate Mousse Recipe Made With Boiled Eggs

Craving chocolate mousse but want a healthier version? This simple recipe uses boiled eggs to create a rich, creamy texture without heavy cream. It's packed with protein, naturally sweetened and takes just a few minutes to prepare.

 Ingredients:  

2 hard-boiled eggs, 

2 tbsp unsweetened cocoa powder, 

2 tbsp honey or maple syrup, 

2 tbsp milk (or any plant-based milk), 

½ tsp vanilla extract, 

a pinch of salt, 

dark chocolate shavings or berries for garnish


Instructions

Peel the hard-boiled eggs and roughly chop them. Make sure they have cooled completely before using.  

Place the boiled eggs, cocoa powder, honey, milk, vanilla extract and a pinch of salt into a blender or food processor. 

Blend for 1-2 minutes until the mixture becomes silky smooth and mousse-like. Scrape down the sides if needed and blend again.

Taste the mousse and add a little more honey if you'd like it sweeter. If the mixture is too thick, add a splash of milk and blend again. 

Transfer the mousse into serving bowls or glasses and refrigerate for at least 30 minutes. Chilling helps improve the texture and flavour. 

 Top with dark chocolate shavings, cocoa powder, fresh berries or chopped nuts before serving. 
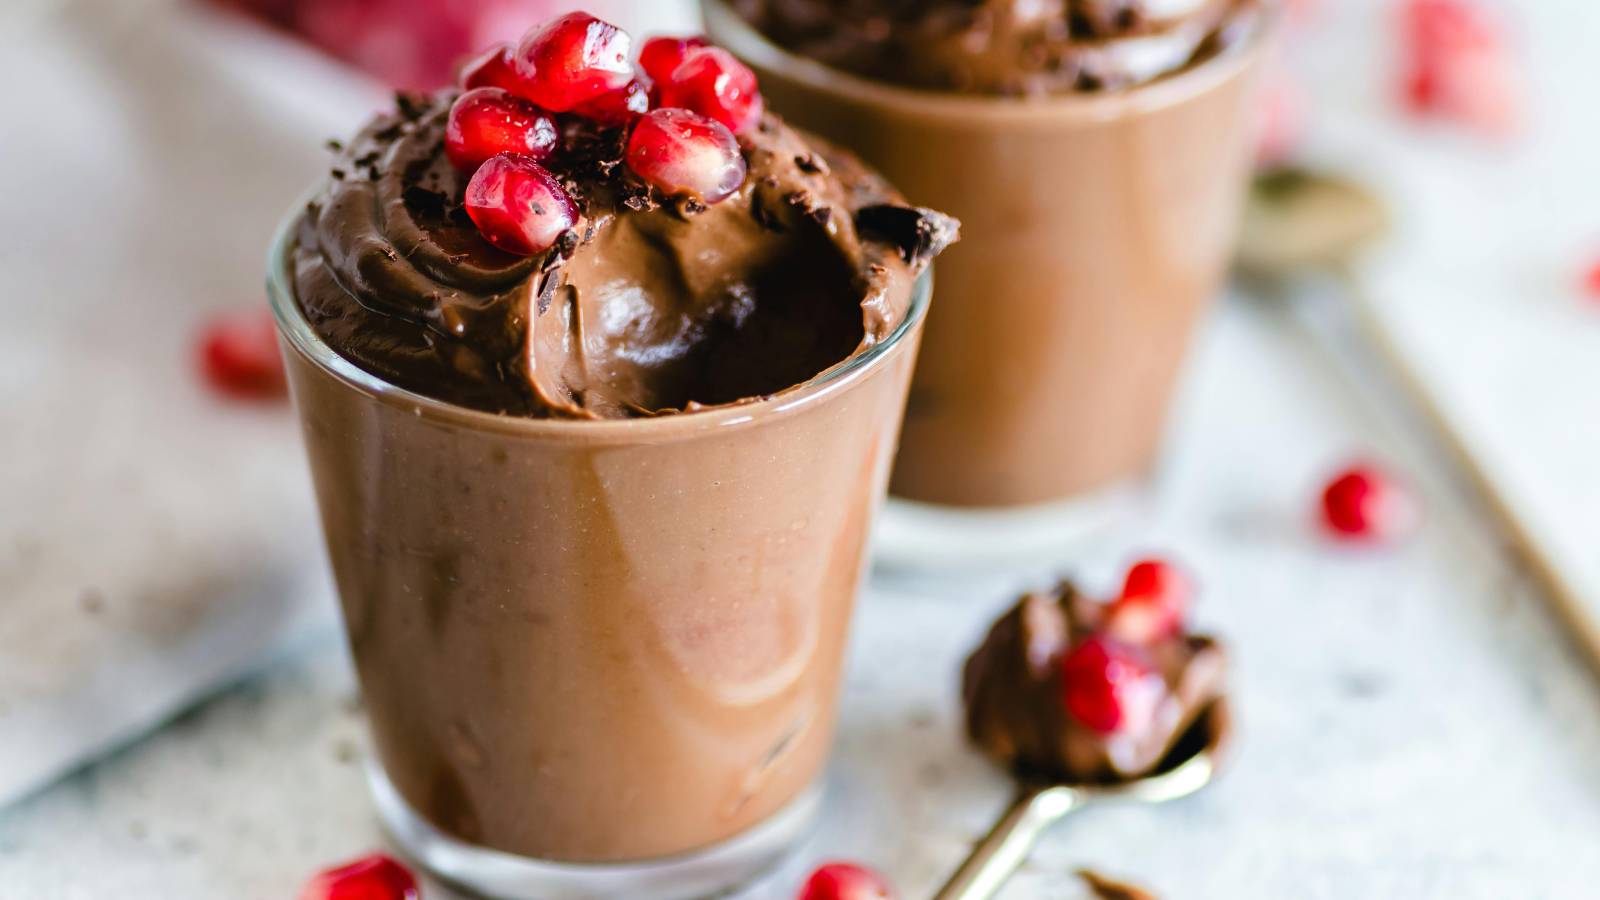
 Looking For Guilt-Free Dessert? Try This High-Protein Chocolate Mousse Recipe Made With Boiled Eggs 


https://gscrochetdesigns.blogspot.com. one can see my crochet creations  

https://kneereplacement-stickclub.blogspot.com. for info on knee replacement

https://cancersupportindia.blogspot.com  for info on cancer and health related topics

https://GSiyers home remedies.blogspot.com   is the latest addition to my blogs

Tuesday, September 12, 2023

10 Tips For Cooking Eggs

Eggs are super versatile, and can be cooked in a variety of ways. But because they are cooked and used so often, we tend to forget the right ways of dealing with them in the kitchen. Whether it's an omelet, a fried egg, a poached egg, a hard-boiled egg, scrambled eggs, or anything else, the following tips and hacks will make your preparation lots easier and might also bring you perfect results. You might also take on some of our terrific ideas for cooking eggs in great ways you never thought of before!


1, Check whether your eggs are fresh

cooking-eggs

The trick is easy: sink your egg into a glass of water. Although eggs can generally last for quite a long time in your fridge (around 5 weeks), it is still important to see whether one is still good for use in the kitchen. If the egg sinks to the bottom of the glass, that's a positive sign. But if it floats, consider discarding it.


2. Keep your eggs lasting longer
If you think buying fresh eggs has become quite a frequent and demanding task, you may need to find an alternative way of storing them. A suggestion would be to freeze them - like that, you would be keeping a stock of eggs for whenever you may need them. Fill a muffin tin with some beaten eggs, and place them in the freezer until they solidify. When they do, transfer them to a freezer-safe plastic bag, and store for up to 6 months. 
 
 
3. Scramble the right way
cooking-eggs
Achieve chef-quality scrambled eggs by cooking them the right way. Here are some tips: 
 
 • Firstly, make sure you keep the heat at medium-low to low, not higher. 
 
• Secondly, opt for butter rather than oil - it is better at keeping the mixture moist in the pan. 
 
• Thirdly, you could use both your hands to improve the way it cooks, by using one to slightly shake the pan in a circular motion, and the other to stir the eggs continuously with a spatula, in the opposite direction. 
 
• Finally, use a spatula to "scramble" the eggs in the pan, although the right way to do this is to push the eggs from side to side. 
 
• If you're on the right heat, your scrambled egg should be ready in no more than 2 minutes. 
 
 
4. Learn how to make a 1-minute omelet in a mug 
 cooking-eggs
 
Looking for a quick but filling breakfast snack that doesn't involve pans and burners? Make your omelet in the microwave! 
 
 Ingredients  
• 1 tablespoon unsalted butter 
 
• 1 tablespoon whole milk 
 
• 2 large eggs 
 
• Pinch of salt 
 
• Pinch of freshly ground black pepper 
 
• 1/2 cup grated cheese 
 
• 1 tablespoon chopped scallion (optional) 
 
 Instructions  
 
Melt the butter with the herbs and scallion first, placing them in a mug in the microwave for 15 seconds. Then, add all the other ingredients, mixing well, leaving the cheese, salt, and pepper to the end. Microwave for another 1 minute - and voila - breakfast is served!

 
5. Put your remaining egg wash to use
cooking-eggs
Egg wash is a common mixture found useful in multiple recipes, including ravioli, dumplings, and scones, to give food a glossy appearance. The thing about egg wash is that you would normally only require about a tablespoon of it, leaving plenty of extra egg mixture remaining. Don't toss this away - use it for your scrambled eggs in your next breakfast. 
 
 
6. Use egg yolk to the fullest
cooking-eggs
Egg yolk contains a great deal of protein and nutrition, so if you have been using egg whites for your recipes and have some yolks left over - make sure they don't go to waste. Use them to add some more flavor to your scrambled eggs or omelets the next time you make them. 
 
Another tip concerning egg yolk would be to separate them from the egg white when you are frying an egg. This might sound odd, but it's a method that allows for better cooking of the egg white, while keeping the yolk runny, if that's your preference. To achieve this, add the yolk to the pan once the white turns opaque, and you'll have one perfect fried egg. 
 
Watch our video on how to separate egg yolk from egg white easily: This is the Perfect, Easiest Way to Separate Egg Yolk. 
 
 
7. Hard boil your eggs the easy way
cooking-eggs
If the kitchen is too busy, you're out of gas, or you just don't have the right equipment to prepare your egg, it might seem impossible to think of a way to cook your eggs. However, we've got it sorted for you - simply make a hard or soft boiled egg using a coffee pot or an electric kettle. This tip can work wonders, especially if you live in a busy shared apartment, dorm, or are staying at a hotel while on vacation.


8. Know the secrets behind poached eggs
cooking-eggs
As a rule of thumb, perfect poached eggs need to be made with the freshest eggs possible. This is due to the fact that if they're not so fresh, the result will be a looser, messier poached egg. If you've happened to use an old egg, you may want to drain off the loose egg white by using a fine mesh strainer. 
 
If you're taking your poached egg with you for lunch, you don't need to eat it cold. You can warm it up using a thermos - first filled with cool water, then replaced with hot water for around 2-3 minutes before serving on top of your salad or bread. 


9. Try ham and egg cups for breakfast
cooking-eggs
It's neither a fried, poached, or scrambled egg, nor is it an omelet - it's an egg in a cup of ham. Using a muffin tin, you can create a multitude of egg-serving variations like this mouth-watering delight to kick-start your day. Here's a great and easy recipe you can use to make it: 
 
 Ingredients 
• Handful of plum tomatoes, halved 
 
• 1 clove garlic 
 
• 2 slices of ham 
 
• 1 tablespoon jack cheese 
 
• Splash of milk 
 
• 1 egg 
 
• Salt & pepper 
 
• Olive oil 
 
Instructions  
First, preheat the oven to 375ºF. Grab a muffin tin and grease one slot (or as many as you need). Place 2 slices of ham inside, overlapping each other. Then, in a small separate pan, cook the tomatoes over the oil and garlic, on medium heat, for a few minutes. When ready, place this into the ham shell and add a splash of milk and cheese. Finally, empty a cracked egg over everything, and drizzle with salt and pepper. 
 
Your ham and egg cup will be ready for serving in 20 minutes. 


10. Make more with just a muffin tin and some eggs cooking-eggs  
 cooking-eggs
 
There's an endless list of what you can do with baked eggs. Ingredients such as cheese, chicken, ham, mushrooms, tomatoes, onions, spinach, and plenty of other interesting vegetables can give splendid results if baked with eggs in a muffin tin. Create your own little "egg muffins" to surprise your family or guests with some heavenly bites, for any meal of the day.


https://gscrochetdesigns.blogspot.com. one can see my crochet creations  

https://cancersupportindia.blogspot.com. feel free to view for easy, simple and health tips  

https://kneereplacement-stickclub.blogspot.com. for info on knee replacement

https://GSiyers home remedies.blogspot.com     is the latest addition to my blogs.

Monday, October 29, 2018

Guide to Correcting Mistakes in Cooking and Baking

All those who cook, know that there are days or times when small mistakes do happen while cooking, if we're not in perfect mood. It can be excess salt, or more sugar, too sour and so on. With the tips below, one need not fret when such small mistakes happen, as there are means to rectify them easily !

1. The dish is too salty

Since everyone’s salt preference and needs are different, most recipes call for "salt to taste". But there are times when food is too salty even for those who like salty food, so what can be done?
  • If the food is made up of a lot of liquids like soup, we’d usually just add water, which is one way of doing it, but you can also add a few raw potatoes to the dish, and they will absorb the excess salt. Another way is to add a little lemon juice or vinegar.
  • If you made a sauce, add flour and cream if possible or soy milk.
  • Salted steak or a piece of meat with a lot of salt - soak the pieces of meat in a bowl of cold water for about two hours, and if that isn’t enough, add a little lemon juice.

2. The dish is too sweet

If your sauce or stew came out too sweet, some will tell you to add lemon juice or vinegar, which makes sense in most cases. But there are times when lemon isn’t suitable for a dish, and in such cases, you can fix the flub using high-fat foods such as olive oil or avocado oil. In any case, don’t be tempted to add salt because a high amount of salt will destroy your dish, whereas a pinch of salt may accentuate the sweetness or won’t make any difference at all.

3. The dish is too sour

If you ever wondered how you can fix sour food besides for using sugar or baking soda, know that adding a little honey or date syrup can be a great solution that will add great flavor to your sauce. For a sour stew, you can add chopped carrots instead of sugar or honey.

4. The dish is too soggy and pale

Food that is pan-fried should in most cases be brown and crispy, but sometimes the first and second pieces come out right, while the rest simply go soggy and don’t crisp up on the pan. The reason for this is the amount of food you put in the pan – overcrowding the pan lowers the temperature of the oil, therefore causing the dish to stew instead of fry. To avoid this situation, just avoid overcrowding the pan, and before adding more to the pan, give the oil about half a minute to reach the desired temperature.

5. Your fried food is very greasy

Super greasy food is often hard to stomach. The main reason for this is the oil temperature and the size of the food you are frying. To avoid excess oil, make sure that the oil temperature is between 350-380 degrees and certainly not less than 280 degrees, and also fry smaller pieces of food - this shortens the time the food spends in oil does not cause the oil's temperature to drop.

6. What do you do if the cake comes out dry?

How annoying is it when after all the time and effort put into baking a cake, it comes out of the oven super dry? But don’t worry, instead of throwing it in the trash or turning it into cake-pops, just do the following:
  • Wet the cake with hot chocolate syrup or with warmed up fruit juice, while the cake is still warm. 
  • Cover the cake with a towel or aluminum foil and allow it to sit for about 10-15 minutes outside or overnight in the refrigerator. 

7. Your hard-boiled eggs always come out rubbery 

Hard-boiled eggs are among the most eaten foods in almost every household, and they even allow us to make other dishes. However, most don’t know that these types of eggs shouldn’t be rubbery in texture. The next time you prepare hard-boiled eggs you can prevent this by letting the eggs sit in a bowl of ice water immediately after removing them from the pot. After you peel them you’ll feel the difference.

8. Your pastries and cookies don’t bake evenly

Beyond aesthetics, cookies and pastries that aren’t evenly baked indicate that part of the dish is under-cooked. In order to prevent such a situation, you need to make sure of some things:
  • Your dough should be rolled out and laid evenly on your baking pan
  • Check with a thermometer to determine if the temperature of the oven is the same as what’s shown on the oven itself. 
  • Find the hot points of your oven and make sure to place your pastries there. You can do this by placing a few slices of bread in different places on the second shelf of the oven.
  • Bake for a few minutes and do not flip the bread during the test, the slices will reveal your oven’s hot spots.

9. Your cookies spread out on the baking pan

If you’ve made cookies more than once then I’m sure you’ve experienced them spreading out all over the baking sheet at least once or twice. If you follow these tips, we're sure you’ll always have perfect cookies:
  • Remove the butter from the refrigerator about an hour before preparation and place it in a warm place until it softens slightly (room temperature) - Do not melt the butter in the microwave. 
  • Cool your dough for about 30 minutes before you plan on baking it
  • Make sure your baking soda and baking powder aren’t expired
  • Place your eggs in a warm place 10 minutes before using them or until they reach room temperature.

10. Your pastry is hard or sticky

Pastries satisfy our cravings for something crispy and delicious, but what can you do to make them not sticky or too hard?
  • First, avoid over-kneading the dough by hand or increasing the speed on your mixer so that it doesn’t come out too hard.
  • Second, mix "wet" ingredients first, then add the dried ingredients and mix all together quickly and for a short time, to prevent the gluten in the flour from forming.

11. Your chocolate becomes lumpy when you try to melt it

You wanted to make a frosting or ganache for your cake so you pull some chocolate in a bowl and in the microwave, only to be left with lumpy chocolate? All you have to do to fix the mistake is to add a little vegetable oil to the chocolate bowl, wait about half a minute so that it warms up a bit and mix well.

12. Stored cookies become moist or dry

Have the cookies you baked dried out or gone soggy? Do one or more of the following:
  • Cool cookies before putting them in your storage container.
  • Do not store soft cookies in the same box as crispy cookies.
  • Store the cookies in a sealed box only.
  • Place an apple slice in a box with soft cookies to keep the inside of the box moist.
  • Bring life back to crispy cookies by re-baking them in a preheated oven at 300 degrees for several minutes and let them cool down on a cooling rack.
  • Do not freeze cookies, unless they have cream on them or are coated with fondant.

For my other blogs, I'm giving the links below, feel free to view and comment too.
https://cancersupportindia.blogspot.com. for all cancer and health related topics
https://gseasyrecipes.blogspot.com. feel free to view for easy, simple and healthy recipes
https://kneereplacement-stickclub.blogspot.com. for info on knee replacemen
t 


Sunday, November 1, 2015

Tips and Tricks for Egg-lovers

those interested in cancer and health related topics are free to see my blog-
http://cancersupportindia.blogspot.com/
 for crochet designs, my blog, those who like a particular design are free to mail me

http://My Crochet  Creations.blogspot.com

For info. about knee replacement, be free to view my blog-

http://knee replacement-stickclub.blogspot.com


1. Check whether your egg is still fresh
 

The trick is easy: sink your egg in a glass of water. Although eggs can generally last for quite a long time in your fridge (around 5 weeks), it is still important to see whether one is still good for use in the kitchen. If the egg sinks to the bottom of the glass, that's a positive sign. But if it floats, consider discarding it.
 
2. Keep your eggs lasting longer
 

If you think buying fresh eggs has become quite a frequent and demanding task, you may need to find an alternative way of storing them. A suggestion would be to freeze them - like that, you would be keeping a storage of eggs for whenever you may need them. Fill a muffin tin with some beaten eggs, and place them in the freezer until they solidify. When they do, transfer them to a freezer-safe plastic bag, and store for up to 6 months.
 
3. Scramble the right way
 

Achieve chef-quality scrambled eggs by cooking them the right way. Here are some tips:
  • Firstly, make sure you keep the heat at medium-low to low, not higher.
  • Secondly, opt for butter rather than oil - it is better at keeping the mixture moist in the pan.
  • Thirdly, you could use both your hands to improve the way it cooks, by using one to slightly shake the pan in a circular motion, and the other to stir the eggs continuously with a spatula, in the opposite direction.
  • Finally, use a spatula to "scramble" the eggs in the pan, although the right way to do this is to push the eggs from side to side.
  • If you're on the right heat, your scrambled egg should be ready in no more than 2 minutes.
 
4. Learn how to make a 1-minute omelet in a mug
 

Looking for a quick but filling breakfast snack that doesn't involve pans and burners? Make your omelet in the microwave!

All you will need is:
  • 1 tablespoon unsalted butter
  • 1 tablespoon whole milk
  • 2 large eggs
  • Pinch of kosher salt
  • Pinch of freshly ground black pepper
  • 1/2 cup grated cheese
  • 1 tablespoon chopped scallion (optional)


Instructions: Melt the butter with the herbs and scallion first, placing them in a mug in the microwave for 15 seconds. Then, add all the other ingredients, mixing well, leaving the cheese, salt and pepper to the end. Microwave for another 1 minute - and voila - breakfast is served!

 
5. Put your remaining egg wash to use
 

Egg wash is a common mixture found useful in multiple recipes, including ravioli, dumplings, and scones, to give food a glossy appearance. The thing about egg wash is that you would normally only require about a tablespoon of it, leaving plenty of extra egg mixture remaining. Don't toss this away - use it for your scrambled eggs in your next breakfast.


6. Use egg yolk to the fullest
 

Egg yolk contains a great deal of protein and nutrition, so if you have been using egg whites for your recipes and have some yolks left over - make sure they don't go to waste. Use them to add some more flavor to your scrambled eggs or omelets the next time you make them. 
Another tip concerning egg yolk would be to separate them from the egg white when you are frying an egg.  This might sound odd, but it's a method that allows for better cooking of the egg white, while keeping the yolk runny, if that's that's your preference. To achieve this, add the yolk to the pan once the white turns opaque, and you'll have one perfect fried egg.

 
7. Hard boil your eggs the easy way
 
egg hacks
If the kitchen is too busy, you're out of gas, or you just don't have the right equipment to prepare your egg, it might seem impossible to think of a way to cook your eggs. However, we've got it sorted for you - simply make a hard or soft boiled egg using a coffee pot or an electric kettle. This tip can work wonders, especially if you live in a busy shared apartment, dorm, or are staying at a hotel while on vacation.


8. Know the secrets behind poached eggs
 

As a rule of thumb, perfect poached eggs need to be made with the freshest eggs possible. This is due to the fact that if they're not so fresh, the result will be a looser, messier poached egg. If you've happened to use an old egg, you may want to drain off the loose egg white by using a fine mesh strainer.
If you're taking your poached egg with you for lunch, you don't need to eat it cold. You can warm it up using a thermos - first filled with cool water, then replaced with hot water for around 2-3 minutes before serving on top of your salad or bread. 


9. Try ham and egg cups for breakfast
 
egg hacks

It's neither a fried, poached, or scrambled egg, and nor is it an omelet - it's an egg in a cup of ham. Using a muffin tin, you can create a multitude of egg-serving variations like this mouth-watering delight to kick-start your day. Here's a great and easy recipe you can use to make it:
What you'll need:
  • Handful of plum tomatoes, halved
  • 1 clove garlic
  • 2 slices of ham
  • 1 tablespoon jack cheese
  • Splash of milk
  • 1 egg
  • Salt & pepper
  • Olive oil
Instructions: First, preheat the oven to 375ºF. Grab a muffin tin and grease one slot (or as many as you need). Place 2 slices of ham inside, overlapping each other. Then, in a small separate pan, cook the tomatoes over the oil and garlic, on medium heat, for a few minutes. When ready, place this into the ham shell and add a splash of milk and cheese. Finally, empty a cracked egg over everything, and drizzle with salt and pepper.
Your ham and egg cup will be ready for serving in 20 minutes.

 
10. Make more with just a muffin tin and some eggs
 
egg hacks

There's an endless list of what you can do with baked eggs. Ingredients such as cheese, chicken, ham, mushrooms, tomatoes, onions, spinach, and plenty of other interesting vegetables can give splendid results if baked with eggs in a muffin tin. Create your own little "egg muffins" to surprise your family or guests with some heavenly bites, for any meal of the day.

Friday, July 24, 2015

Some things that shoud not be microwaved

Hard boil eggs
 If you try to hard boil eggs in your microwave you're likely to either end up with a big mess or burned fingers! The rapid heat from the microwaves creates a lot of steam in the egg, which has nowhere to escape. Exploded egg is hard to clean up—trust us.

 Meat
Frozen cuts of meat are tricky to defrost in a microwave: Thinner edges start cooking while the thicker middle remains frozen. And if your microwave doesn't rotate food while cooking it, this too can lead to uneven distribution of heat, which can can allow bacteria to grow. The safest way to thaw meat is to defrost it overnight in your refrigerator, according to food safety experts.

Breast milk

Not only does microwaving frozen breast milk warm it unevenly, which can create scalding hot spots for sensitive little mouths, other research has found that this heating method may destroy some of breast milk's immune-boosting proteins, particularly on high power. A better bet: Nuke a mug of water, then place a bottle of breast milk in the mug to come to room temperature.

Chinese takeout containers

Metal (even small amounts of metal, like the handles on those white containers) and microwaves don't mix. Or, more accurately, when they mix, they can start fires. Put the rice in a bowl to warm it up.

Plastic containers

You know you shouldn't pop plastic leftover containers in there, but you still do. Here's why that's bad: Many plastics contain estrogen-like chemicals (BPA is a well-known one) that can leach into your food when the plastic is heated. In a study published in Environmental Health Perspectives, 95 percent of 450 plastic products (such as baby bottles, zipper-top bags and containers) tested released chemicals that acted like estrogen after they were microwaved, washed in a dishwasher, or soaked in water. Even products labeled "BPA-free" released estrogen-like chemicals. Better to be safe and warm up your dinner directly on a plate.

Styrofoam containers

As a type of plastic, styrofoam can release harmful chemicals into your food when heated. Dump the leftovers onto a glass dish covered with a paper towel instead.

Certain plates

Do you have a lot of fancy China or metallic-trimmed bowls? Keep them far from the microwave. Even if the metallic trimming is miniscule, it may still react in the microwave, according to the USDA. If you use the microwave a lot, it’s best to invest in a plain colored glass plate for microwave use only.

Nothing

With no food or liquid to absorb the microwaves, the magnetron (which is what makes the microwave function) ends up absorbing the microwaves instead, which can damage your microwave and even start a fire, according to the USDA. Make sure you don't accidentally press "start" without food or drink inside.

Cups of water
When plain water is heated in a microwave in a ceramic or glass container for too long, it can prevent bubbles from forming, which usually help cool the liquid down. The water becomes superheated; when you move the cup, the heat releases violently and erupts boiling water. To avoid this scalding risk, heat water only the minimum amount of time needed or heat it for longer in small cycles.

That mug you’ve had for years and years

Certain mugs made before the 1960s, like old versions of Fiestaware, were glazed with materials that could give off radiation and may contain lead and other harmful heavy metals. That mug you found at your neighbor's garage sale may look cute, but consider adding it to your shelf collection instead of drinking from it.

Beware of “Microwave Safe” labels

The only thing a “microwave safe” label tells you is that you can microwave the container without damaging it or damaging the microwave. In fact, manufacturers aren’t even required to test their ceramics to ensure safety after heating, according to the FDA (that’s probably why you’ve burned yourself on too-hot ceramic mugs). Even though something may say it’s safe to nuke, if you've never used it before, consider heating your liquid or food on the stove and then transfer it to a bowl, plate, or mug.

Popping the wrong foods, containers, or mugs in the microwave could make you sick, expose you to harmful chemicals, or even start a fire. Follow these tips to avoid dangerous microwave mistakes.

those interested in cancer and health related topics are free to see my blog-
http://cancersupportindia.blogspot.com/
 for crochet designs, my blog, those who like a particular design are free to mail me

http://My Crochet  Creations.blogspot.com

For info. about knee replacement, be free to view my blog-

http://knee replacement-stickclub.blogspot.com