Showing posts with label butter melted. Show all posts

Sunday, May 3, 2026

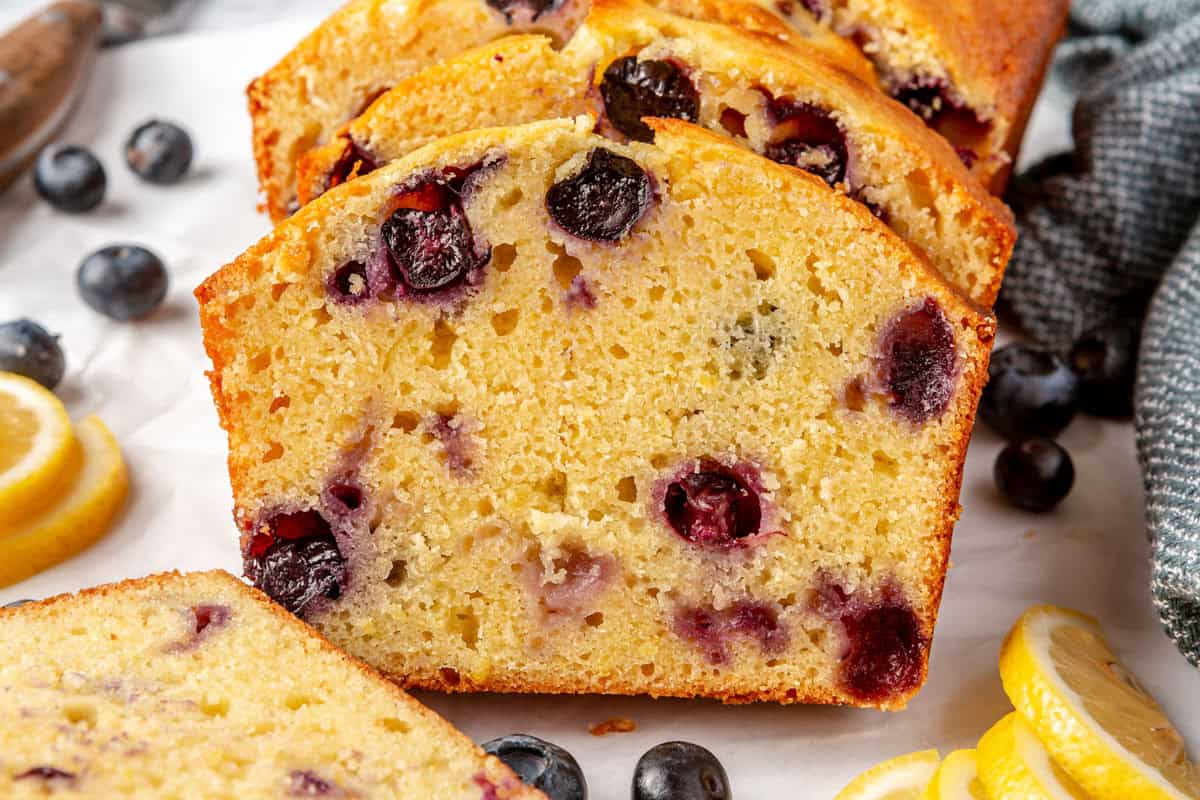
Lemon Blueberry Bread

 Best lemon blueberry quick bread recipe. 

 Ingredients

1 ¾ cups all-purpose flour plus more for coating the blueberries
1 tsp baking powder
½ tsp salt
2 large eggs at room temperature
½ cup maple syrup or granulated sugar
¼ cup milk at room temperature
¼ cup butter melted
¼ cup lemon juice
3 tbsp grated lemon zest
¾ cup blueberries fresh or frozen
  Instructions
Preheat the oven to 350°F and line an 8×4-inch loaf pan loaf pan with parchment paper.
In a medium bowl, whisk together the flour, baking powder and salt. Set aside.
In another large bowl, beat the eggs, maple syrup, milk, butter and lemon juice with a hand mixer until combined.
Transfer the dry ingredients on top of the wet ingredients and mix until no streaks remain.
In a small bowl, toss the blueberries with flour to prevent them from sinking into the loaf. Gently fold the blueberries into the batter along with the lemon zest.
Pour the batter into the prepared pan and bake for 50-55 minutes, or until a toothpick inserted in the center of the loaf comes out clean. If necessary, tent the pan with foil after 40 minutes of baking to prevent the top from browning too much.
Remove from the oven and allow the bread to cool completely in the pan set on a wire rack before slicing
.
   

https://gscrochetdesigns.blogspot.com. one can see my crochet creations  

https://kneereplacement-stickclub.blogspot.com. for info on knee replacement

https://cancersupportindia.blogspot.com  for info on cancer and health related topics

https://GSiyers home remedies.blogspot.com   is the latest addition to my blogs
  

Friday, March 20, 2026

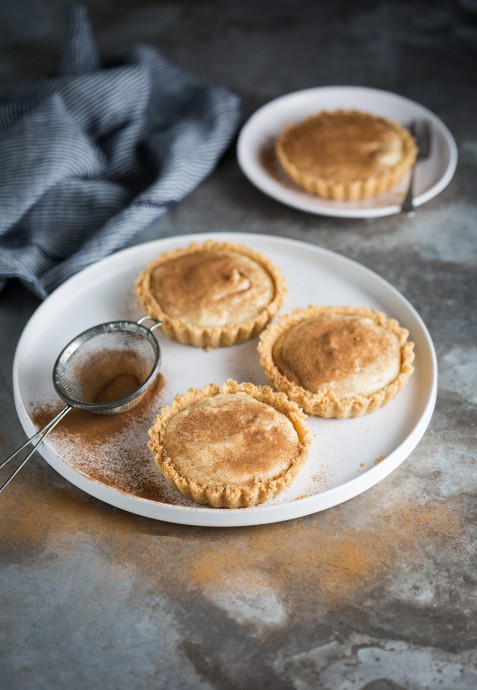
Unbaked Milk Tarts

 The Best Classic South African Unbaked Milk Tarts 

 Ingredients:

  • 200 gm 1 packet biscuits ( Marie / Digestive / Glucose biscuits)
  • 100 gm butter melted
  • 700 ml full cream milk
  • 1 tin condensed milk
  • 2 tsp vanilla extract
  • 2 eggs separated
  • 50 gm cornstarch
  • 50 ml water
  • pinch of salt
  • Cinnamon to decorate

 Instructions

  • Break the biscuits into fine crumbs by hand or by using a food processor and mix in the melted butter until well combined.
  • Line a 25cm-26cm pie tin with the biscuit crumbs and press down to compact. Place in the fridge or freezer to set while you make the filling.
  • If you are making individual milk tarts, use 1 1/2 packets of biscuits (300 grams) and 150 grams of butter. Line the base and sides of 12 x 8cm individual tart cases with the biscuit crumbs and press to compact. Place in the fridge or freezer to set while you make the filling.
  • In a medium-sized pot, heat the milk, condensed milk and vanilla over a medium until boiling point (make sure you stir until the condensed milk is dissolved).
  • While that is heating up, separate the eggs and whisk the eggs whites to soft peak in a bowl. Set aside.
  • In another bowl whisk the egg yolks, cornstarch, water and salt. When the milk is at boiling point take it off the heat and allow it to cool for 3 minutes. Add the egg yolk mixture slowly while whisking vigorously all the time.
  • Return the pot to a low heat and continue to whisk constantly until it thickens, about 5 -7 minutes.
  • Add the egg whites to the milk mixture and whisk for about 2 more minutes until well combined.
  • Pour the filling into the lined pastry cases and allow it to cool to room temperature before putting it in the fridge to set completely.
  • Sprinkle generously with cinnamon and serve.

Notes

It is best to make this Milk tart the day before and allow it to fully set and cool in the fridge overnight. the flavour will also improve overnight. The filling can be used as a chilled thick custard for various other desserts. To make 12 mini milk tarts increase the crumb mixture to 1.5 packets (300 grams) and 150 grams of butter. Store the milk tart in the fridge.


https://gscrochetdesigns.blogspot.com. one can see my crochet creations  

https://kneereplacement-stickclub.blogspot.com. for info on knee replacement

https://cancersupportindia.blogspot.com  for info on cancer and health related topics

https://GSiyers home remedies.blogspot.com   is the latest addition to my blogs


Sunday, November 23, 2025

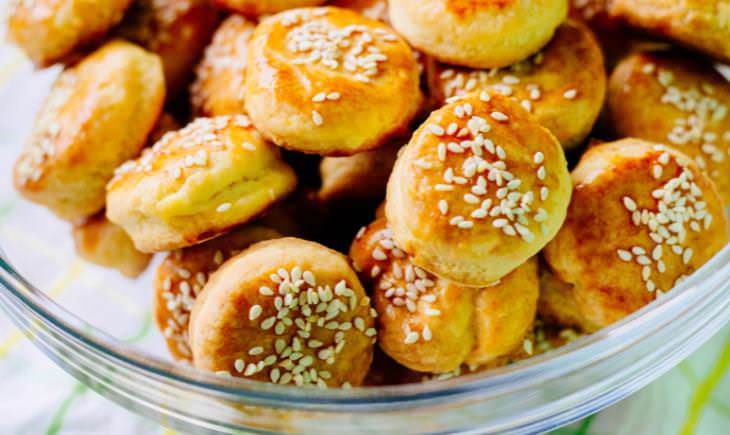
Popeyes Biscuits

In this recipe, we'll be trying to imitate the famous Popeyes biscuits. Working in a cool environment is very important as we want to keep everything dry and tight until it gets to the oven. 

Popeyes Biscuits 
 
Ingredients: 
 
All-Purpose flour - 1 cup (chilled) 
Cake flour - 1 1/4 cups (chilled) 
Baking powder - 2 1/2 tsp. (chilled) 
Baking soda - 1/4 tsp. (chilled) 
Granulated sugar - 2 tsp. (chilled) 
Kosher salt - 2 tsp. (chilled) 
Butter - 7 tbsp. (frozen) 
Butter - 1 tbsp. (melted) 
Buttermilk - 3/4 cup (chilled)


Preparations
 
Chill the grater, bowl, rolling pin, and both types of flour in the fridge. Freeze 7 tbsp of butter.
 
If possible, work in a cool room. 
 
Preheat the oven to 375°F (190°C). 
 
Whisk the flours, baking powder, baking soda, sugar, and salt. 
 
Dust the grater with flour to prevent the butter from sticking to it. 
  
Grate in the frozen butter with the small holes of the grater. Toss and freeze for 5 minutes. 
 
Create a well in the center, add the chilled buttermilk and gently stir 20 times. 
 
Dust the countertop with flour and knead the dough for 3 minutes. 
 
Roll it into a 7” x 12” (18 x 30 cm) rectangle, short edge facing closest to you.
 
Fold the bottom half of the dough up over the top half, and rotate 90°. 
 
Roll, fold and rotate twice more, and then roll the dough into a 7” x 12” rectangle, no thicker than half an inch 
 
Line a baking pan with parchment paper. 
 
Cut biscuits with a glass, roll the leftovers, and cut a few more from it. 
 
 Arrange on the baking pan, and make sure they're all touching. 
 
This way they will rise together. Bake for 16-18 minutes, brush with melted butter and if you like, some sesame. 
 
 Chef's Tip: Cake flour has less protein than all-purpose flour. To make it at home, measure 1 cup all-purpose, remove 2 tbsp from it and replace with 2 tbsp cornstarch. Sift twice, and there you have it! 


https://gscrochetdesigns.blogspot.com. one can see my crochet creations  

https://kneereplacement-stickclub.blogspot.com. for info on knee replacement

https://cancersupportindia.blogspot.com  for info on cancer and health related topics

https://GSiyers home remedies.blogspot.com   is the latest addition to my blogs
 

Thursday, November 6, 2025

Cheesecake in a Cooker !


Ingredients: 

For the crust

8-10 digestive biscuits 

3 tbsp melted butter 

For the Cheesecake 

500g cream cheese (softened) 

2/3 cup sugar 

2 tsp cornstarch 

2 whole eggs 

½ tsp vanilla extract 

¼ cup sour cream 

For Topping (optional) 

½ cup fresh berries 

2 tsp sugar 

1 tsp lemon juice 

Method: 

To prepare the crust of the cake, using a mixing jar, crush the digestive biscuits into a fine powder. Transfer the crushed biscuits into a mixing bowl, and pour the melted butter in it. Mix it well until it forms a crumbly consistency. 

Take your baking pan, grease it with some butter, and then gently transfer the biscuit and butter mix into it. Using a flattened spoon, spread the crust mix all across the baking pan. Now gently press it down, so that it forms a firm and even crust. Once the crust is formed, keep it in the refrigerator. 

To prepare the cheesecake, keep the cream cheese outside at room temperature to soften it. Using an electric whisk, beat the cream cheese until it is smooth and fluffy. Now add sugar, (preferably granulated sugar) and add it to the cream cheese, along with the cornstarch. Whisk everything once again till the sugar is completely dissolved. 

Next add the eggs one after another, whisking the mixture after each addition. The vanilla extract is the next thing that goes into the cheesecake. Now stir in the sour cream, do not whisk anymore, but simply fold it in using your hands or a spatula. 

Now remove the baking pan from the refrigerator, and pour in the cheesecake batter. 

Gently tap the base of the pan to get rid of any bubbles formed while pouring the batter. 

Now get your pressure cooker, and place a metal rack inside it. Pour 1 cup of water in it. Gently place your baking pan inside the pressure cooker on the metal rack. Shut the lid securely and let it pressure cook on a medium flame for about 20 minutes of 4 whistles. 

After 20 minutes, wait for the natural pressure of the cooker to release, then gently remove the cheesecake. Quickly run a knife around the edges of the baking pan, to release the cheesecake from the edges, making it easy to remove. Once it is completely cooled, place it in the refrigerator and let it chill for around 4 hours. 

In the meantime, you can make a berry compote to top the cheesecake with. In a saucepan, add the fresh berries of choice with sugar and allow the berries to soften, using a spatula gently press the berries to soften them and make them mushy. Once the compote is almost ready, add the lemon juice and mix. 

Pour the compote over the cool cheesecake, cut into pieces and serve! 


https://gscrochetdesigns.blogspot.com. one can see my crochet creations  

https://kneereplacement-stickclub.blogspot.com. for info on knee replacement

https://cancersupportindia.blogspot.com  for info on cancer and health related topics

https://GSiyers home remedies.blogspot.com   is the latest addition to my blogs


Tuesday, October 21, 2025

Banoffee Pie

 a low angle view looking at a single, plated slice of banoffee pie. 

 What Is Banoffee Pie? 

Banoffee pie is a British dessert made with banana slices, whipped cream, and a caramel sauce. The original recipe, created in 1971, is attributed to the owner and chef of Hungry Monk Restaurant in Sussex. Its name is a combination of the words “banana” and “toffee.” 

Ingredients

1 (13.4 ounce) can dulce de leche

1 1/2 cups graham cracker crumbs

1/3 cup white sugar

2 tsp ground ginger (Optional)

6 tbsp butter, melted

3 bananas, sliced

1 1/2 cups heavy cream

3 tbsp powdered sugar

chocolate shavings (Optional)

espresso powder (Optional)

Dulce de leche is a thick, rich, caramel-like confection made by slowly heating sweetened milk until it thickens and caramelizes. It has a milky flavor that is less intense and burnt-tasting than traditional caramel. It is a popular topping, filling, and ingredient used in many desserts worldwide, especially in Latin America.  

 Preparations

Gather ingredients. Preheat the oven to 350 degrees F (175 degrees C) 

Mix graham cracker crumbs, white sugar, ginger (if using), and melted butter together in a medium bowl. Press mixture into an ungreased 9-inch fluted tart pan with a removable bottom or 9-inch pie pie plate. 

 graham cracker crust pressed into an ungreased 9-inch fluted tart pan with a removable bottom or 9-inch pie pie plate. 

 Bake crust in a preheated oven until set, about 12 to 15 minutes. Cool crust on a wire rack for 15 minutes.  

 Spread dulce de leche in the cooled crust; arrange bananas evenly on top.

sliced bananas placed on top of dulce de leche in the cooled crust. 

Beat heavy cream and powdered sugar in a large bowl until stiff peaks form, about 3 minutes. Spread whipped cream over bananas. 

Refrigerate pie for at least 2 hours OR overnight. Sprinkle with chocolate shavings, cocoa powder, and/or espresso powder, if desired, before serving.  


https://gscrochetdesigns.blogspot.com. one can see my crochet creations  

https://kneereplacement-stickclub.blogspot.com. for info on knee replacement

https://cancersupportindia.blogspot.com  for info on cancer and health related topics

https://GSiyers home remedies.blogspot.com   is the latest addition to my blogs
 

Friday, August 8, 2025

Classic Banoffee Pie - Easy, No-bake !

 Ingredients

For the base:  
 
7 tbsp (100g) butter, melted  
 
250g graham crackers or digestive biscuits, crushed 
 
For the toffee: 
 
7 tbsp (100g) butter  
 
⅔ cup (100g) dark brown sugar  
 
1 can (14 oz/397g) sweetened condensed milk 
 
For the top:  
 
3 to 4 bananas  
 
1¼ cup (300ml) heavy cream, lightly whipped  
 
Cocoa powder 


Method:. 
 
Crush the crackers/biscuits in a food processor or by hand, as finely as possible. Mix it with the melted butter and spread it around the base of an 8-inch (20 cm) spring-form pan. If you wish, you may grease the pan beforehand to make it easier to remove the pie later. Leave it in the freezer for ten minutes. 
 
Melt the butter and brown sugar in a non-stick saucepan over low heat, stirring all the time with a silicon spatula or whisk, until the sugar has dissolved. Add the sweetened condensed milk and bring to a boil, always mixing. Let it boil for about a minute and spread over the biscuit base. Let it cool for a few minutes and then chill it for at least 1 hour in the fridge, until firm. 
 
Slice the bananas and place them over the toffee. Top with whipped cream and decorate with cocoa powder. Leave it in the fridge until it’s time to serve.


https://gscrochetdesigns.blogspot.com. one can see my crochet creations  

https://kneereplacement-stickclub.blogspot.com. for info on knee replacement

https://cancersupportindia.blogspot.com  for info on cancer and health related topics

https://GSiyers home remedies.blogspot.com   is the latest addition to my blogs


Friday, August 1, 2025

Green Garlic Locho

Locho is a popular street food from Surat . And fresh green garlic takes it to the next level and how! You are going to love this flavour-packed dish.


For Locho:
 

1 cup Chana Dal

¼ cup Urad Dal

¼ cup Poha

3/4 cup curd

Salt to taste

¼ tsp Turmeric Powder

2 tbsp Ginger & Green Chili Paste

Pinch of Hing

1 tbsp Oil 

1 tsp Eno fruit salt

Water as per desired consistency

Melted Butter

¼ cup Green Garlic finely chopped

Sev for garnish

1 Onion finely chopped

For Locho Masala: 

1 tsp Jeera Powder

 1 tsp Pepper Powder

1 tsp Salt

1 tsp Kala Namak

1 tsp Chaat Masala

1 tsp Red Chili Powder

Method:

Combine all ingredients of locho masala and keep aside

Grind chana dal, urad dal and poha into a coarse powder

Whisk in curd and salt, rest for 10 min

Meanwhile place a greased dhokla plate in a steamer and let it heat for 10mins

Now add in haldi, ginger -chili paste, hing, oil and water till you get a runny batter

Lastly add in Eno and transfer into the greased container

Steam on high flame for 7-10mins (do not overcook)

While hot, drizzle some butter on top, sprinkle locho masala, garnish 

with green garlic, sev, cheese and serve hot with chutney & onion.


https://gscrochetdesigns.blogspot.com. one can see my crochet creations  

https://kneereplacement-stickclub.blogspot.com. for info on knee replacement

https://cancersupportindia.blogspot.com  for info on cancer and health related topics

https://GSiyers home remedies.blogspot.com   is the latest addition to my blogs


Thursday, July 31, 2025

Ricotta Lime Squares with Almond Crunch

 This may contain: a close up of a cake with almonds on it 

Ingredients

2 cups whole milk ricotta, well-drained OR fresh / soft paneer

¾ cup granulated sugar 

3 large eggs, separated

2 tbsp lemon zest

¼ cup Limoncello OR lime juice as per taste

¾ cup all-purpose flour (for a softer crumb)

1 tsp baking powder

¼ tsp salt

¼ cup melted butter, plus more for greasing

½ cup sliced almonds

Powdered sugar, for finishing


Preparations

 Set oven to 325°F (165°C). Grease your 9×9-inch pan and line with parchment (leave an overhang for easy lift-out).

In a large bowl, combine ricotta, sugar, egg yolks only, lemon zest, limoncello/ lime juice, and melted butter. Whisk until smooth and creamy. 

In a second bowl, whisk together the flour, baking powder, and salt.

Gently fold the dry mix into the ricotta mixture—don’t overmix! You want the batter light and airy.

In a clean third bowl, beat the egg whites until soft peaks form. Add 1 tablespoon sugar gradually while whipping to stabilize them.

Gently fold the whipped whites into the batter in two additions, using a spatula. Fold just until combined. This is what makes the texture cloud-like!

Pour batter into your prepared pan. It’ll be thick but smooth. Scatter the sliced almonds on top, pressing just lightly so they stick.

Bake for 35–40 minutes, or until the edges are golden and a toothpick inserted in the center comes out with moist crumbs (not wet batter). The center will still jiggle slightly—this is perfect.


https://gscrochetdesigns.blogspot.com. one can see my crochet creations  

https://kneereplacement-stickclub.blogspot.com. for info on knee replacement

https://cancersupportindia.blogspot.com  for info on cancer and health related topics

https://GSiyers home remedies.blogspot.com   is the latest addition to my blogs