Showing posts with label sugar. Show all posts

Sunday, September 27, 2026

Dahi Gujiya

  Ingredients

1 cup White Urad Dal (Split)

3 cups Hung Curd (Greek Yogurt)1/

1/3 cup Cumin powder (Jeera)

1/3 cup Black pepper powder

Salt , to taste

Oil

1 liter Water

1 teaspoon Enos Fruit Salt , or cooking soda

1 tbsp Sugar

1/2 cup Green Chutney (Coriander & Mint)

1/2 cup Sweet Chutney (Date & Tamarind)

1 tsp Red Chilli powder

1 tsp Black Salt (Kala Namak)

2 tsp Sugar

 dahi gujiya recipe from www.archanaskitchen.com

Preparations

To begin with Dahi Gujiya, firstly soak urad dal for 4 hours. Drain all the water after soaking and using a mixer grind it into a thick paste. Do not add any water while grinding.

The consistency of the batter can be slightly coarse, but make sure the batter is thick. Transfer the batter to a bowl. 

Add about 1 tsp of salt to the batter and blend the batter with your hands for about 10 minutes. This will make the batter soft and fluffy and the gujiyas will turn nice, soft and fluffy. If your batter turns too runny or if you do not whisk the batter with your hands the gujiyas will not turn soft.

Heat oil for deep frying in a deep fry pan. Take a small plastic sheet and rub it with water. Wet your fingers with water. Take a small lemon sized ball batter, roll it into round shape and then place it on wet plastic sheet. Flatten it into 3-1/2 inch diameter circle.

Sprinkle some roasted cumin powder, crushed peppercorns and grated ginger (if you are using). Fold the circle into half holding onto the plastic sheet.

Carefully pull the plastic sheet making sure the shaped gujiyas don’t break. Place the gujiyas on your wet palm and now pull off the plastic sheet from the other side of the gujiyas.

Carefully drop the gujiyas in hot oil and deep fry until golden brown on both sides. Make sure the flame is on medium low.

Into a wide bowl, add 1-litre water, Enos fruit salt/cooking soda and sugar. Mix everything well and keep it aside.

Once the gujiyas turn golden brown, transfer the gujiyas into the water bowl. Repeat for rest of the batter.

Let the fried gujiyas soak in water for good 1 to 2 hours.

After 1-2 hours, remove the soaked gujiyas from water, keep it between your palm and gently press it to squeeze out the water.

Place the gujiyas on serving plates. Pour a good amount of whisked curd over the gujiyas, sprinkle some red chili powder, black salt, a little sugar, roasted cumin powder and few teaspoons of tamarind and mint chutney and it is ready to be served.

Serve Dahi Gujiya as a wonderful festival snack during Holi or Diwali along with a cup of Thandai or Ginger Tea.


https://gscrochetdesigns.blogspot.com. one can see my crochet creations  

https://kneereplacement-stickclub.blogspot.com. for info on knee replacement

https://cancersupportindia.blogspot.com  for info on cancer and health related topics

https://GSiyers home remedies.blogspot.com   is the latest addition to my blogs


Whole wheat Vegetable Pizza

 Ingredients:

For the pizza dough: (makes two medium size pizzas) 1 Cup = 240 ml

3 Cups whole wheat flour/ Atta 

1 to 1 1/2 Cups Water (depending on the flour brand)

2 tsp Instant yeast ( or 2 1/2 tsp dry active yeast) 

1/2 tsp Cane sugar (can replace with regular sugar)

1/2 tsp Salt

1 Tbsp Olive oil/ or any oil to coat the dough

For the toppings: (for 1 pizza)

Around 5 Tbsp Pizza sauce or Tomato ketchup

Approx 1 Cup grated mozzarella cheese or as required

1 Cup of mixed vegetables (like Capsicum, Onion, sweetcorn, mushroom,babycorn)

A handful of chopped olives

Salt to taste

A dash of pepper powder

Olive oil or any oil to coat the dough surface.

Step by step recipe:

Take 1 Cup lukewarm water and add 1/2 tsp Cane sugar into it. Mix well and add 2 tsp instant yeast. Mix once and allow it to proof.{The water should NOT be very hot nor cold for the yeast to proof} 

Meanwhile, take 3 cups of wheat flour in a large mixing bowl and add salt to it. Mix well.  

Now the yeast has proofed as shown. (If the yeast does not proof ie does not rise, discard it and do not follow the next steps as maybe the yeast has expired.)

Now add this to the flour- salt mixture and knead just like you knead normal dough for chapatis adding the extra 1/2 Cup water if necessary. 

Now add olive oil towards the end of the kneading process and knead once again to form a smooth dough. ( If you don’t have olive oil, any oil like sunflower or coconut oil will do)

Keep the dough covered in a warm place for about 1.5 hours to 2 hours for the dough to rise and double the size. If the weather is cold, it might take even 3 hours.

Meanwhile chop and prepare veggies for topping. 

Now after 1.5 hours, check if the dough has risen and doubled. If so, remove and divide into two halves. 

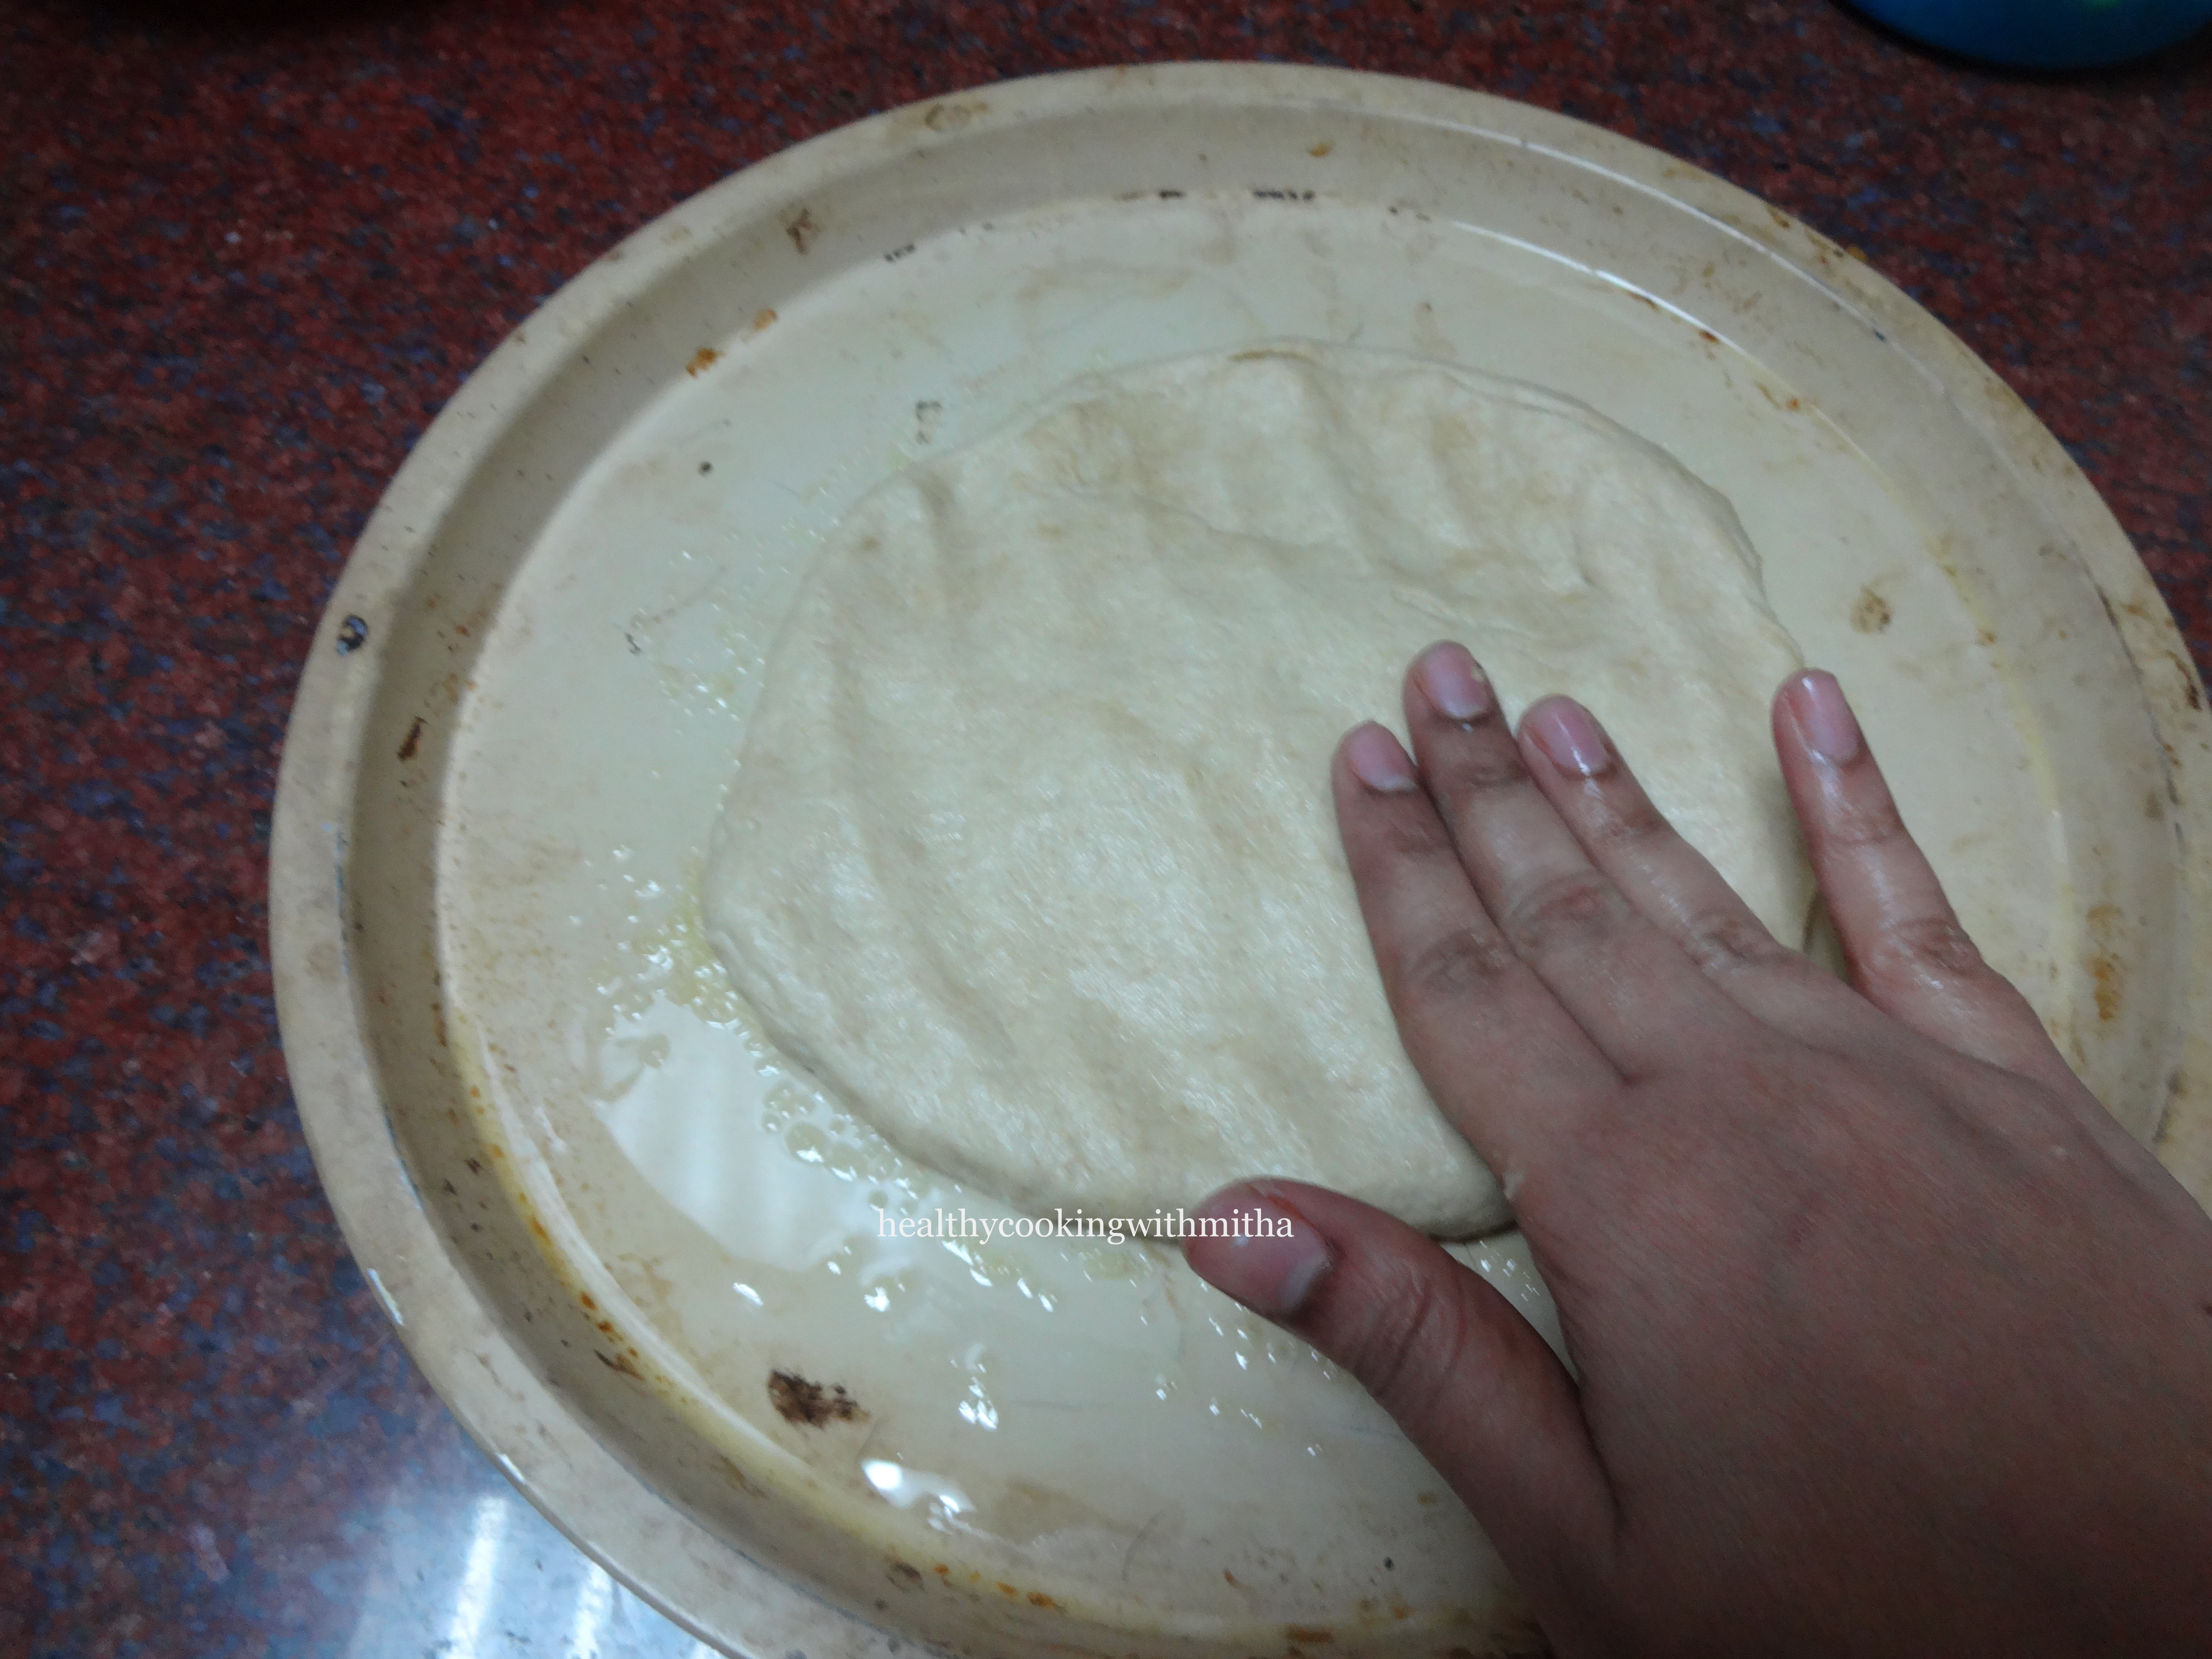
Spread one half of the dough over a well greased (with oil and dust little wheat flour) oven proof pizza plate with fingers as shown. 


Spread evenly in a round shape if possible and then coat the dough with oil. 

Add a layer of pizza sauce or ketchup and grated mozzarella cheese. 

Add veggies and spread evenly. 

Add another layer of mozzarella cheese.

Now top with olive slices. 

Preheat the oven at 200 C for 10 mins. ( Do this before you start topping your pizza. So by the time you finish topping, the oven is very hot. The oven needs to be very hot when you place the pizza in the oven.)

Now place the pizza in the center rack of the hot oven and bake for 15 mins at 200 C. Do NOT open the oven door in this time. After 15 mins, check if the cheese has melted and turned golden. If so, take it out.

  Slice and enjoy your healthy pizza.


Notes:

* Very important to note that the 3 Cups of wheat flour we used yields two pizzas. So use only half the dough for one pizza. If you use the whole dough for one pizza, it will turn thick and won’t cook properly.

* Here is the other half of the dough. I refrigerate it in an airtight container and it lasts atleast 3 to 4 days in the fridge and I can make pizza again. 

* Grease the pizza plate well with oil and dust wheat flour over it so that the pizza does not stick to the plate. Look at the under side of the pizza. Love the colour.

Also always proof your yeast to check if it’s good or not. Else it’s a waste of ingredients. I have explained proofing in the first few steps.

* Every oven is different. So do keep an eye after 10 mins into the baking time. But don’t open the oven door many times as it disturbs the baking process.

* Do remember to preheat the oven at least for 10 mins at 200 C so that the oven is very hot when pizza is placed which is very essential for proper baking.


https://gscrochetdesigns.blogspot.com. one can see my crochet creations  

https://kneereplacement-stickclub.blogspot.com. for info on knee replacement

https://cancersupportindia.blogspot.com  for info on cancer and health related topics

https://GSiyers home remedies.blogspot.com   is the latest addition to my blogs
 

Mango chutney


Ingredients

Mangoes 2 large

water 1/3 cup

cardamoms 6

ginger grated 1 tsp

clove pdr 1/4 tsp

cinnamon pdr 1/4 tsp

sugar 1 1/2 cups

vinegar 1 tbsp

red chili pdr 1/2 tsp

cumin pdr 1/2 tsp

salt


Preparations

Take mangoes which are slightly ripe and has sweet and sour taste (i.e. it should not be fully ripe but not completely raw too). Wash them in running water. Peel and cut them into long and thin slices or small pieces.

Boil 1/3 cup water in a pan. Add mango slices and cook over low flame for around 4-5 minutes. Stir in between occasionally.

Add cardamom pods, grated ginger, clove powder, cinnamon powder and sugar. Mix properly and cook over low flame until slices are soft and tender and mixture turns thick or for approx. 15-20 minutes.

When mixture turns thick, add vinegar and salt. Stir and cook for 4-5 minutes.

Turn off flame and allow mixture to cool at room temperature. Sprinkle cumin powder and red chilli powder over it and mix well. The chutney would get thicker as it cools.

Sweet and hot mango chutney is ready; Transfer it either to serving bowl for immediate serving or to sterilized glass bottles and store in a cool, dry place for anytime use.  

Variations

  • Use heavy based saucepan or non-stick pan and cook on low flame to allow even cooking and avoid burning.
  • Use raw green mangoes instead of slightly ripe mangoes for tangier chutney. Add more sugar if its too sour.
  • Add more red chilli powder and spices if you love very spicy flavor and taste.
  • Goes well with roti, parathas, theplas, bread toast, adai.


    https://gscrochetdesigns.blogspot.com. one can see my crochet creations  

    https://kneereplacement-stickclub.blogspot.com. for info on knee replacement

    https://cancersupportindia.blogspot.com  for info on cancer and health related topics

    https://GSiyers home remedies.blogspot.com   is the latest addition to my blogs


    Tomato Kasundi Chutney

    Ingredients

    5–6 large tomatoes, about 500 g

    10–15 cherry tomatoes, about 125 g

    ½ cup mustard oil

    3 tbsp garlic, coarsely ground

    1½ tbsp ginger, coarsely ground

    2 green chillies, finely chopped

    2 tsp mustard seeds

    1 tsp fenugreek seeds

    1 tsp salt

    2 tsp red chilli powder

    1 tbsp cumin powder

    1 tsp garam masala

    2 tbsp sugar

    4 tbsp white vinegar  


    Preparations

    Clean the tomatoes, remove the tops and coarsely grind them.

    Heat mustard oil in a pan until it reaches the smoking point. Turn off the heat and allow the oil to cool slightly.

    Add mustard seeds and fenugreek seeds. Let them crackle.

    Add the coarsely ground garlic, ginger and chopped green chillies. Sauté until they change colour.

    Add the ground tomatoes and mix well.

    Cover and cook over medium heat until the tomatoes soften, stirring every few minutes.

    Once some of the excess liquid has evaporated, add salt, red chilli powder and cumin powder.

    Cover and cook for another 4–5 minutes.

    Add sugar, garam masala, vinegar and the cherry tomatoes.

    Cook until the cherry tomatoes soften, and the oil begins to leave the sides.

    Remove from the heat and serve. 


    Important Tip-  Don’t skip heating the mustard oil to the smoking point. It helps mellow the raw sharpness of the oil and gives the kasundi its characteristic depth of flavour. 

    Best with- Pakoras, samosas, cutlets, fried snacks, rice, roti or as a relish with sandwiches. 


    https://gscrochetdesigns.blogspot.com. one can see my crochet creations  

    https://kneereplacement-stickclub.blogspot.com. for info on knee replacement

    https://cancersupportindia.blogspot.com  for info on cancer and health related topics

    https://GSiyers home remedies.blogspot.com   is the latest addition to my blogs

     

    Bengali Dum Aloo and Poori

     Luchi & Alur Dom 

    INGREDIENTS

    FOR ALOO DUM 

    TO BOIL THE POTATOES


    Ingredients to make aloo dum


    Ingredients for Luchi


    Preparations

    For dum potatoes

     Add 1 tablespoon of salt to 6 cups of boiling water

    Stir well so it dissolves

    Add 500 g of baby potatoes or normal potatoes washed well and cut in halves

    Boil till the potatoes are soft (for approximately 15 minutes) 

    Cool down the potatoes, peel them and keep them aside.

    Transfer the tomatoes to a blender jar

    To the same blender jar, add green chilies, ginger pieces and blend to a smooth paste

    Keep this aside

    Set a pan on medium heat and add 1 tablespoon ghee

    Add the pre-boiled potatoes and sprinkle half a teaspoon of salt

    Stir fry the potatoes till they turn golden brown (for approximately 10 minutes)

    Keep them aside

    To the same pan add 1 tablespoon oil

    Add cardamoms, cinnamon sticks, bay leaves, dry red chilli, cumin seeds, and give it a quick stir

    Add turmeric powder and add the tomato-ginger paste

    Mix well and place the lid on

    Let it cook for 8 to 10 minutes. Give it a stir intermittently

    Add kashmiri red chili powder, cumin powder and mix well

    Let the gravy thicken for approximately five minutes

    Add salt (to taste) and sugar (to taste)

    Add the potatoes and let it coat well with the gravy

    Add garam masala and mix well

    Add 1 tablespoon of ghee

    Keep stirring till the sauce thickens further (for approximately five minutes)

    Garnish with coriander leaves


    To Make Luchis

    To 2 cups of all purpose flour (maida), add half a teaspoon of salt, 3 tablespoons of oil and mix thoroughly

    A fist full of flour should be able to hold it’s shape

    Use warm water to knead the dough

    Add a little water at a time and keep kneading till the dough comes together. This will take approximately 10 minutes

    Keep the dough covered for approximately 30 minutes

    After 30 min knead the dough for sometime

    Apply little oil on your palms and portion the dough

    Potion them in small disks and make around 10 cm wide flat dough with the rolling pin

    Fry them in oil on one side, till it puffs up and then fry them on the other side (should take approximately 2 min)


    https://gscrochetdesigns.blogspot.com. one can see my crochet creations  

    https://kneereplacement-stickclub.blogspot.com. for info on knee replacement

    https://cancersupportindia.blogspot.com  for info on cancer and health related topics

    https://GSiyers home remedies.blogspot.com   is the latest addition to my blogs


    Sunday, September 20, 2026

    Buckwheat crêpes with chocolate-hazelnut butter

    Buckwheat crêpes with chocolate-hazelnut butter from www.houseandgarden.co.uk  

    Ingredients

    For the crêpes

    2 cups (450 g) water
    11⁄4 cups (175 g) buckwheat flour (Kuttu flour)
    4 large eggs
    1⁄4 cup (55 g) oil
    1 tbsp sugar
    1⁄2 tsp salt
    1 tbsp melted unsalted butter or extra-virgin olive oil
    1⁄2 cup Chocolate-Hazelnut Butter, at room temperature

    For the chocolate-hazelnut butter

    2 cups (300 g) raw hazelnuts
    3 ounces (85 g) bittersweet chocolate, chopped
    2 tbsp melted coconut oil
    1 tbsp  maple syrup
    1 tsp vanilla extract
    1⁄2 tsp flaky sea salt


    Method

    Preheat the oven to 300 degrees F. Spread the hazelnuts on a baking sheet and bake for 15 minutes, or until fragrant. Transfer the hazelnuts to a clean kitchen towel and rub them together to peel off the skins. It’s OK if you cannot remove them completely, but try to get as much as you can, as the skin is bitter.

    Transfer the hazelnuts to a high-speed blender or food processor and blend until creamy, stopping to scrape the bowl a few times. It will take a few minutes to pulverise the hazelnuts; exactly how long depends on your machine. If the motor gets hot, stop and restart a few minutes later.

    Meanwhile, bring a small pot with 2 inches of water to a simmer. Place the chocolate in a heatproof bowl and position over the pot. Reduce the heat to low and melt the chocolate, making sure no water gets into the bowl and no flames reach the sides. Add the melted chocolate to the blender and process until smooth and incorporated. Add the coconut oil, maple syrup, vanilla, and salt and blend until combined.

    Transfer the butter to a glass jar with an airtight lid, seal, and store at room temperature for 2 weeks or in the refrigerator for up to 1 month. It will harden solid when refrigerated, so bring the butter to room temperature a couple of hours before using.

    For the crêpes

    Combine the water, flour, eggs, olive oil, sugar, and salt in a blender, and puree on high speed until well mixed, about 30 seconds. You can use the batter right away, but I like to chill it in the refrigerator overnight, which allows the flour to hydrate fully and results in more flavour, elasticity, and crispness.

    When you are ready to cook the crêpes, give the batter one good stir, especially if it has been resting in the refrigerator. Heat a nonstick crêpe pan over medium-high heat. Brush the pan with a little bit of the melted butter, then pour in about 1/3 cup of the batter while swirling the pan to ensure it goes in as a thin layer. Small bubbles will appear around the batter as it cooks. Tuck in the edges with a rubber spatula and cook for 30 seconds, or until golden. Grab an edge with your fingers and gently flip the crêpe over, or use a spatula if the pan is too hot. Finish cooking for another 30 seconds, then slide onto a plate. Repeat with the remaining batter.

    Spread about 1 teaspoon of the Chocolate-Hazelnut Butter over half of each crêpe, fold, and serve immediately while warm. Any leftover batter can be stored in an airtight container in the refrigerator for up to 3 days.


    https://gscrochetdesigns.blogspot.com. one can see my crochet creations  

    https://kneereplacement-stickclub.blogspot.com. for info on knee replacement

    https://cancersupportindia.blogspot.com  for info on cancer and health related topics

    https://GSiyers home remedies.blogspot.com   is the latest addition to my blogs


    Lemon Coconut Muffins

    Ingredients

    1 cup sugar

    1/4 cup unsalted butter, at room temperature

    1/4 cup extra virgin coconut oil, at room temperature

    zest of one large lemon

    1 tbsp lime extract

    2 large eggs

    1 cup buttermilk

    2 cups all-purpose flour

    1/2 tsp salt

    1/2 tsp baking pdr

    1/2 tsp baking soda 


    Preparations

    Preheat the oven to 375 degrees F. Grease a 6 cavity jumbo muffin pan.

    In a large mixing bowl, cream the butter, coconut oil and sugar until fluffy. Add the zest, extract, eggs, and buttermilk and beat just until combined.

    In a separate bowl, sift the flour, baking powder, baking soda, and salt. Add the flour mixture to the wet mixture and beat just until combined, being careful not to over-beat. A few small lumps is okay.

    Scoop the batter into the jumbo muffin pan, filling each cavity about 3/4 full.

    Bake for about 25 minutes or until a toothpick inserted into the middle of a muffin comes out clean but moist.  Be careful not to over-bake or the muffins will be dry.  Let the muffins cool in the muffin tins for at least 5 minutes before transferring to a wire rack to cool completely.

    Notes

    * Low quality lemon extract smells strong out of the bottle, but when its baked it loses its flavor.  * Optional: Combine some extract lemon zest with some sugar and sprinkle over the filled muffin tins before baking. You can also sprinkle with some flaked coconut.
    • Optional: I personally prefer the dominant flavor to be lemon, but if you really want even more coconut flavor, you can add a teaspoon of coconut extract as well.


    https://gscrochetdesigns.blogspot.com. one can see my crochet creations  

    https://kneereplacement-stickclub.blogspot.com. for info on knee replacement

    https://cancersupportindia.blogspot.com  for info on cancer and health related topics

    https://GSiyers home remedies.blogspot.com   is the latest addition to my blogs

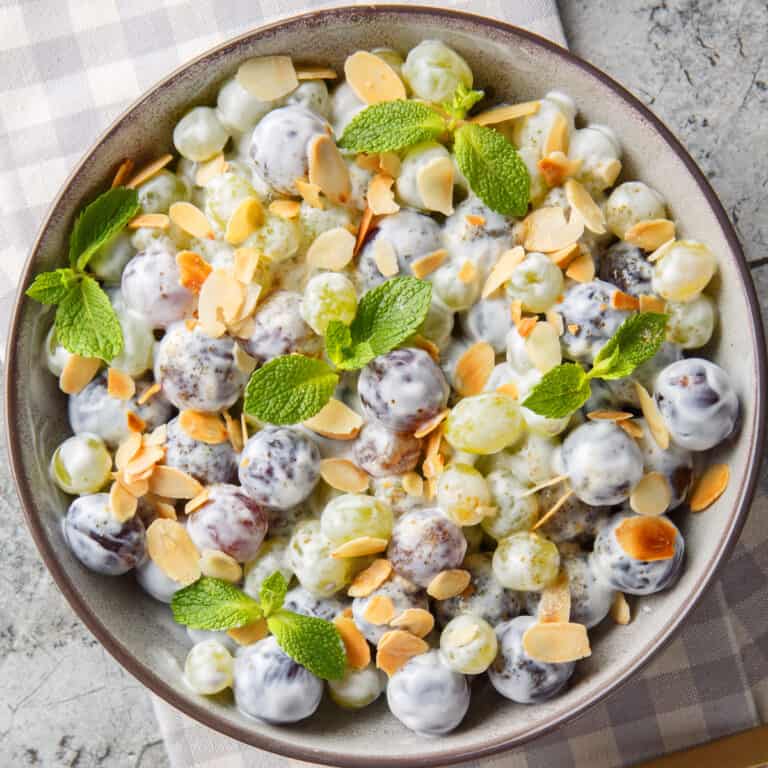
    Grapes salad

     grape salad recipe best classic creamy easy sour cream cheese brown sugar vanilla almonds pecans walnuts nuts 

     Ingredients

    8 ounces cream cheese, softened

    1 cup sour cream

    1/3 cup granulated sugar, or brown sugar for a more robust flavor (adjust according to sweetness of grapes) 

    2 tsp vanilla extract

    1-2 tbsp heavy cream or half and half, optional if you prefer to thin the dressing out a little

    1-2 tsp lemon juice, or to taste

    4 pounds seedless grapes (combination of green, red and/or black), stems removed, washed, drained, and dried on a clean dish cloth or paper towels

    2 tbsp brown sugar, or more to taste 

    3 tbsp  flaked almonds, chopped pecans or walnuts, optional, lightly toasted and cooled


    Preparations

    In a large mixing bowl, beat the cream cheese until it is soft and fluffy, then add the sour cream, sugar, heavy cream, lemon juice and vanilla and beat until combined. Add the grapes and gently fold them in until thoroughly coated with the dressing. Cover and refrigerate for at least 2 hours before serving, or overnight. This can be made a day in advance.

    This will keep for 2-3 days before the grapes become mushy.


    https://gscrochetdesigns.blogspot.com. one can see my crochet creations  

    https://kneereplacement-stickclub.blogspot.com. for info on knee replacement

    https://cancersupportindia.blogspot.com  for info on cancer and health related topics

    https://GSiyers home remedies.blogspot.com   is the latest addition to my blogs