Showing posts with label citric acid. Show all posts

Thursday, August 20, 2026

Peri Peri Masala At Home

 Originating from African and Portuguese culinary traditions, Peri Peri (or Piri Piri) is centered around the African Bird's Eye chili. While the original recipe relies on a wet marinade made from crushed fresh peppers, garlic, and citrus, the dry spice seasoning version has taken the global food scene by storm. The seasoning has become a staple for everything from crispy French fries and buttered popcorn to grilled chicken, roasted veggies, and paneer. 

 Ingredients
2 tbsp Kashmir red chilli powder
1 tbsp garlic powder
1 tbsp onion powder
1 tbsp dried oregano
1 tbsp black salt

1 tbsp caster sugar
½ tsp citric acid powder
½ tsp freshly ground black pepper  


Preparations

Ensure all your powdered ingredients and mixing bowls are completely dry to prevent the seasoning blend from clumping during the storage process.

 Combine the Kashmir red chilli powder, garlic powder, onion powder, dried oregano, black salt, caster sugar, citric acid, and black pepper in a small bowl.

Now, transfer the mixed spices to a small blender jar and pulse briefly for ten seconds to ensure all the herbs are finely ground and uniformly integrated. 

Store the freshly made Peri-peri masala in a dry airtight shaker and keep in a cool pantry up to 3 months. 


https://gscrochetdesigns.blogspot.com. one can see my crochet creations  

https://kneereplacement-stickclub.blogspot.com. for info on knee replacement

https://cancersupportindia.blogspot.com  for info on cancer and health related topics

https://GSiyers home remedies.blogspot.com   is the latest addition to my blogs

Tuesday, December 10, 2024

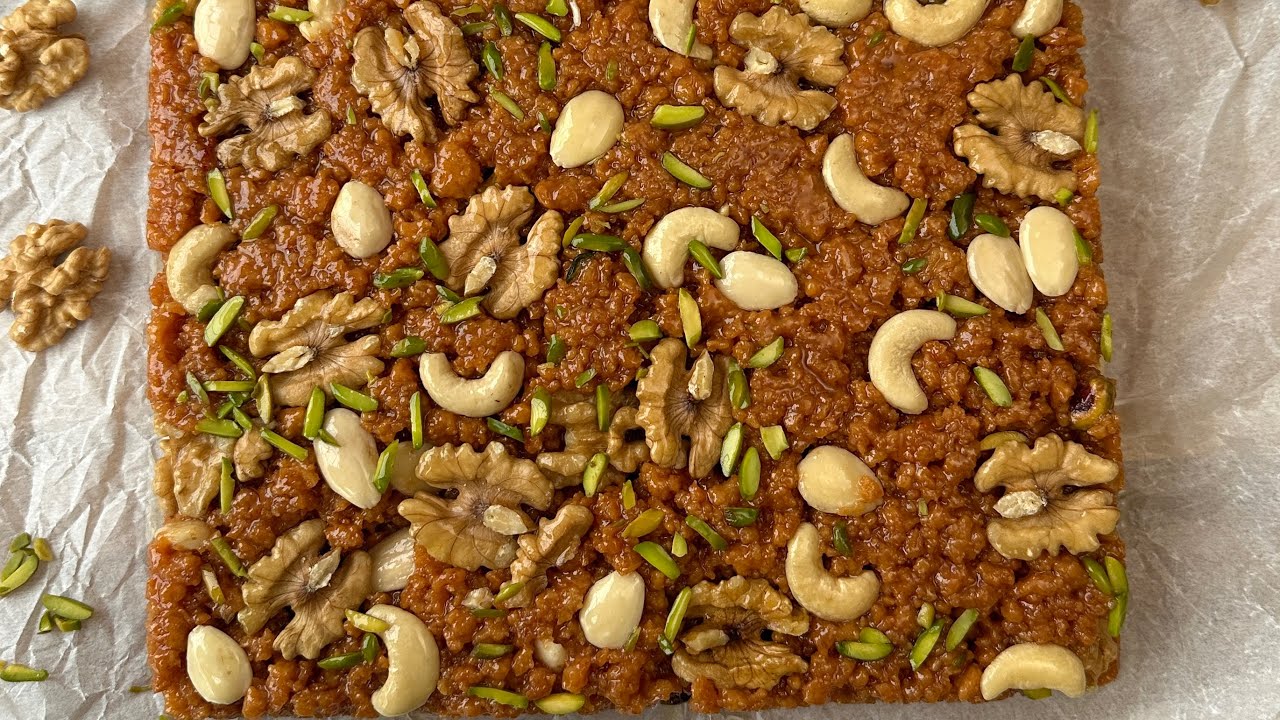
SOHAN HALWA

 Ingredients


Instructions

Prepare The Sprouted Wheat. Place the whole wheat in a bowl or container and cover it with enough water to fully submerge the wheat.Let it soak for 24 to 36 hours to soften the wheat kernels. 

After soaking, drain the water from the wheat.Transfer the wheat to a large, dry bowl.Cover the bowl with a wet towel to create a moist environment for sprouting.Allow the wheat to sprout for 2-3 days, ensuring the towel stays damp by adding water if it dries out.

Once the wheat has sprouted, spread it out on a tray to dry.The drying time may vary depending on the weather conditions, typically 1 or 2 days.

Prepare The Halwa

In a heavy-bottomed pan, combine the sprouted wheat flour, plain flour, and gradually add 3 cups of milk while whisking to avoid lumps.Adjust the milk quantity as needed to achieve a smooth consistency.

Pour 1.5 liters of whole milk into the pan and bring it to a boil, stirring occasionally to prevent sticking.

In a glass, dissolve citric acid and alum in water completely.

Once the milk mixture boils, turn off the heat and slowly add the citric acid and alum mixture while gently stirring. (you may not need all of the mixture , once milk curdle , stop adding more alum mixture)

Turn on the heat again and cook the mixture until the milk curdles and water spreads.

Turn the flame to medium-high and add brown food color, sugar, glucose syrup, and ghee.Cook until all water evaporates, stirring occasionally.

Stir continuously and cook until the halwa leaves the sides of the pan and you see strings of sugar and glucose.

Remove the halwa from heat and let it cool for 20 minutes.

Mix in the dry fruits and additional ghee. Transfer the mixture into a mold, layering with dry fruits.

Let the Sohan Halwa cool down completely in the mold for 6-7 hours.Once set, slice and serve as desired.


https://gscrochetdesigns.blogspot.com. one can see my crochet creations  

https://kneereplacement-stickclub.blogspot.com. for info on knee replacement

https://cancersupportindia.blogspot.com  for info on cancer and health related topics

https://GSiyers home remedies.blogspot.com   is the latest addition to my blogs.

Wednesday, September 25, 2024

Instant Idli without curd

Ingredients

semolina/ suji  ½ cup

rice flour  ½ cup

citric acid / nimbu  sat   1/2 tsp

salt  ½ tsp

baking soda  1/4 tsp

water  1 cup

oil for greasing idli moulds


Method

Take a bowl, add citric acid and salt, add water, give them a good mix.

add rice flour and semolina,, mix well, see that there are no lumps

rest the batter for 15 minutes

In the mean time, grease the idli moulds with oil, put water in a steamer to boil.

After 15 minutes, give one more mix to the batter.

divide the batter into 2 parts,

NOTE- Actually it’s a stage to add baking soda in batter but once baking soda os added, batter needs to be steamed immediately. If your idli moulds can make only 8 idlis, then divide the natter to add 1/8 tsp baking soda,  OR ¼ tsp of baking soda, IF  YOUR IDLI MOULD CAN MAKE 16-20 IDLIS ADD BAKING SODA TO THE ENTIRE BATTER.

Mix well after adding baking soda. Pour the batter in idli moulds in steamer.

steam for 15 minutes. Check by inserting a toothpick, if it comes out clean, it’s a sign that idli is perfectly cooked.

Let it cool for 3-4 minutes, take out idlis using the wet backside of the spoon.

Prepare the 2nd batch  in case you’ve to steam again. Steam in the same way.

Serve hot with milagai podi and chutney.


NOTE- you can double/ triple the quantity as per your requirements.

This idlis are made by mixing rice flour and semolina, you can make the idlis using only 1 ingredient from amongst the 2. But in that case, keep an eye on the quantity of water, you need to use.


https://gscrochetdesigns.blogspot.com. one can see my crochet creations  

 https://kneereplacement-stickclub.blogspot.com. for info on knee replacement

 https://cancersupportindia.blogspot.com  for info on cancer and health related topics

https://GSiyers home remedies.blogspot.com   is the latest addition to my blogs.


Saturday, October 3, 2020

Mozzarella - Home made !

If you love cheese and/or Italian food, then you're probably a fan of mozzarella, but did you know it's surprisingly simple to make it at home? This easy guide will take you through the process of making your very own mozzarella, from start to finish. Impress friends and relatives, save money, and, best of all – have a fresh supply of mozzarella all the time. Just one warning – once you get into the habit of making mozzarella at home, you'll be making it all the time!

Ingredients: 
 Makes 450g (1lb)
 1¼ cup of water 
1 gallon 2% or whole milk (4 liters)
1½ teaspoon citric acid 
1 teaspoon kosher salt 
 ¼ teaspoon liquid rennet 
 
 Equipment needed: 
Large non-reactive pot 
Measuring cups and spoons 
Thermometer 
 Slotted spoon 
Microwaveable bowl 
Large knife (or something similar for cutting the curds) 
Rubber gloves 
 
Instructions: 
1. Stir the citric acid in 1 cup of water until it fully dissolves. In a separate bowl, mix the rennet in ¼ cup of water until fully mixed. 
 Mozzarella
2. Pour the milk into the large pot and stir in the citric acid mix. Set on the stove over medium heat until the milk is at 90°F (32°C), and stir a little. 
3. Remove the pot from the stove and stir in the rennet solution. Stir for 30 seconds (make sure not to do it for longer) and stop. Cover the pot and let it sit for 5 minutes.

Mozzarella

4. The milk should have set by now, looking somewhat like tofu (If it hasn’t, cover the pot and let it sit for 5 more minutes). Cut the curds into squares, making sure they’re cut all the way to the bottom. 
5. Put the pot back on the stove and warm the curds to 105°F (40°C). Stir slowly and try not to break the curds too much. 
6. Once the curds clump together, remove the pot from the stove and continue stirring it for 5 more minutes. 
7. Use the slotted spoon to separate the curds from the whey, and place them in the microwaveable bowl.
Mozzarella
8. Microwave the curds for 1 minute, then drain any excess whey. Put on the gloves and start folding the curds onto themselves. (The curds should still feel like cottage cheese) 
9. Put the curds back in the microwave for 30 seconds, and then check their temperature. Once they’re at 135°F (57°C) stop microwaving them.
Mozzarella
10. Sprinkle the salt over the cheese and using both hands, start stretching and folding the curds.

Mozzarella

11. Once the curds tighten and take on a glossy sheen, you can shape them into a ball, or several smaller balls.
Mozzarella
If you’re not going to eat the cheese immediately, put it in the fridge. The cheese should keep for about a week. For best results, put the cheese in a sealable container, pour in a cup of whey and add a teaspoon of salt to the mix, and then seal and refrigerate. 
 
Final notes: 
You can keep the whey and use it for its great health benefits. 
Use goat or sheep's milk for a stronger-flavored mozzarella.

https://gscrochetdesigns.blogspot.com. one can see my crochet creations  

https://cancersupportindia.blogspot.com. feel free to view for easy, simple and health tips  
https://kneereplacement-stickclub.blogspot.com. for info on knee replacement