Showing posts with label cocoa pdr.. Show all posts

Monday, August 11, 2025

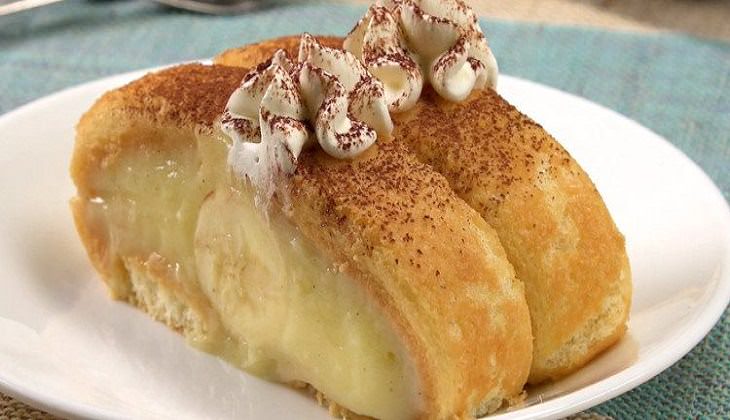
Ladyfinger Roll Cake- No Bake !

 Ladyfinger Roll Cake  

This creamy and delicate ladyfinger roll cake is a gourmet challenge for those who grow bored with sponge cakes. But here's the nice part- it doesn't require baking! If you don't want store-bought pudding, you can use our créme anglaise or créme patisserie recipes.

Ingredients :
 
Ladyfinger cookies - 24 
 
Milk - 1 1/2 cups 
 
Vanilla pudding - 2 cups (or pastry cream) 
 
Banana - 2 (peeled) 
 
Cocoa powder - 1 tbsp. (or instant coffee)


Preparations
 
In a bowl, dip each ladyfinger into the milk. 
 
Lay a long piece of plastic wrap on the counter. 
 
Place two rows of ladyfingers, side by side, on the plastic wrap. 
 
Cover with a second piece of plastic wrap, and place them in the fridge for 4 hours or overnight. 
 
If needed, brush on some milk and chill for another hour. 
 
Once pliable, remove the top plastic and spread the pudding in a thin, even layer over the ladyfingers. 
 
Leave a 1/2-inch border along one of the long sides. 
 
Place the bananas, lengthwise, in the middle of the row of ladyfingers that are completely covered with pudding or pastry cream. 
 
Carefully, using the extending plastic wrap, roll the ladyfingers up and over the bananas and continue rolling the entire cake to form a cylinder with the ends of the two rows of ladyfingers coming together. 
 
Chill in the fridge for 30 minutes. 
 
Serve on a long plate, sprinkle with cocoa powder for garnish and top with whipped cream with the help of a piping bag. 

https://gscrochetdesigns.blogspot.com. one can see my crochet creations  

https://kneereplacement-stickclub.blogspot.com. for info on knee replacement

https://cancersupportindia.blogspot.com  for info on cancer and health related topics

https://GSiyers home remedies.blogspot.com   is the latest addition to my blogs


Monday, June 23, 2025

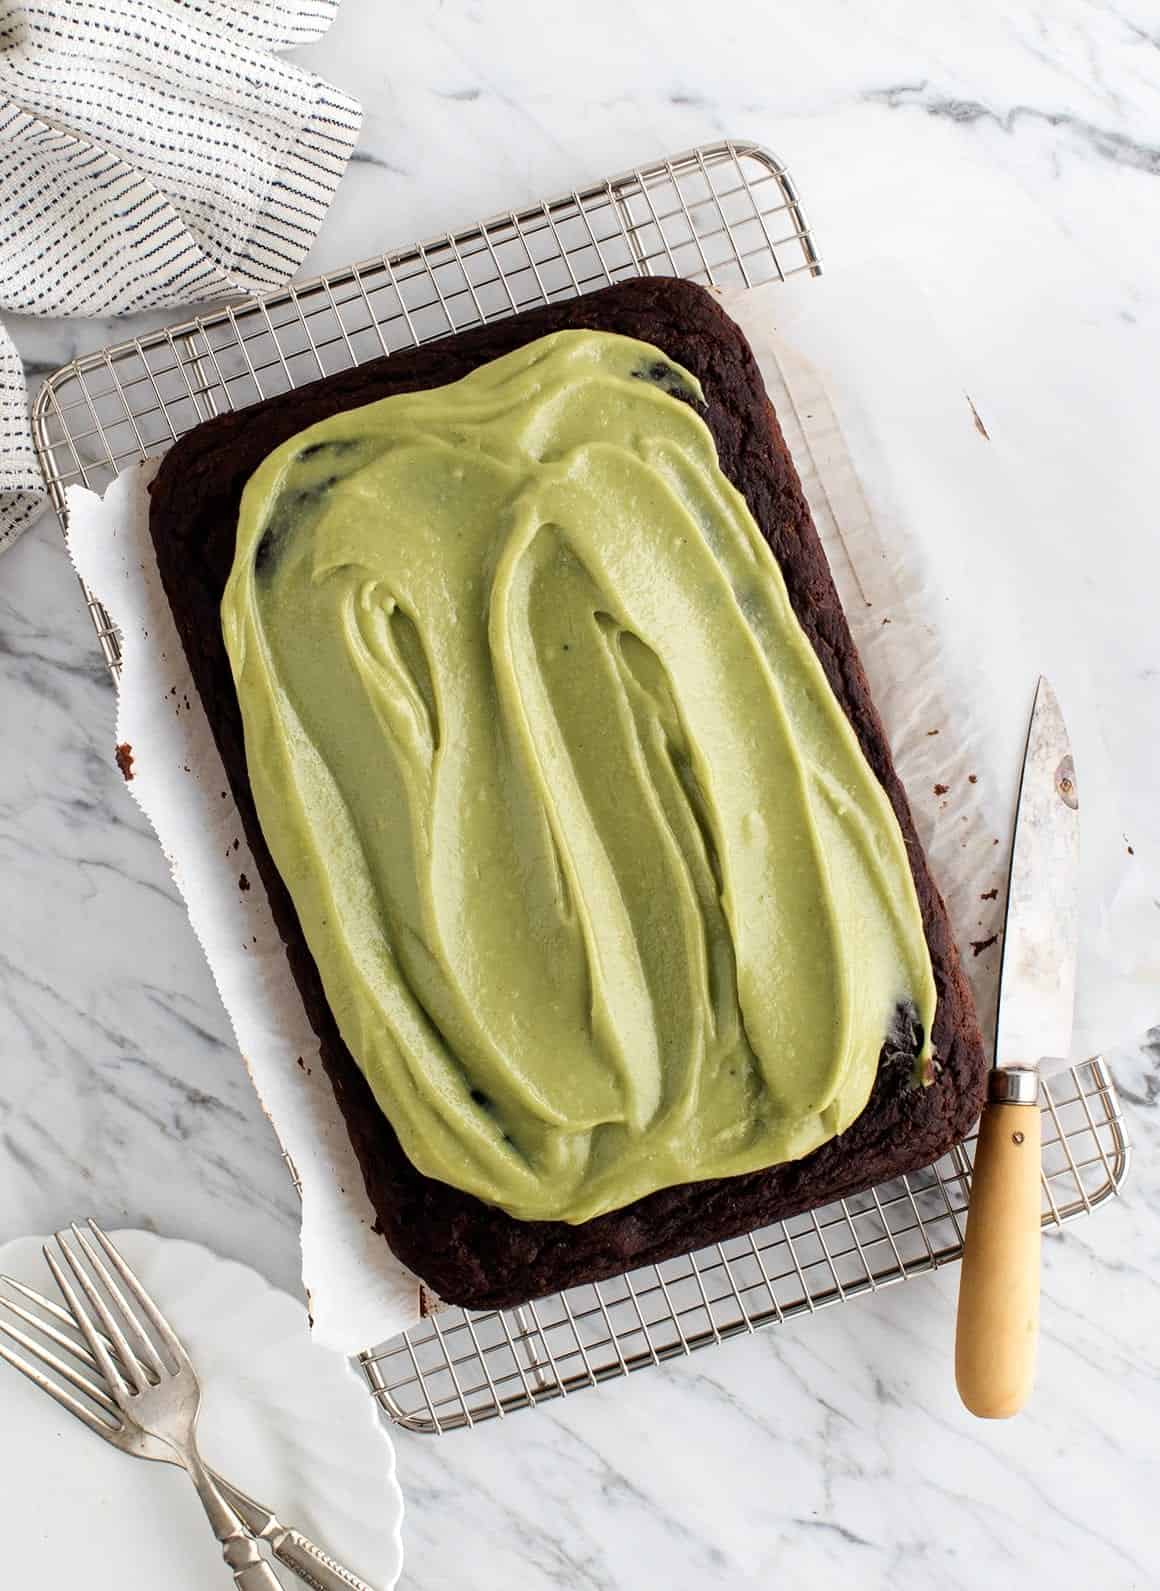
Chocolate Zucchini Cake


 Ingredients

1 tbsp ground flaxseed

3 tbsp water

2 tsp apple cider vinegar

1 cup almond milk, at room temperature ( you may substitute with whatever milk you've)

2 cups all-purpose flour (or half white/half wheat)

⅓ cup cocoa powder

1 tbsp baking powder

1 tsp baking soda

½ tsp sea salt

¼ cup coconut oil, melted

⅔ cup maple syrup / honey

1 tsp vanilla extract

1¼ cups finely shredded unpeeled zucchini


Matcha Cashew Frosting
 
1¼ cups raw cashews
 
¼ cup + 2 tbsp almond milk
 
¼ cup pdr sugar
 
2 tbsp solid coconut oil
 
1 tsp vanilla extract
 
¼ to ½ tsp matcha tea powder
 
¼ tsp sea salt
 
 
Preparations
 
Preheat the oven to 350°F and grease a 9x13-inch baking dish with coconut oil.
 
In a small bowl, combine the ground flaxseed and water and set aside to thicken. Stir the vinegar into the almond milk and set aside.
 
In a large bowl, combine the flour, cocoa powder, baking powder, baking soda, and salt. In a medium bowl, whisk together the flaxseed mixture, almond milk/vinegar mixture, coconut oil, maple syrup, and vanilla.
 
Pour the wet ingredients into the bowl with the dry ingredients and stir until just combined. Don’t over mix. Fold in the zucchini.
 
Pour the batter into the baking dish and bake for 30 to 35 minutes, or until the top of the cake springs back to the touch. Cool completely before frosting.
 
Make the frosting: In a blender, combine the cashews, almond milk, powdered sugar, coconut oil, vanilla, matcha, and sea salt and process until smooth and creamy. Add more matcha, if desired. Chill until ready to use, or for at least 20 minutes to firm up.
 

Note: 

1) I used powdered sugar in the frosting because maple syrup made the frosting darker green than I liked. The powdered sugar also thickened it best.

2)Matcha varies in color, some are very bright green, some are more dull, so the color of your frosting may vary based on the matcha that you use.  


https://gscrochetdesigns.blogspot.com. one can see my crochet creations  

https://kneereplacement-stickclub.blogspot.com. for info on knee replacement

https://cancersupportindia.blogspot.com  for info on cancer and health related topics

https://GSiyers home remedies.blogspot.com   is the latest addition to my blogs


Monday, June 16, 2025

Finger millet Chocolate cake- egg-less

 Ingredients 

Sift all dry ingredients together except for sugar in one bowl. 
 
In another bowl, mix all the wet ingredients together including sugar.
 
Preheat the oven for 10 minutes at 180° C.
 
Grease the cake tin with oil and dust it with some flour.
 
Add the dry ingredients to the wet ingredients bowl, in portions and mix well. Ensure there are no lumps formed.
 
Pour the batter into the cake tin.
 
Tap it on a flat surface to remove air. Ensure to level the cake equally.
 
Place it in the oven and bake it for 25-30 minutes or until fully baked. 
 
Let it cool a little, before you unmould the cake. 

https://gscrochetdesigns.blogspot.com. one can see my crochet creations  

https://kneereplacement-stickclub.blogspot.com. for info on knee replacement

https://cancersupportindia.blogspot.com  for info on cancer and health related topics

https://GSiyers home remedies.blogspot.com   is the latest addition to my blogs
  

Friday, May 2, 2025

Sorghum chocolate cake- Gluten free, Egg-less, healthy cake

 Ingredients

1 Cup Jowar flour (Sorghum flour) {106 grams}

2 Tbsp unsweetened Cocoa powder {10 grams}

1/2 tsp Baking powder

1/4 tsp Salt

1/4 Cup thick Curd or Yogurt {60 ml}

1/4 tsp Baking soda

1/2 Cup Jaggery powder {66 grams}

1/2 Cup Milk {100 ml}

1/4 Cup Ghee {54 ml}


Preparations

Take yogurt and baking soda in a bowl. Mix well. Keep aside.  

Also preheat the oven in the center rack at 180 C for 10 minutes. 

Sieve together all the dry ingredients – Jowar flour, cocoa powder, baking powder and salt and keep it aside.  

Now to the yogurt- baking soda mix, add jaggery powder, milk and ghee. Mix well. 

Now add the dry ingredient mix to the wet ingredients and mix using spatula. Don’t over mix and just fold until you can’t see any dry flour specks. 

Now spread the batter evenly in your greased baking pan.

Now keep the pan to bake @ 180 deg. C for 15 minutes, keep an eye, as the time can vary a lot depending on the size of your oven, outside temperature, voltage etc.

Check by inserting a toothpick in the center, if it comes out clean, remove from the oven, completely, invert it on a plate, cut and enjoy the gluten free healthy chocolate cake. 

https://gscrochetdesigns.blogspot.com. one can see my crochet creations  

https://kneereplacement-stickclub.blogspot.com. for info on knee replacement

https://cancersupportindia.blogspot.com  for info on cancer and health related topics

https://GSiyers home remedies.blogspot.com   is the latest addition to my blogs


Thursday, March 27, 2025

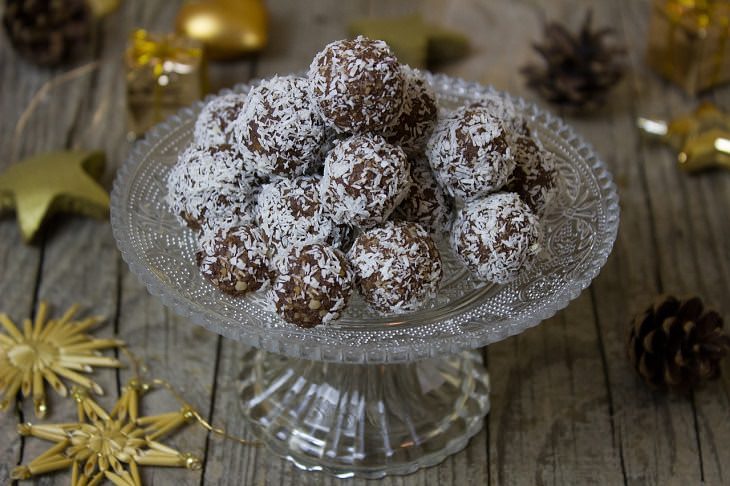
Rum balls

 Rum Balls


Ingredients: 
 
Plain cookies - 9 oz. (or sweet crackers) 
 
Sweetened condensed milk - a 14 oz. can 
 
Rum - 3 tbsp. (optional) 
 
Coconut flakes - 1 cup, divided 
 
Cocoa powder - 1/2 cup 
 
 
Preparation: 
 
Using a food processor or a plastic bag and a rolling pin, crush the cookies into crumbs. The end result doesn’t have to be a fine powder, and having larger chunks is okay. 
 
Place the crushed cookies, half of the coconut flakes, condensed milk, cocoa powder, and rum in a bowl and mix using a wooden spoon and your hands until a thick mixture forms. 
 
Scoop out tablespoon portions, roll into a ball and roll in coconut. Lay out on a baking sheet and refrigerate before serving.


https://gscrochetdesigns.blogspot.com. one can see my crochet creations  

https://kneereplacement-stickclub.blogspot.com. for info on knee replacement

https://cancersupportindia.blogspot.com  for info on cancer and health related topics

https://GSiyers home remedies.blogspot.com   is the latest addition to my blogs


Saturday, March 8, 2025

Eggless Chocolate Sponge Cake

 Ingredients

 all purpose flour  1 1/2 cups 

cocoa pdr  1/4 cup

baking soda 1 tsp

pdr sugar 1 cup

milk 1 cup 

oil 1/3 cup    OR melted butter 80 ml

lemon juice 1 tbsp OR apple cider vinegar

vanilla essence  1 tbsp


Method

Mix well vinegar, vanilla,  milk, oil, pdr sugar

Mix all dry ingredients

mix both wet and dry ingredients gently, pour it in a greased pan 

Bake @ 170 C for 25-30 minutes. The time can vary depending on the size of the oven,voltage, so keep a watch, check for done by inserting a knife in the center, if it comes out clean, remove and cool.

Let it cool, before you cut.


https://gscrochetdesigns.blogspot.com. one can see my crochet creations  

https://kneereplacement-stickclub.blogspot.com. for info on knee replacement

https://cancersupportindia.blogspot.com  for info on cancer and health related topics

https://GSiyers home remedies.blogspot.com   is the latest addition to my blogs

Saturday, February 22, 2025

Egg-less Chocolate Tres Leches Cake

Ingredients

1/2 

Chocolate cake

Heat milk in a saucepan. Add the butter and heat the milk until the butter dissolves and the milk just begins to boil.
In a separate bowl, sift together the dry ingredients: all-purpose flour, cocoa powder, baking powder, baking soda, and salt. Set aside.
In another bowl, combine sugar with yogurt and vanilla essence (the wet ingredients) then whisk until homogenous.
Gradually add the dry ingredients and the hot milk mixture to the wet mixture, alternating between the two. Stir continuously with a hand mixer or whisk until you achieve a smooth batter-like consistency.
Pour the batter into a buttered and floured round baking pan. Tap the pan 2-3 times to release any air bubbles.
Bake in a preheated oven at 180°C for 40 minutes, or until a skewer inserted into the center comes out clean.

Whipped Cream

To prepare the chocolate ganache, place the chopped dark compound chocolate and whipping cream in a bowl. Melt in the microwave in 30-second intervals, stirring until the chocolate has melted and combines with the cream. Set aside to cool completely.
In a separate bowl, whip the whipping cream until soft peaks form.
Add the cooled chocolate ganache to the whipped cream. If the ganache isn’t cool yet, allow it to cool completely before adding.
Whip the mixture until stiff peaks form. Your delicious chocolate mousse is now ready!

The 3 Milk Layer

Heat full-fat milk in a deep-bottomed pan. While whisking continuously, add the heavy cream and condensed milk.
That’s it! Your 3-milk sauce is ready to be poured over the cake. 
 

Assembling Chocolate Tres Leches Cake

Poke the cooled chocolate cake with a skewer or fork. Pour the prepared 3-milk sauce over the entire cake.
Refrigerate the cake for 3-4 hours, allowing it to absorb the delicious sauce.
Slice the cake in half. Spread the chocolate whipped cream on one slice, then top with the other slice to create a sandwich with chocolate whipped cream in the middle.
Pour the remaining 3-milk sauce over the cake.
Refrigerate the cake for an additional 30 minutes, so it sets completely. Your cake is now ready to serve!
Decorate the cake with nuts and berries, slice into pieces, and serve.

https://gscrochetdesigns.blogspot.com. one can see my crochet creations  

https://kneereplacement-stickclub.blogspot.com. for info on knee replacement

https://cancersupportindia.blogspot.com  for info on cancer and health related topics

https://GSiyers home remedies.blogspot.com   is the latest addition to my blogs

Thursday, February 13, 2025

Brownie Cookies

INGREDIENTS

1/4

PREPARATIONS

Preheat the oven to 180 C.
Place the butter and chocolate into a heatproof bowl and set over a pan and gently simmering water.
Allow to melt, stirring occasionally until fully melted. Remove the bowl from the heat and set aside for the moment.
In the bowl of a stand mixer fitted with the whisk attachment, or using an electric hand mixer, whisk together the eggs and sugars, on medium-high speed, for exactly 5 minutes.
Once the eggs have been mixing for exactly 5 minutes pour in the chocolate mixture and mix for a minute or so to combine.
Meanwhile mix together the dry ingredients, sieving the cocoa powder if it has lots of lumps.
Add the dry ingredients and mix very briefly just until combined. Use your spatula to give one last mix, scraping the bottom of the bowl to make sure everything is evenly combined.
Use a ice cream scoop to form the cookies. The batter will be a little on the wet side, so invert the cookie scoop just above the baking tray to avoid spills.
Make sure to leave plenty of space between each cookie as they will spread. Sprinkle each cookie with a little flaked sea salt before placing into the oven and baking for 12 minutes.
The cookies will come out of the oven with that wonderful crinkled look and slightly domed. They will collapse a little as they cool but this helps form that perfect fudgy center.
The cookies will be very soft so allow them to cool on the baking trays for at least 20-30 minutes before removing from the tray to cool completely. These cookies will keep for 4-5 days but will be best within the first 3 days.


https://gscrochetdesigns.blogspot.com. one can see my crochet creations  

https://kneereplacement-stickclub.blogspot.com. for info on knee replacement

https://cancersupportindia.blogspot.com  for info on cancer and health related topics

https://GSiyers home remedies.blogspot.com   is the latest addition to my blogs