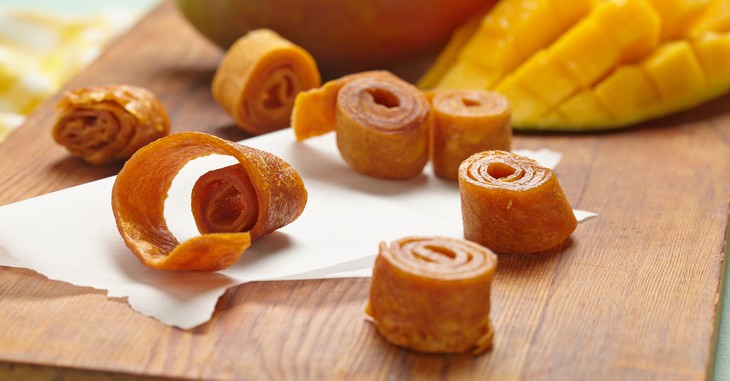
Fruit leathers are delicious, chewy, rolled
up, dried fruit snacks that you can make yourself. They are made by
pureeing your chosen fruit and laying it out on a flat surface to dry.
Making your own fruit leathers allows you to save money, cut down on
sugar, and have great fun rolling out such delicious healthy snacks.
These healthy fruit leathers are perfect for diabetics, since you will
not be adding any sugar, while most of the fresh fruit’s nutritional
value will remain.
You may use canned fruit (well drained),
frozen or fresh fruit to make your leathers. For best results use the
highest quality fresh, organic fruit. Plump for either ripe or slightly
overripe fruits. Wash them thoroughly, and remove the stem and seeds.
Any fruit will do. Popular examples include: strawberry, peach, apricot,
blueberry, apple, raspberry, mango, pineapple and others.
Instructions (for roughly 20 1" strips)
1. Place racks in the lowest and highest thirds of your oven. Heat to
170°F (76.6°C). Using silicone baking mats (or parchment paper), line
two big sheet pans.
2. Use a food processor to puree 1½ lbs. fruit (if using berries, hull
and stem; stone fruit should be pitted) and ½ cup of unsweetened
applesauce. Taste. If you require, add some honey for extra sweetness.
3. Pour out the puree into the middle of both sheet pans. With a
spatula, spread the puree evenly to make a 1" border. Make sure that the
edges are a little thicker than the rest (edges dry quickest, so this
will prevent them from cracking).
4. Place the trays into the oven. Cook/dry
out for between 4 and 6 hours, until the puree looks like leather. It
should be firm but a little tacky (though this depends on how watery the
fruit was). Now turn off the heat and let it sit in the oven until room
temperature is reached.
5. Top with a sheet of wax/parchment paper and turn over onto a counter.
Carefully remove baking mat; roll up wax paper and fruit leather
together.
6. Using kitchen shears, cut the rolls into 1" segments. Now keep in an
airtight container for 2 weeks at room temperature.
https://gscrochetdesigns.blogspot.com. one can see my crochet creations
https://kneereplacement-stickclub.blogspot.com. for info on knee replacement
https://cancersupportindia.blogspot.com for info on cancer and health related topics
https://GSiyers home remedies.blogspot.com is the latest addition to my blogs.
No comments:
Post a Comment