Ingredients
Chickpeas (2 cans, 15 ounces each): Be sure to drain and rinse
them thoroughly before use.
Onion (1 medium): Finely dice it
Carrot (1 large): grated carrot adds moisture and a subtle
sweetness to balance the savory notes, provides beta-carotene.
Zucchini (1 medium): grated zucchini helps to keep
the patties tender and juicy. Remember to squeeze out excess moisture
after grating to prevent soggy patties.
Red Bell Pepper (1/2 medium): diced red bell
pepper, it also
provides Vitamin C and antioxidants.
Garlic (2-3 cloves):minced garlic
Fresh Parsley (1/4 cup, chopped) OR coriander leaves finely chopped as per your taste you can choose which herb you prefer. Both are full of vitamins and minerals.
Breadcrumbs (1 cup, plus more if needed): Acting
as a binder, breadcrumbs help to absorb excess moisture and give the
patties structure. OR use oats powdered or semolina
Egg (1 large) or Flax Egg (for vegan option): OR cornflour paste for vegetarians
Oil (2 tbsp): Used
for sautéing the vegetables and for brushing the patties before baking,
Spices (1 tsp cumin, 1/2 teaspoon paprika, 1/4 teaspoon chili powder, salt and pepper to taste):
This blend of spices creates a warm, savory, and slightly smoky flavor
profile. Cumin adds earthy warmth, paprika contributes a mild sweetness
and color, and chili powder provides a gentle kick. Adjust salt and
pepper to your preference.
Preparations
Begin
by preparing your vegetables. This step is crucial for building flavor
and ensuring the vegetables are cooked just right within the patties.
Peel
and finely dice the medium onion. Small, even pieces will cook quickly
and blend seamlessly into the patty mixture. Aim for pieces about ¼ inch
in size.
Wash
and peel the large carrot. Using a box grater or a food processor with a
grating attachment, grate the carrot. Grated carrots cook quickly and
distribute evenly throughout the patties, adding sweetness and moisture.
Wash
the medium zucchini. There’s no need to peel it. Grate the zucchini
using the same method as the carrot. Once grated, place the zucchini in a
clean kitchen towel or cheesecloth and squeeze out as much excess
moisture as possible. This step is vital to prevent the patties from
becoming soggy.
Wash
and remove the seeds and membranes from half of a medium red bell
pepper. Dice the pepper into small, even pieces, similar in size to the
diced onion.
Peel and mince 2-3 cloves of garlic. Mincing garlic releases its aromatic oils and ensures it flavors the entire patty mixture.
Heat
2 tablespoons of oil in a large skillet over medium heat. Allow
the oil to shimmer slightly, indicating it’s hot enough.
Add
the diced onion to the hot skillet and sauté for about 3-4 minutes, or
until softened and translucent. Then, add the minced garlic and sauté
for another minute, until fragrant. Be careful not to burn the garlic,
as it can become bitter.
Add
the grated carrot and diced red bell pepper to the skillet. Sauté for
another 5-7 minutes, or until the vegetables are slightly softened but
still have a little bit of texture. You don’t want them to be mushy.
Once
the vegetables are sautéed, remove the skillet from the heat and set
aside to cool slightly. Allowing them to cool slightly before adding
them to the chickpea mixture prevents the heat from cooking the egg
prematurely (if using) and makes it easier to handle the mixture.
While the vegetables are cooling, prepare the chickpea base for your patties.
Open
both cans of chickpeas, drain the liquid, and rinse the chickpeas
thoroughly under cold running water. Rinsing removes excess sodium and
any can residue.
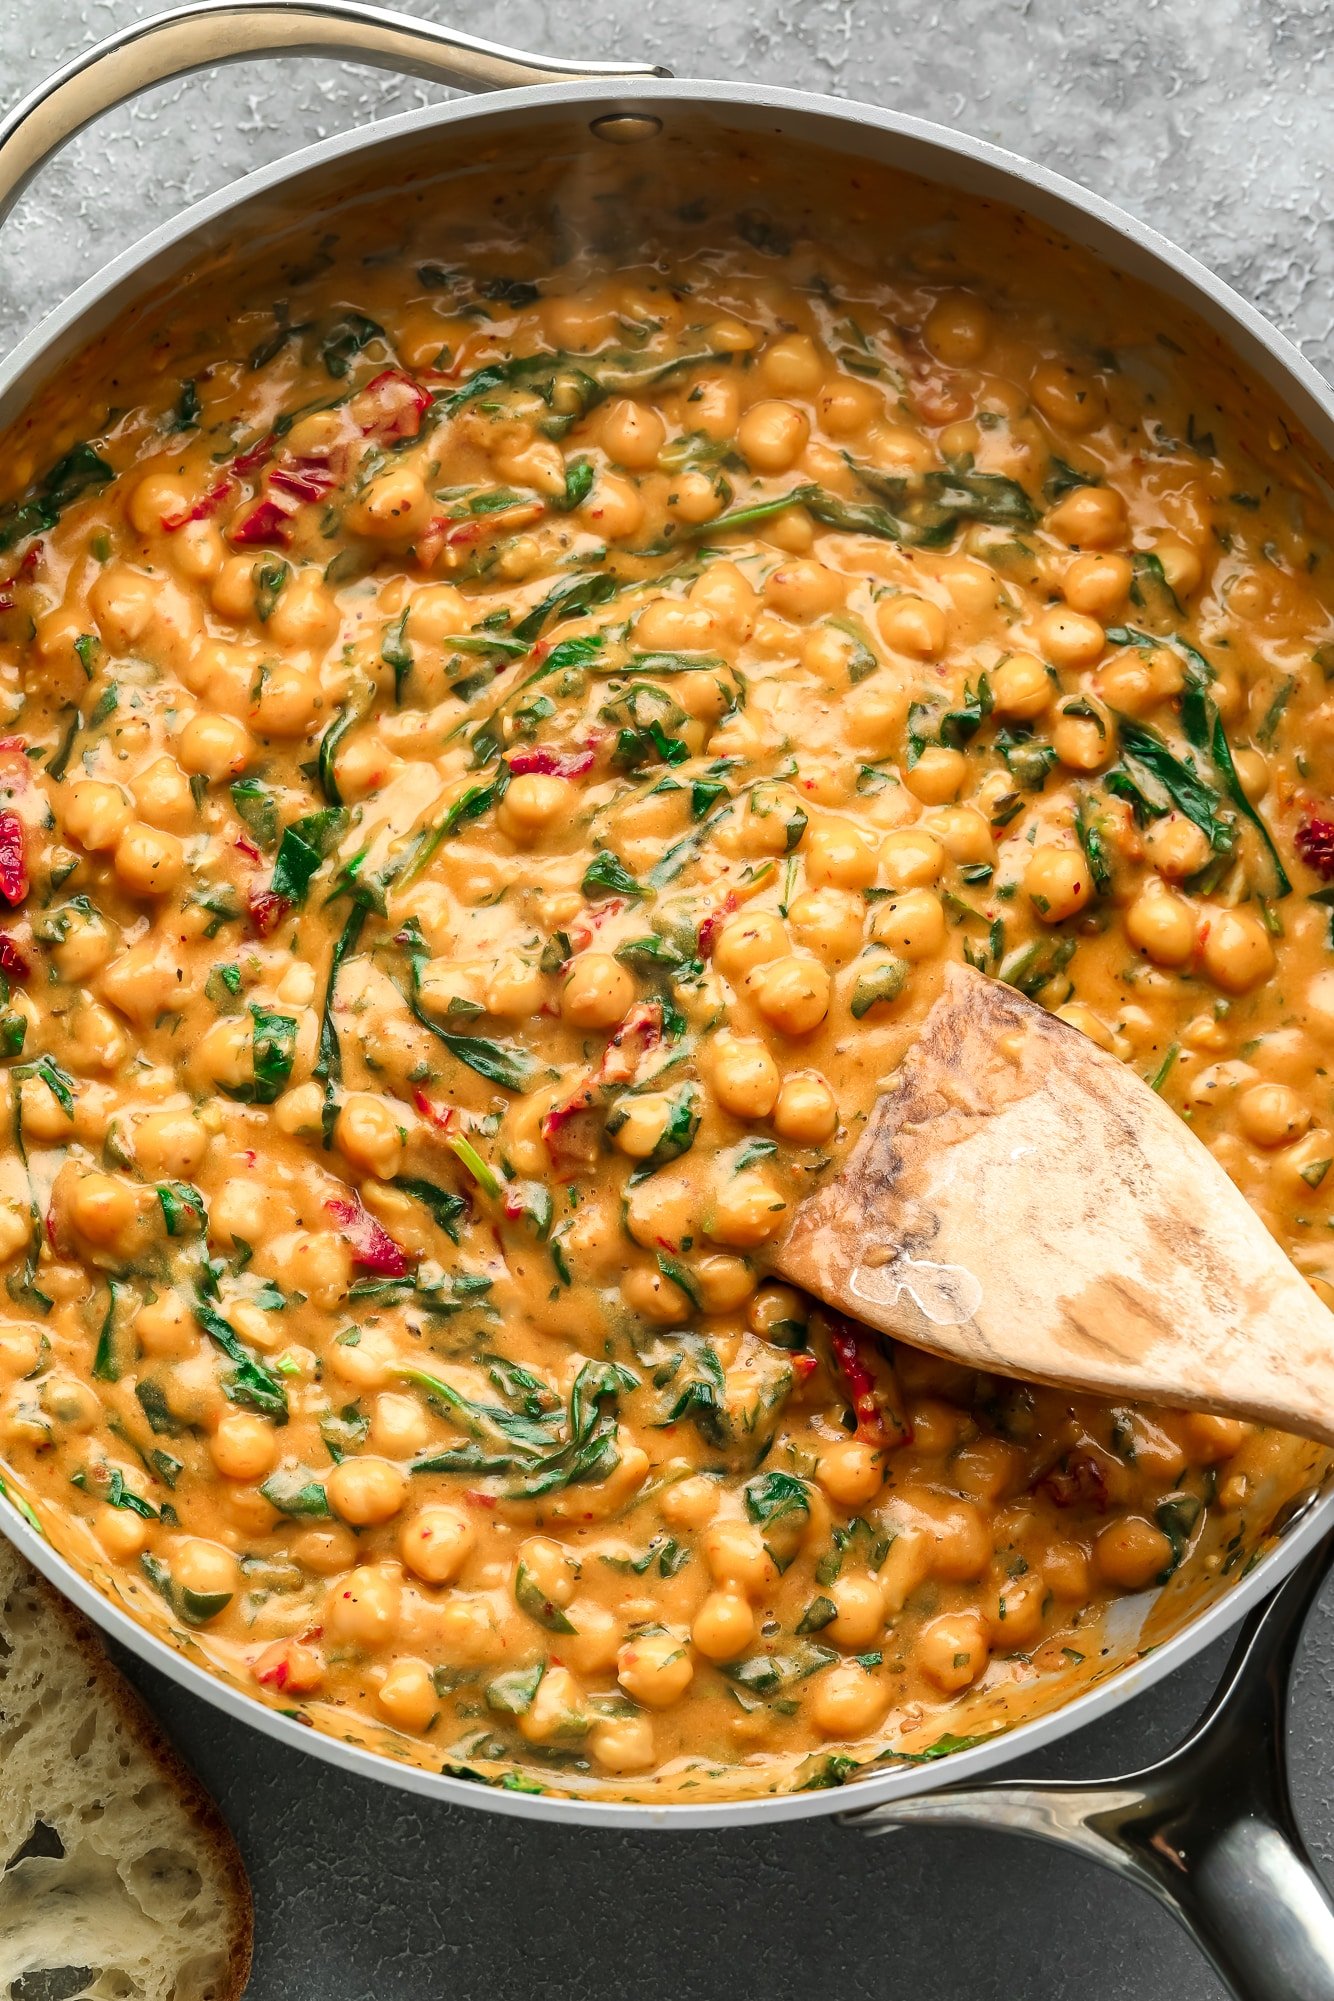
Place
the drained and rinsed chickpeas in a large bowl. Using a potato
masher, fork, or the back of a spoon, mash the chickpeas until they are
mostly broken down but still have some texture. You don’t want a
completely smooth paste; some chunkiness is desirable for texture in the
patties. Alternatively, you can pulse them a few times in a food
processor, being careful not to over-process them.
Add the slightly cooled sautéed vegetables (onion, garlic, carrot, and bell pepper) to the bowl with the mashed chickpeas.
Add
the grated zucchini (remember to squeeze out excess moisture!), chopped
fresh parsley, breadcrumbs, egg (or flax egg), cumin, paprika, chili
powder, salt, and pepper to the bowl.
Now, it’s time to bring all the components together and create the patty mixture.
Using
your hands or a large spoon, thoroughly mix all the ingredients
together until everything is well combined. Ensure the spices and
breadcrumbs are evenly distributed throughout the chickpea and vegetable
mixture.
The
mixture should be moist enough to hold together but not too wet. If the
mixture seems too wet, add a tablespoon or two more of breadcrumbs
until it reaches a workable consistency. If it seems too dry, add a
tablespoon of olive oil or water. The ideal consistency should allow you
to easily form patties that hold their shape.
Preheat
your oven to 375°F (190°C). Line a baking sheet with parchment paper.
Parchment paper prevents sticking and makes for easy cleanup.
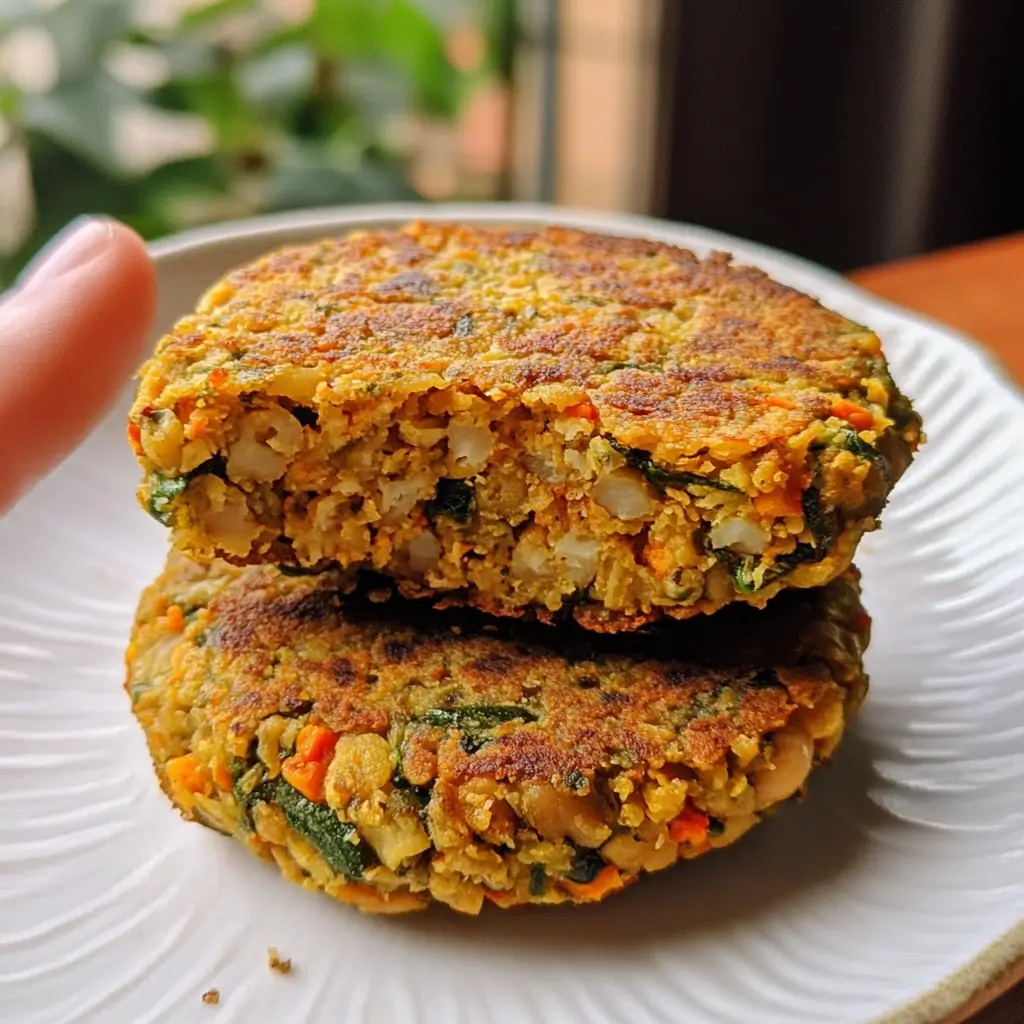
Take
about ¼ cup of the chickpea mixture and shape it into a patty, about ½
inch thick. You can use your hands to form round or oval patties. Aim
for consistent size and thickness for even baking. Place the formed
patty on the prepared baking sheet. Repeat this process with the
remaining mixture. You should get approximately 10-12 patties, depending
on the size you make them.
For extra browning and crispness, lightly brush the tops of the formed patties with a little olive oil.
Baking is the final step that cooks the patties through and gives them a delicious golden-brown exterior.
Place the baking sheet with the patties in the preheated oven and bake for 20-25 minutes.
After
20-25 minutes, carefully flip the patties using a spatula. Bake for
another 10-15 minutes, or until the patties are golden brown on both
sides and heated through. The internal temperature should reach 165°F
(74°C) if you are using a meat thermometer, although this is primarily a
vegetarian dish, checking for thorough heating is still important.
The
patties are done when they are firm to the touch and golden brown. You
can gently press one patty; it should feel firm and spring back
slightly.
Once
baked, remove the baking sheet from the oven and let the patties cool
slightly on the baking sheet for a few minutes before serving. This
allows them to firm up a bit and makes them easier to handle.
https://gscrochetdesigns.blogspot.com. one can see my crochet creations
https://kneereplacement-stickclub.blogspot.com. for info on knee replacement
https://cancersupportindia.blogspot.com for info on cancer and health related topics
https://GSiyers home remedies.blogspot.com is the latest addition to my blogs


:max_bytes(150000):strip_icc()/__opt__aboutcom__coeus__resources__content_migration__serious_eats__seriouseats.com__recipes__images__2014__10__20141022-quinoa-tomato-cucumber-salad1-3ada7fefc6f042efae631c789e086250.jpg)