Saturday, October 31, 2020

Baking Easy With These Tips

Baking is definitely one of the most complex culinary arts out there, with many adept cooks dreading to so much as dip their toes into "the art of baking". This is a real shame, as homemade desserts and pizza are objectively the best. Mastering this art is not so difficult, as long as you remember that baking is more like a science than an art. If you treat it as such and follow a few simple, but specific rules, you will get a delicious and beautiful result every time. These 11 essential tips will ensure your hard work in the kitchen baking pays off without fail.
 
1. The Color of Your Baking Pan Matters
baking tips baking pan color
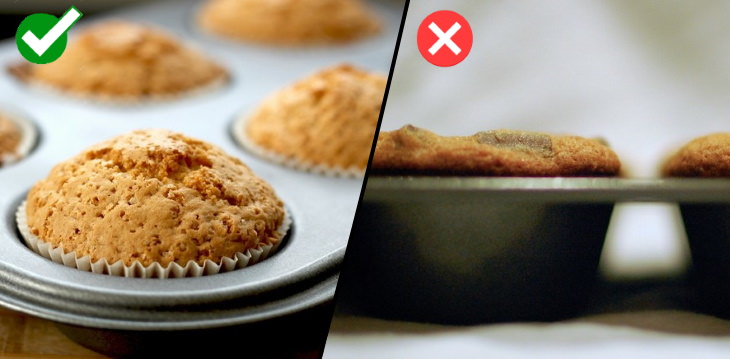
The majority of people don’t know that the color of your baking pan may influence your baking just as much as your oven or the ingredients you use. Dark baking pans are best used to brown up something very fast, as dark colors absorb light and heat better. So, these are perfect for roasted vegetables, but not ideal for cookies, cupcakes, and cakes, as the results may be uneven (browned outside, but undercooked on the inside, just like the muffins on your right). 
 
Light pans and sheets, on the other hand, reflect more light, so they are perfect for cookies, muffins, and cakes, but won’t be able to give you the much-desired pizza crust. 
 
2. Don’t Leave Ingredients Out in the Sun
baking tips baking soda
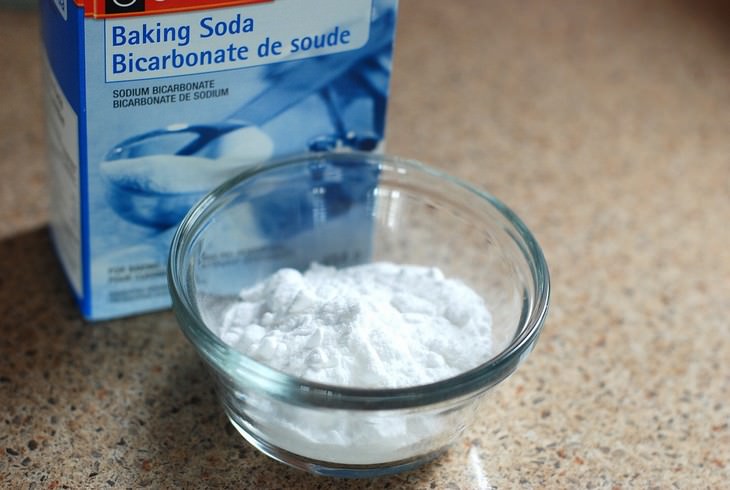
Your cake didn’t rise and you have no idea why? It may be because you left baking powder or baking soda under direct sunlight. These ingredients can react to the sun, rendering them no longer active later when you add them to cake batter. That’s why it’s best to keep all of your ingredients out of direct light. 
 
3. Use a Grater to Prep Your Cool Butter
baking tips grating butter
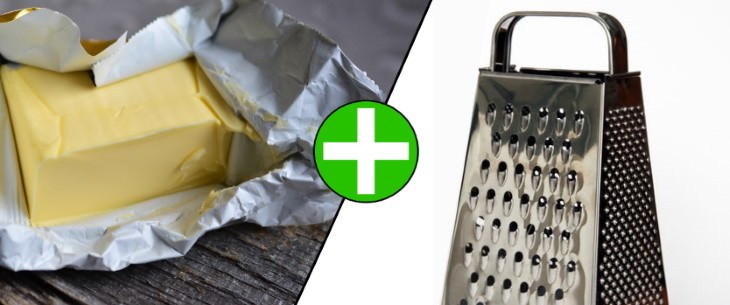
Butter is one of the trickiest and most important ingredients to work with when baking. Always pay attention to the butter temperature your recipe calls for. 
 
If your specific recipe calls for chilled butter (e.g. to make a pie crust), you can save a lot of time by simply using a cheese grater instead of cutting the butter into cubes. After grating the required amount of butter, return it to the fridge for a couple of minutes to cool down before using. A super crispy crust is guaranteed using this method, as you’ll be handling the dough less and it won’t it have time to warm up. Also, don’t throw away the butter wrapping, use it to grease the baking pans instead. 
 
4. Take into Account the Temperature in your Kitchen 
baking tips cookie fail
When baking, we use some ingredients that have different properties when used at different temperatures (e.g. butter), and others that require a certain temperature to be activated (e.g. yeast). These temperature-sensitive ingredients can fail to deliver when used in a kitchen that’s too hot or too cold. 
 
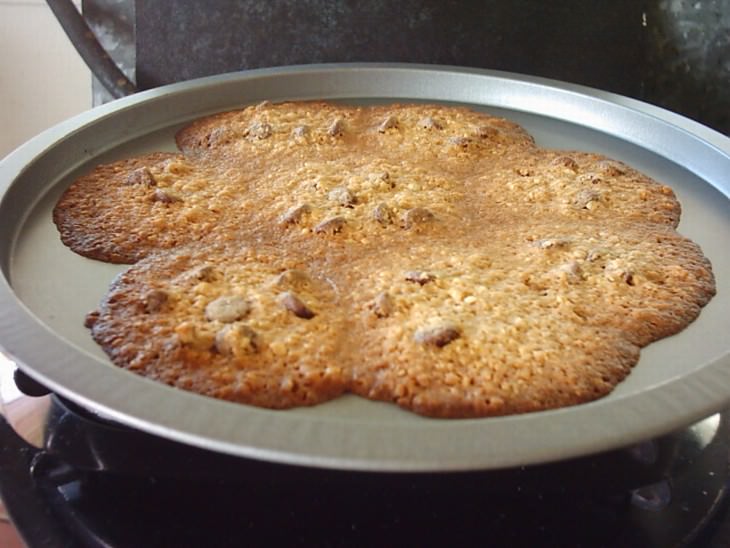
For example, cookie dough can become more liquidy when made in hot climates, whereas sourdough simply won’t proof in a cold room, so always take the room temperature into account and make adjustments to the baking process to compensate. 
 
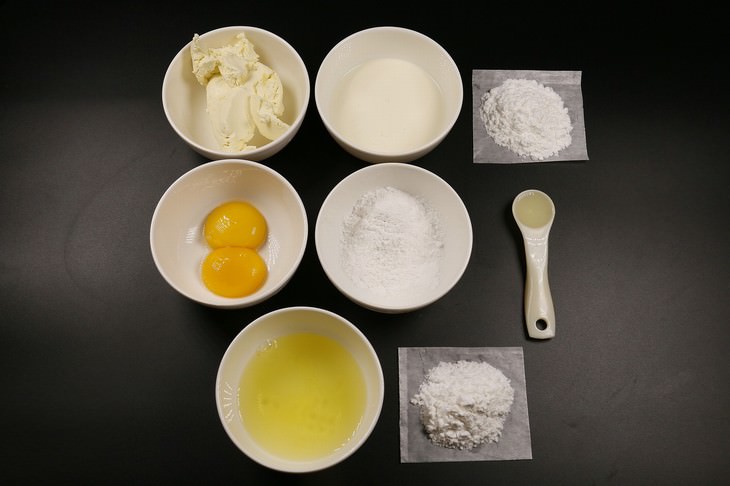
5. Don't Measure Out Your Ingredients Over the Mixing Bowl  
baking tips prep the ingredients
We see this mistake all the time: a person cracking eggs, measuring out sugar, vanilla or even flour directly over the mixing bowl containing the rest of the ingredients. And while we understand that using separate bowls means a lot more dishes to do later, using only one bowl is often a recipe for disaster. 
 
Instead, you have two options: either prepare all ingredients ahead of time as they do on cooking shows (and we illustrate in the photo above) or simply use a second bowl to measure out each ingredient and transfer them to the main bowl one by one. Both methods ensure that you add the exact quantity of each ingredient and not a smidgen more, which is exactly what you want. 
 
6. Use a Scale Instead of Measuring Cups
 baking tips scale
Compared to cooking, baking is a very exact science, where a few pinches of flour or an ounce of butter can make or break a recipe. And while we recognize that using cups when baking is a long-standing American tradition, have you ever wondered the majority of chefs use the scales instead? 
 
The major reason for that is the huge variance in size between different brands and styles of measuring cups. One blogger even conducted an experiment and found that by using only 2 different brands of measuring cups to measure out 5 cups of flour yielded in an over 12% difference in weight, enough to really affect the quality of the dough. That’s why we always recommend using a more precise measurement, i.e. a scale. 
 
7. Don’t Scoop the Flour with a Cup to Measure out Flour 
baking tips flour
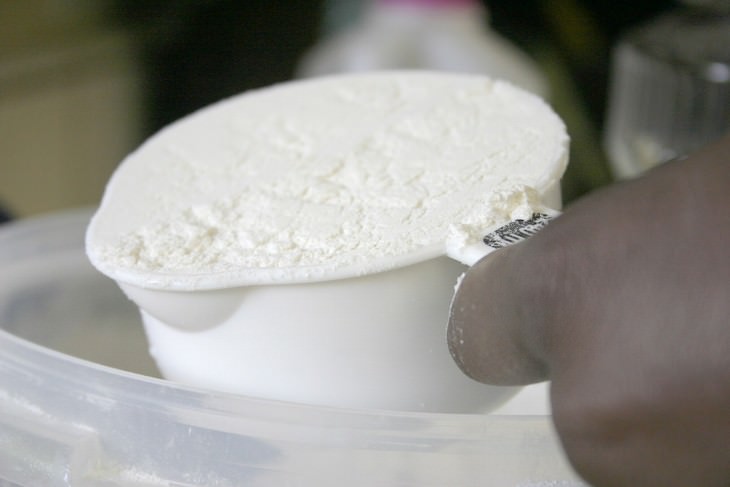
If you want to stick to your grandma’s cups to measure out your ingredients, that’s perfectly fine, as long as you know they’re accurate. But do keep in mind that how you’re packing flour into your cup matters as well. 
 
And while scooping out the necessary amount of flour may seem like the right thing to do, experts actually recommend spooning flour into the cup. This is important because when scooping, you might pack the flour in the cup too densely, which can actually dry out your dough or thicken the filling too much. 
 
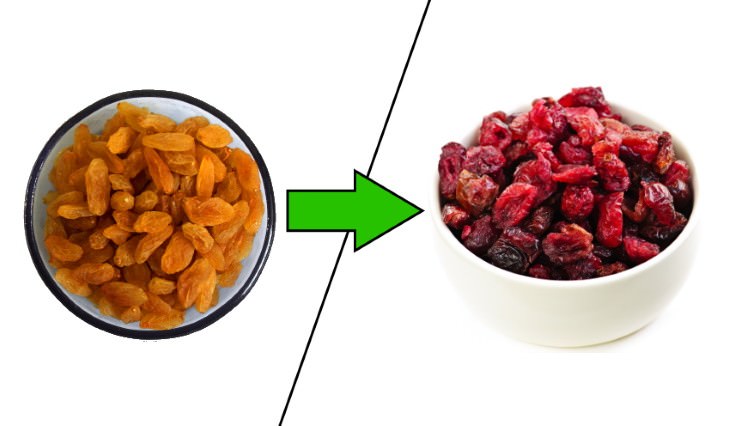
8. Know Which Ingredients You Can or Cannot Interchange
 baking tips substitutions
It doesn’t get better than closely following a recipe that you know and trust, but what if you like a new recipe, but don’t have or simply don’t like one of the ingredients in it? In some cases, you can substitute these ingredients for others, whereas in others, the ingredients are irreplaceable. 
 
Core ingredients, such as specific types of flour and sugar, or fatty ingredients (such as oils or butter) are often more difficult to replace without affecting the taste or texture of the end product. Filling ingredients, spices, and artificial flavors, such as vanilla, chocolate, raisins or fruits, on the other hand, are usually optional or interchangeable. 
 
Some recipes will offer alternatives to uncommon ingredients, and others will offer vegetarian/vegan replacements, so always look out for those in a recipe.
 
9. Use an Oven Thermometer when Baking
baking tips oven thermometer
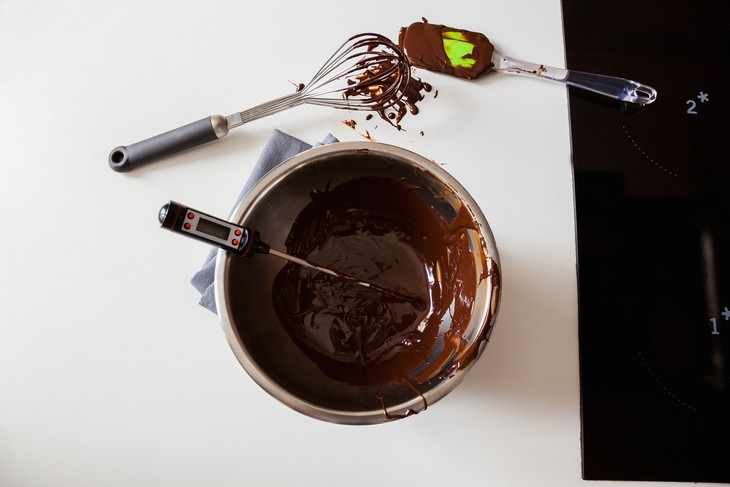
Many people have an oven thermometer in their kitchen, but end up using it only to cook meat, to which we say, “what a waste”! Built-in thermometers in old ovens often malfunction, so if you find that a perfectly good cake batter or meringue simply don’t rise as they’re supposed to, or seem to crack or dry out every time, your oven might actually not be showing you the exact temperature. 
 
Probably the cheapest way to get around this problem and monitor the exact temperature in your oven is using your oven thermometer. These are usually affordable and very handy in the kitchen. 
 
10. Use a Slotted Spoon to Separate Eggs
baking tips slotted spoon
How to separate an egg yolk from the egg white without piercing the yolk is an eternal dilemma. Some people use their hands, some use the so-called half-shell method, and some buy as special contraption just for that one task. I personally like to find a new use to the tools I already have in my kitchen, and using an ordinary slotted spoon to separate eggs accomplishes this task like nobody’s business.
 
I simply crack the egg into a small bowl and then retrieve the yolk with the spoon. Just make sure to do one egg yolk at a time to avoid smashing the other yolks in an attempt of catching one of the yolks. 
 
11. Prevent a Domed Cake with This Trick
baking tips even cake
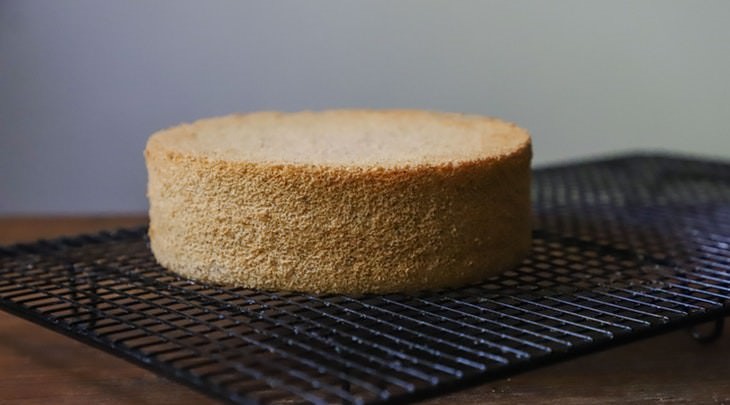
Even if your ingredients and recipe are solid and your oven works perfectly, you can sometimes end up with a domed cake that is dry on the inside. This is very annoying, as it means that you will have to cut off part of the cake to make it straight again, and you might have to infuse your cake with syrup to make it moister. 
 
This problem can be avoided by using cake rings, which can be purchased in stores or made at home. The video below shows you how to use these rings and compares cakes made using this method versus the traditional way of baking a cake.

https://gscrochetdesigns.blogspot.com. one can see my crochet creations  

https://cancersupportindia.blogspot.com. feel free to view for easy, simple and health tips  
https://kneereplacement-stickclub.blogspot.com. for info on knee replacement

50 Great Kitchen Tips and Tricks

Some people hate to enter the kitchen, while many like me would love to spend a lot of time there. During winter, of course, it is the best place at home, as it is warmer than any other place at home. But, in summer, one is keen to be out from the kitchen as early as possible. 

infographic kitchen tips

https://gscrochetdesigns.blogspot.com. one can see my crochet creations  

https://cancersupportindia.blogspot.com. feel free to view for easy, simple and health tips  
https://kneereplacement-stickclub.blogspot.com. for info on knee replacement

A Quick Recipe For the Easiest Bread You Will Ever Bake

 This isn't my recipe. I just read it, thought it is something interesting, unique and worth trying. It may sound a bit counterintuitive, using ice-cream for baking bread, but it actually makes for a super easy and incredibly soft and delicious treat. In fact, to make this delicious bread using ice cream, you only need one other ingredient! Let's run through this quick recipe and make ourselves some scrumptious slices of bread. 

The 2 Magic Ingredients

If you break down the ingredients used in ice cream, you'll see that you already have half the ingredients you need to make sweet bread, i.e., sugar, eggs, and cream. This recipe calls for the use of butter pecan ice cream but don't feel restricted by the flavor, you can go for anything you want. 
 
Another important ingredient for baking is self-rising flour, used for making everything from cookies and cakes to fried snacks and pizza! Self-rising flour contains salt, baking powder, and flour, which just happen to be the other three ingredients you need to make a loaf of fluffy and delicious bread. Toss in just a pinch of sugar and your bread is ready to go. 

So here are the ingredients you need: 
1 cup of butter pecan ice cream 
3/4 cup of self-rising flour 
1 tablespoon of sugar 
 
Preparation:  
This delightful sweet treat is easy enough to make once you have your ingredients in hand. In 4 simple steps your bread will be rising and ready
A Recipe for easy and quick ice cream bread made with 2 ingredients, A Loaf of bread sliced
Step 1: First make sure your ice cream is softened. If it's frozen solid, just microwave it for a few seconds. 
Step 2: Mix the softened ice cream with the self-rising flour and add in the sugar as well. Mix thoroughly until your batter is heavy and thick. 
Step 3: Pour your batter into a loaf pan (or any other suitable sized oven-friendly dish) and bake it for 25 minutes at 350°F. 
Step 4: After taking out your pan, allow it to cool for a few moments before removing your bread and slicing it. It tastes best served hot.

Enjoy Some Variety!   A Recipe for easy and quick ice cream bread made with 2 ingredients, A multitude of ice creams and toppings
A Recipe for easy and quick ice cream bread made with 2 ingredients, A multitude of ice creams and toppings Like The best thing about this loaf of sweet baked goodness is that you don't have to be restricted to butter pecan - in case you're not a fan. You can try baking this bread with other store-bought variants of ice cream, depending on the flavor of your choice. However, depending on the individual ingredients of each ice cream flavor, the results may vary. Chocolate chips and other meltable additions found in different flavors tend to sink to the bottom and melt adding a soft and gooey texture to your bread! So make sure to experiment with ice cream and bake the best bread.
Wouldn't it taste yummy ! Already mouth is watering, as I can't ice-cream or anything cold, surely I can eat this ( provided something is left behind for me) !


https://gscrochetdesigns.blogspot.com. one can see my crochet creations  

https://cancersupportindia.blogspot.com. feel free to view for easy, simple and health tips  
https://kneereplacement-stickclub.blogspot.com. for info on knee replacement

Friday, October 30, 2020

Corn cutlets / vadai !

We had bought some fresh corn. Normally hubby loves when it is boiled, but this one wasn't tasty, he said. So, I decided to make cutlets/ vadai from it. It was boiled corn, I scraped it with a knife to remove the corn from the cob.

Ingredients ( got 16 small cutlets)

corn 1/2 cup or half of the big corn

rice flour  1/2 cup 

besan  1/3rd cup

pottukadalai pdr) roasted dal pdr)  1 heaped tbsp

onion 1 medium finely chopped

 salt and chili pdr to taste

hing little

ajwain/ carom seeds  1/2 tsp

water to knead stiff

oil for frying


Method

added corn, onion, flours, hing, carom seeds, chili pdr and salt, mixed well

added little water to make a stiff dough, so that I'ld flatten it like cutlet to fry

fried in medium hot oil, once when light brown, remove, fry again, then it becomes crisp.


https://gscrochetdesigns.blogspot.com. one can see my crochet creations  

https://cancersupportindia.blogspot.com. feel free to view for easy, simple and health tips  
https://kneereplacement-stickclub.blogspot.com. for info on knee replacement


Thursday, October 29, 2020

Dishes Using a Waffle Iron

 1. Hash browns

waffles
Grate fresh potatoes over the waffle iron adding vegetables and cheese. You can also use frozen tater tots. 
 
2. Reheat macaroni and cheese waffles  
waffles
A classic enjoyable meal easily reheated. Dip your refridgerated macaroni in flour and coat this with a beaten egg. Bread this with crumbs and place it on the waffle iron.

4. Cinnamon rolls 
This one only takes 6 minutes. Place Refrigerated Cinnamon Rolls on your waffle iron. Use cooking spray for a non-stick result. Drizzle with icing. Presto.

5.French toast, waffle-style  
 waffles
For an quick decadent breakfast cut off the crusts of bread, dip in whisked egg and press in the waffle iron. Add cinnamon, syrup or jam for that finishing touch. 
 
6. S'mores, without the campfire 
waffles
S'mores have 3 ingredients: marshmallows, chocolate and graham crackers. Click here for a graham cracker dough recipe.

7.Savory mashed potato waffles, with cheddar

waffles

Use leftover mashed potatoes to make delicious savory waffles. Add a pinch of flour and flavor by adding cheddar, chives, garlic powder and butter.

8.Chocolate cake

9.Red velvet cookies
wafflesGraham cracker dough recipe  
You’ll need the following ingredients: 
 2 cups all-purpose flour 
1 cup brown sugar 
1 teaspoon baking soda 
3/4 teaspoon salt 
Pinch of cinnamon 
 7 tablespoons butter, chilled, chopped into cubes 
1/3 cup honey 
5 tablespoons milk 
2 tablespoons vanilla extract 
 
How to make the graham cracker dough: Mix the dry ingredients. In another bowl whisk the milk, honey and vanilla together. Add the butter to the dry ingredients, mix until it looks like coarse cornmeal. Add the liquid mixture to the dry mixture. A dough should form. If a dough doesn't form add more flour, up to half a cup. Let the mixture sit for at least two hours, or overnight. 
 
Red velvet cookies recipe 
Ingredients: 
1 box red velvet cake mix 
 ½ cup butter softened 
 1 cup flour 
2 eggs 
 
How to make the cookies: 
Mix butter s and eggs with the cake mix. Add flour to this mixture, and combine. Roll into balls and place on the waffle iron. How to make the icing Combine the following until smooth: 4 oz. cream cheese 1 tablespoon of milk 2 cups powdered sugar

https://gscrochetdesigns.blogspot.com. one can see my crochet creations  

https://cancersupportindia.blogspot.com. feel free to view for easy, simple and health tips  
https://kneereplacement-stickclub.blogspot.com. for info on knee replacement