Sunday, December 28, 2014

Almond Butter Banana Bread

Ingredients:

1 1/2 cups flour
1/2 cup whole -wheat flour (if you don't have this available use 2 cups of all-purpose flour above)
1 teaspoon baking powder
1 teaspoon baking soda
1/2 teaspoon salt
1/2 teaspoon cinnamon
1/8 teaspoon allspice (or nutmeg)
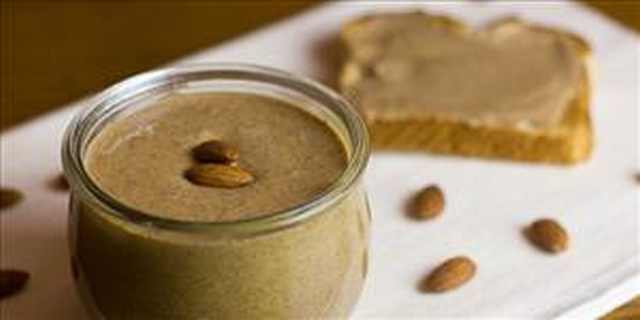
1/3 cup almond butter
1/2 cup honey (if your almond butter has honey in it, use less)
1 1/2 cups of mashed ripe banana
1/2 cup low-fat buttermilk or cow's milk
1 large egg, lightly beaten
1/2 teaspoon vanilla extract
1/2 teaspoon almond extract (if you really like the taste of almonds)

Topping:

2 tablespoons of chopped almonds
1 1/2 teaspoon of granulated sugar (with the big grains)

Begin by preheating the oven to 350 degrees (177 degrees Celsius). Place a baking sheet in the oven that has been sprayed or covered with a non-stick agent (or butter). Spray or cover a standard loaf pan with non-stick spray or butter as well.

Whisk together the flours, baking soda, baking powder, salt, cinnamon, and allspice in a large bowl. Then, create a hole in the center of the mixture to add in the wet ingredients.

Combine the almond butter and honey in a small bowl and heat in the microwave until slightly heated and combined, about 30 seconds. Let the mixture cool for a few minutes before adding it to a combination of the wet ingredients, the banana, buttermilk (or milk), egg and extracts. Add this to the flour mixture and combine well.

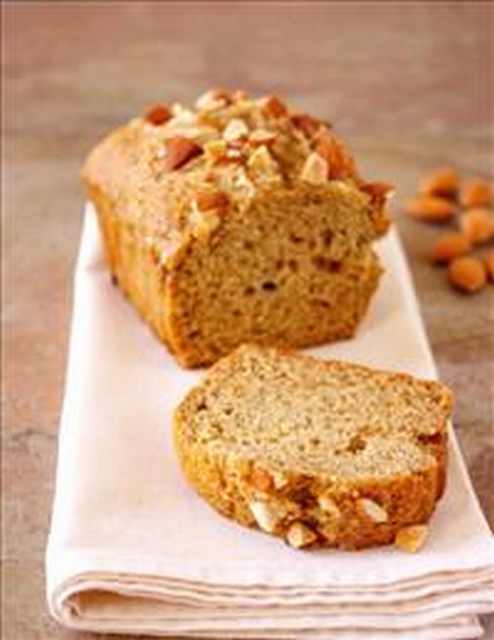
Pour the batter into the loaf pan and top with the chopped almonds and granulated sugar. Place the loaf on the baking sheet in the oven and bake for about 28-30 minutes, or until a toothpick comes out clean.

Remove the loaf from the oven and cool on a wire rack from about 10 minutes before removing the bread from the pan. Place the loaf on a plate to let it cool completely. When wrapped, the bread will keep for about 2 days at room temperature, and in the refrigerator for about 4 days. The bread can also be frozen and keeps for about a month.


slicedThose interested in health and cancer related topics are free to view my cancer blog-
http://cancersupportindia.blogspot.com/


those interested in cancer and health related topics are free to see my blog-
http://cancersupportindia.blogspot.com/
 for crochet designs, my blog, those who like a particular design are free to mail me

http://My Crochet  Creations.blogspot.com

For info. about knee replacement, be free to view my blog-

http://knee replacement-stickclub.blogspot.com

Homemade Almond Butter

Recipe makes: one small to medium sized jar of almond butter
Ingredients:

1 1/2 cup toasted almonds
A pinch of salt
almond butter

Begin by placing the almonds in the food processor (or blender). Turn it on and let the machine pulse and grind the almonds on a medium to fast speed. Add in the salt while the food processor is at work. Stop every couple of minutes and scrape down the sides of the bowl.

After about 15 minutes in the food processor, you will begin to see the oils separating and the consistency start to become creamy. This entire process should usually take about 20-30 minutes.

If you'd like your butter a bit on the sweeter side, add in a tablespoon of honey or agave syrup while processing the almonds. These are better sweet alternatives to sugar and will make the butter an even healthier treat!


you can see almond banana bread recipe in the next one.


Those interested in health and cancer related topics are free to view my cancer blog-
http://cancersupportindia.blogspot.com/


those interested in cancer and health related topics are free to see my blog-
http://cancersupportindia.blogspot.com/
 for crochet designs, my blog, those who like a particular design are free to mail me

http://My Crochet  Creations.blogspot.com

For info. about knee replacement, be free to view my blog-

http://knee replacement-stickclub.blogspot.com

Homemade Delicious Pita Breads

Recipe makes: about 8-12 pitas, depending how you shape them

Ingredients:

3 1/4 cups unbleached all-purpose flour/ maida
2 teaspoons salt
2 teaspoons instant yeast
2 tablespoons olive oil
1 1/4 cups water at room temperature

About 1 1/2 hours before shaping, or for the best flavor, about 8 hours to 3 days ahead, mix the dough.

The dough can either be done in a mixer or by hand (although a mixer is of course the easier option)

With the Mixer: In the bowl of the mixer, combine all of the ingredients. With the paddle attachment, mix at low speed until all the flour is moistened (about 20 seconds). Then, change to the dough hook and raise the speed to medium and knead for 10 minutes. By the end of the mixing process, the dough should stand clean in the bowl and be very soft and smooth, a little sticky to the touch. Add a little flour or water if necessary.

By Hand: In a large bowl, combine all of the ingredients except for 1/4 of the flour. Then, with a wooden spoon or your hand, mix until the flour is moistened and knead the dough in the bowl until it comes together. Sprinkle a bit more of the flour on the counter or a cutting board and place the dough on it. Knead the dough for about 5 minutes, adding as little flour as possible. The dough should be very sticky. Then, cover it in the bowl and allow it to rest for about 5-20 minutes until it is not as sticky.

After you have waited until the dough is less sticky, knead the dough for another 5 to 10 minutes until it is soft, smooth and just a little sticky to the touch. If needed, add a bit of flour or water.

baked

Next, let the dough rise. Using an oiled spatula or dough scraper, scrape the dough into a large bowl that has been lightly greased with cooking spray or oil. Press the dough down and lightly spray or oil the top of it. Cover the container with plastic wrap and wait until the dough rises to double its height. Refrigerate the dough overnight or up to 3 days, checking it every hour for the first four hours and pressing it down if it starts to rise.

Now
you are ready to bake. Preheat the oven to 475 degrees Fahrenheit (246 degrees Celsius) one hour before baking. Place the oven shelf at the lowest level and have a cast-iron, baking stone, or baking sheet in the oven before preheating.

Then shape the dough. Cut the dough into 8-12 pieces, working with one piece at a time. While you are working, keep the rest of the dough covered with a damp cloth. On a floured space, shape each piece of dough into a ball and then flatten them into a disk. Cover the dough with oiled plastic and allow it to rest for 20 minutes before baking.

balls of doughrolled outrolling out


To bake, quickly place one piece of the dough directly on the stone or skillet and bake for 3 minutes. The pita should be completely puffed, but not yet beginning to brown. If your pita is not moist enough it will not puff up, so have a bit of water at your side to splash on the pita. If you are using a baking stone or sheet, you can cook up to 3-4 pitas at a time.

fresh

When the pitas are done, transfer them to a clean towel. Before serving, you can reheat the pita for about 30 seconds so they are warm.

Enjoy this tasty bread with your family or give it as a gift to your friends! Homemade pita bread is truly the best!

cut

Those interested in health and cancer related topics are free to view my cancer blog-
http://cancersupportindia.blogspot.com/


those interested in cancer and health related topics are free to see my blog-
http://cancersupportindia.blogspot.com/
 for crochet designs, my blog, those who like a particular design are free to mail me

http://My Crochet  Creations.blogspot.com

For info. about knee replacement, be free to view my blog-

http://knee replacement-stickclub.blogspot.com

Sunday, December 7, 2014

Healthy Carrot-dates kheer/ payasam

Ingredients

carrot grated/ ground   3 big ones
dates  8-10 chopped and ground with carrot
milk 500-600 ml
sugar free about 1 1/2 tbsp or you can use sugar to taste
nuts and raisins as desired

Method
either you can grate or grind carrot and dates together and cook in milk, stirring from time to time on low flame till it thickens little.
To be frank, as I find grating difficult, I just cut carrots and dates into small pieces, pressure cooked in the pan with wee bit if milk and water, then cooled, then I ground it in the mixie
then I added sugar-free, as I wanted my husband to have it. This quantity gives about 3 big glasses.

Those interested in health and cancer related topics are free to view my cancer blog-
http://cancersupportindia.blogspot.com/


those interested in cancer and health related topics are free to see my blog-
http://cancersupportindia.blogspot.com/
 for crochet designs, my blog, those who like a particular design are free to mail me

http://My Crochet  Creations.blogspot.com

For info. about knee replacement, be free to view my blog-

http://knee replacement-stickclub.blogspot.com

Friday, November 21, 2014

Health Benefits and Uses for Home-Grown Herbs

Herbs are some of the best things you can grow around your house and garden. They are mostly easier to grow then many kinds of vegetables and fruits and yet they can be just as healthy and tasty to eat. These are 10 of the easiest, healthiest and most recommended herbs for you to grow, each with important tips on where and how to grow them. They are guaranteed to make your food taste better, your house smell nicer and your overall health better than ever before.

Rosemary:
A good for source of iron, calcium, and vitamin B6, rosemary has been found to be helpful with enhancing memory and concentration as well as providing neurological protection. It is an herb that’s perfect to grow in a pot, but not in direct sunlight, so you don't even need to have a garden. Use dry or fresh rosemary to add a great taste to pizzas or baked potatoes.

Thyme:
Thyme is a powerful herb that can help you with many types of breast and colon cancer, bacterial infections and skin problems. Thyme is commonly used for the treatment of diarrhea, stomachache, arthritis, sore throat and bronchitis. The plant is very hardy and is easy to grow, it is also safe to harvest without constant fear of the plant dying. It is best used in deep stews and meat marinades.

Sage:
Sage is used in medicine to help alleviate symptoms of mental disorders such as Alzheimer's and depression. It can also be used to solve digestive problems, improve memory and help type 2 diabetes patients with lowering cholesterol and triglyceride levels. A sage plant requires plenty of sunshine, good drainage and good air circulation. Sage is most often used with poultry and pork but can also be used to flavor cheese.
Lemon Balm:
Many people believe that lemon balm has calming effects that can reduce anxiety and sleep problems, it is also used for digestive problems like upset stomach, intestinal gas, vomiting and colic. This useful plant tends to be naturally pest and disease resistant, all it really needs is some decent soil, protection from punishing heat and a regular watering schedule. This herb can be used for making homemade tea and as a yummy salad addition.
Parsley:
Parsley contains more vitamin C and K than basically anything else you eat, it works wonders for people with kidney stones, gastrointestinal disorders, constipation, diabetes, cough, and asthma. If you plan on planting some parsley seeds in your garden do so in moist, rich soil and plant each seed about 7 inches (18 cm) apart. Chop parsley and sprinkle it on any dish you want to add a little life and color to, it's mild on flavor and yet very refreshing.
Chives:
Chives is nutrient-dense herb, its low on calories and high on beneficial nutrients like vitamins, minerals and antioxidants. Chives contains choline, an important nutrient that helps with sleep, muscle movement, learning and memory. It has no problems growing in-doors or out-doors but it prefers full sun light, it is also important to give chives consistent watering in the growing season, to ensure high yields. Add a bit of chives to salads or other dishes spiced with herbs to give them an unexpected twist.
Mint:
Best grown in a pot, as it grows to fill whatever space you give it, mint is a very useful herb to have around the house. It can be used as a simple answer to allergies, colds, Irritable bowel syndrome and abdominal pains. Use mint to make home-made natural tea, add to your salads, and even just crush a bit of leaves and add to water with some lemon juice for a great healthy drink.
Oregano:
This plant will glow at ground level but won't spread too aggressively which means its best gown out-doors or in large containers. Not only does this herb provide food flavor and an amazing smell, it's also high on potent antioxidants and anti-bacterial ingredients. Water the oregano only when the soil is dry, they are native to arid regions and don't like too much water. Use it when you are making some home-made pizza, mix it in with your pasta sauce and even try adding a bit to your morning's scrubbed eggs.
Tarragon :
Tarragon has been used as a traditional remedy to stimulate appetite and alleviate anorexic symptoms. It is a rich source of vitamins such as vitamin C and vitamins A and B, and other minerals like calcium, manganese, iron and magnesium. Keep tarragon in a spot of the garden that enjoys full sun in the morning with dappled light in the afternoon. It can tolerate full afternoon sun in locations that don't get too hot but it should be kept well watered. Tarragon is a tasty spice for any dish with rice or chicken and can also add a refreshing, but not overpowering, taste to fish.
Basil:
Consider planting this herb in your garden and house just for the smell if not for its many possible heath benefits. Rich in antioxidants and anti-aging properties, basil is a good source for vitamin A, vitamin K, vitamin C, magnesium, iron and potassium. During dry periods water the plants freely, basil loves moist ground, and also be sure to pick the leaves regularly to encourage growth throughout the summer. Commonly used in Italian cooking, basil combines wonderfully with anything that includes tomatoes and cheese.
Those interest in health and cancer related topics are free to view my cancer blog-
http://cancersupportindia.blogspot.com/
those interested in cancer and health related topics are free to see my blog-
http://cancersupportindia.blogspot.com/
 for crochet designs, my blog, those who like a particular design are free to mail me

http://My Crochet  Creations.blogspot.com

For info. about knee replacement, be free to view my blog-

http://knee replacement-stickclub.blogspot.com
 Tulsi/ basil, antioxdants, Vitamin A, B, C and K, magnesium, iron, potassium, tarragon, appetite, oregano, mint/ pudina, irritable bowel syndrome, chives, parsley, lemon balm, digestion, sage, thyme, rosemary,

Healthy Protein Rich Pancake

Ingredients

besan/ gram flour 1/2 cup
atta/whole wheat flour  1/2 cup
milk and water as needed
moong sprouts or any other sprouts either cooked or plain 1/2 cup
salt to taste
ginger-garlic-green chilli paste  2 tbsp OR you can use finely chopped ginger, green chillies and garlic if desired, which has anti-fungal, anti-bacterial, anti-cancer properties
baking pdr.  1/2 tsp
spring onion finely chopped 1/4 cup or less
fresh coriander leaves/ parsley finely chopped 1 tbsp

Method
mix all the ingredients well, keep aside for at least 10 minutes (you can use only besan or only wheat flour)
heat a non-stick pan, coat lightly with oil, make pancakes, these won't come very thin, once light brown on one side, turn over, add little oil if needed, cook till brown, as it is getting cooked, you can sprinkle some cheese on top, as it will melt or once done on both sides, then sprinkle cheese in between, fold into half and serve hot, either plain or with desired chutney/ ketchup.

Health Tip- this is a very healthy pancake, as sprouts and besan are rick in proteins, also there is cheese and milk, to give you calcium, gives you enough carbs, Vitamin C from coriander leaves and spring onion. So, this can become a complete meal on its own, good to take for packed lunch.

Those interest in health and cancer related topics are free to view my cancer blog-
http://cancersupportindia.blogspot.com/

those interested in cancer and health related topics are free to see my blog-
http://cancersupportindia.blogspot.com/
 for crochet designs, my blog, those who like a particular design are free to mail me

http://My Crochet  Creations.blogspot.com

For info. about knee replacement, be free to view my blog-

http://knee replacement-stickclub.blogspot.com

26 Handy Tips For Any Kitchen

Some people think it's an easy thing to prepare meals in your kitchen. In their mind, it's a skip and a jump to a well prepared meal. Those of us who actually DO the cooking, though, know that it is both a science and an art, where experience can make a huge difference, and where handy tips are always welcome to save time and achieve better results. Here are 26 great kitchen tips we should all learn.
kitchen tips
kitchen tips
kitchen tips
kitchen tips
kitchen tips
kitchen tips
kitchen tips
kitchen tips
kitchen tips
kitchen tips
kitchen tips
kitchen tips
kitchen tips
kitchen tips
kitchen tips
kitchen tips
kitchen tips
kitchen tips
kitchen tips
kitchen tips
kitchen tips
kitchen tips
kitchen tips
kitchen tips
kitchen tips


kitchen tips
  
Those interest in health and cancer related topics are free to view my cancer blog-
http://cancersupportindia.blogspot.com/
those interested in cancer and health related topics are free to see my blog-
http://cancersupportindia.blogspot.com/
 for crochet designs, my blog, those who like a particular design are free to mail me

http://My Crochet  Creations.blogspot.com

For info. about knee replacement, be free to view my blog-

http://knee replacement-stickclub.blogspot.com