Saturday, September 29, 2018

11 Surprising Uses for Wax Paper

Wax 
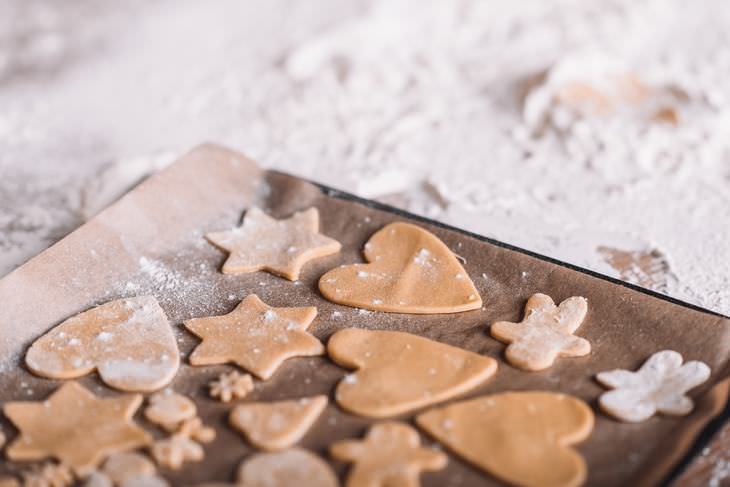
paper is handy to have in the kitchen. You've likely used it while rolling out dough for cookies, or wrapping food to store in the fridge. But what most people don't know is that there are more innovative uses for wax paper than just the basics. From cleaning hacks to helping your garden, here are some of the most unexpected ways to use this kitchen essential outside the kitchen:
 
1. Unstick a door
When a door is hard to shut because it sticks to the frame run a piece of wax paper over the edge and it will resolve the issue in no time.
2. Make decorating a cake easier
wax paper
If you are not a baker, writing 'Happy Birthday' on a cake for the first time with frosting can be difficult. So, instead of taking your chances, pipe it a few times onto wax paper and pop the sheet into the freezer for a half hour. Once frozen, you can easily peel it off and place it on your cake. 

3. Shine up stainless steel
With stainless steel, you will likely get fingerprints all over your fridge, dishwasher or sink. Instead of using all of those expensive stainless steel cleaners, run a piece of wax paper over the surface or faucet and it will sparkle like new. 
 
4. Make old wood new again
Just as wax paper shines stainless steel, it also works for most wooden surfaces like a wooden bowl or salad tongs that are going dull. Simply rub a piece of wax paper on the surfaces after you wash and dry them. After that, they'll appear shiny and new. 

5. Cleans (and protects) garden tools
Simply scrunch up a sheet of wax paper and rub it over your dirty spades and other gardening hand tools. Doing so will loosen the grime on the metal, and it will provide a barrier that will prolong the life of the tools, keeping them from rusting. 
6. It cleans your floors
If you are out of paper cloths, just attach a piece of wax paper to the end of any wet/dry mop. The wax on the sheet picks up dirt, dust, and grime on the wood floors almost as well as a cleaning pad will. 
 
7. Get rid of bacteria in wooden cutting boards
A wood cutting board is great, but a lot of bacteria seeps into it after cutting all that raw meat. Try placing a sheet of wax paper on top of the surface before cutting up your meat, this can limit the number of bacteria that gets on your cutting board. 
8. Deflect dust
In places where you find dust collects - usually on top of your kitchen cabinets, on window sills, or on your dresser, place some wax paper. Then, replace the sheet every few weeks or months as it gets dirty. You will never have to use a duster again. 
 
9. Fix a stuck zipper
If you have a zipper which has jammed in a backpack or a purse, grab a sheet of wax paper and lightly run it over the teeth of the zipper. This will help the zipper glide along its track easily. 
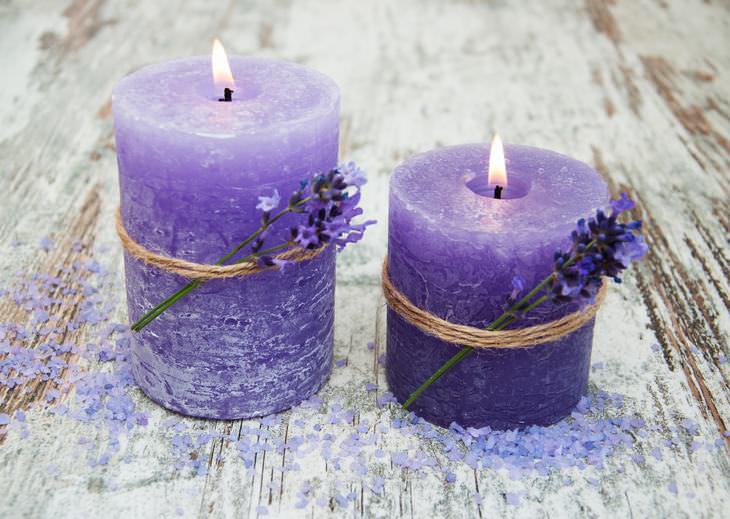
10. Prevent color bleeding
wax paper
Have you ever put your candles away for the season, only to unwrap them the next year and find out the dye bled all over everything you stored it with? Wrap them in a sheet of wax paper before you store them and the wax will keep the colors from bleeding. 
11. Dries a wet book
If you have dropped a book in the bathtub, there's nothing worse than wet pages. Place a few pieces of wax paper into the pages. The water will absorb into the wax and the wax will help prevent the pages from sticking to each other.

For my other blogs, I'm giving the links below, feel free to view and comment too.
https://cancersupportindia.blogspot.com. for all cancer and health related topics
https://gscrochetdesignss.blogspot.com. feel free to view for easy, simple crochet designs
https://kneereplacement-stickclub.blogspot.com. for info on knee replacemen


Saturday, September 22, 2018

Stop Avocado Turning Brown With This Easy Trick and Know Its Benefits

Whilst delicious, Avocado’s are on the more pricey end of the grocery list and you don’t always need to use a whole one at that time. That leaves the dilemma. What to do with the unused half and what is the best way to store it? Avocados are rich in nutrition- so no one wants all that to go waste, like-
1) High in fibre
2) High in potassium
3) Lowers bad cholesterol
4) Raises good cholesterol
5)Regulates blood sugar levels
6) Reduces the risk of stroke
 7) Protects against eye diseases
8)Improves nutrient absorption
9) Prevents birth defects
10) Promotes healthy bones
11)Anti-inflammatory
12)Slows ageing
13) Aids in weight loss
14) Nourishes skin
15)Strengthens immune system
16) Rich in Omega -3 fatty acids

There is nothing more frustrating than discovering that your Avocado fails to make it through the night and it’s a mushy mess.

There are lots of suggestions including rubbing lemon and lime juice, leaving the stone and covering with the unused skin and also a covered water method.

How To Stop Avocado From Turning Brown

Cut red onion into slices, then put the half of the avocado on top of it, cover the container with a tight lid. Onion gives out sulfuric acid, which helps to preserve the avocado and it is this acid which makes us cry when we cut onion. This will help avocado to last for 5 days at least.

To preserve the avocado dip too, you can place slices of onion on it.

For my other blogs, I'm giving the links below, feel free to view and comment too.
https://cancersupportindia.blogspot.com. for all cancer and health related topics
https://gscrochetdesignss.blogspot.com. feel free to view for easy, simple crochet designs
https://kneereplacement-stickclub.blogspot.com. for info on knee replacemen


Sunday, September 16, 2018

Ammni Kolakattai ( little spicy

 the mavu/ batter cooked and ready to roll
 ammni kolakattais steamed
ammni kolakattais fried and ready to eat

INGREDIENTS
rice flour 1 cup
water 2 cups
salt to taste
red chili pdr. to taste
oil 1 tbsp
mustard seeds 1/2 tsp
hing little

METHOD
I mixed rice flour and water well in the pan in which I was going to cook it, without any lumps, adding salt and chili pdr.
Keep stirring while you cook, till the mavu comes together thick, remove, cool slightly till you can handle to roll into small balls
once the balls are rolled, put them either in greased idli plates or like what I did in a greased cooker pan and I steamed for about 6-7 minutes, remove and cool.
Heat a kadai/ pan with oil, add mustard seeds, once it crackles, add hing and little chili pdr., add the steamed balls, roast them well, if you like them to be crisp, then roast in slow flame with little more oil. serve hot or cold.

For my other blogs, I'm giving the links below, feel free to view and comment too.
https://cancersupportindia.blogspot.com. for all cancer and health related topics
https://gscrochetdesignss.blogspot.com. feel free to view for easy, simple crochet designs
https://kneereplacement-stickclub.blogspot.com. for info on knee replacemen

Left-Over Rice Idli

INGREDIENTS
left over rice  1 cup
fine rava/ suji  1 1/2 cups
curd  1/2 cup + little more if needed to get the correct consistency
salt to taste
Eno fruit salt  1/2 tsp 

METHOD
mash the rice well, add rava, mix well, add curd, mix well along with salt
keep aside for 10 minutes to see if you have to add more curd or water to get the correct consistency.
then add Eno fruit salt, mix well, pour in greased idli plates, steam for 10 minutes
serve hot with chutney of your choice or with milagai podi.

For my other blogs, I'm giving the links below, feel free to view and comment too.
https://cancersupportindia.blogspot.com. for all cancer and health related topics
https://gscrochetdesignss.blogspot.com. feel free to view for easy, simple crochet designs
https://kneereplacement-stickclub.blogspot.com. for info on knee replacemen

Tuesday, September 11, 2018

FRIED MODK/ KOLAKATTAI

INGREDIENTS
for the outer cover
maida/ atta or mixture of both 1 cup
fine suji/rava  2 tbsp
ghee 1 tbsp
salt wee bit
water to knead to a soft dough
ghee/ oil for frying

FILLING
coconut grated 1 cup
gur  1/2-3/4 cup ( as per taste)
sesame seeds/ til white roasted  2 tbsp
nuts finely chopped  2 tbsp
finely chopped dates/ dried figs  2 tbsp ( if adding dates/ figs, reduce gur quantity)

METHOD
in a pan, roast sesame seeds, keep aside
in the same pan, add coconut, gur little water cook till almost dry, along with dates/ figs finely chopped, then add til and nuts, cook till dry, remove, cool

For the dough, add the flour, suji, salt, mix well along with ghee, then add water to make a soft dough. Let it rest for 10 minutes, roll the dough like for roti, cut into strips, put filling, shape, see that it is well sealed, keep all ready or you can make a few and start frying in medium hot oil, while you can prepare the rest, that is the way I do. Once golden, strain in colander and when cool, store after doing nevadiyam !( offering to God). This will last for few days, if your family doesn't finish the same day !

For my other blogs, I'm giving the links below, feel free to view and comment too.
https://cancersupportindia.blogspot.com. for all cancer and health related topics
https://gscrochetdesignss.blogspot.com. feel free to view for easy, simple crochet designs
https://kneereplacement-stickclub.blogspot.com. for info on knee replacemen

STEAMED SPICY-VEG MILLET KOLAKATTAI

INGREDIENTS
millet flour  1 cup
rice flour 1/2 cup
carrot finely chopped 1
green chilies finely chopped 3 or as per taste
beans finely chopped 3-4
cauliflower finely chopped 2 tbsp ( optional)
mustard seeds 1/2 tsp
urad dal 1 tbsp
chana dal 1 tbsp
ginger finely chopped 1 tsp
curry leaves finely chopped 1 tsp
fresh coriander leaves finely chopped 2 tsp
hing little
salt to taste
oil 2 tsp
water to knead

METHOD
in a bowl, mix the 2 flours and salt for the flours mix well
in a kadai, add oil, once hot, add mustard seeds, after it crackles, add the dals, fry till golden, add hing, green chilies, curry leaves and ginger fry for a minute
add the veges and little salt toss for a few minutes, veges need not get cooked, as it is going to be steamed.
add the veges to the flour mixture, mix well, then sprinkle little water to knead to a soft dough. roll the dough into balls or oval as desired
in a steamer, which is ready with boiling water, put the rolled kolakattais in the steamer/ idli plates and steam for 8-10 minutes, it depends on how big / small your kolakattais are ! once done, when you touch with wet hand, it shuoldn't stick, remove from the steamer/ cooker, cool for a minute, remove serve hot with chutney if desired.  
OR, you may fry the kolakkatais in little oil and also serve hot, it will taste good.

For my other blogs, I'm giving the links below, feel free to view and comment too.
https://cancersupportindia.blogspot.com. for all cancer and health related topics
https://gscrochetdesignss.blogspot.com. feel free to view for easy, simple crochet designs
https://kneereplacement-stickclub.blogspot.com. for info on knee replacemen

Millet Pal ( milk) Kolakatti ( modak)

INGREDIENTS
millet flour ( ragi/ kelvaragu or whatever you've) 1 cup ( if ragi is used, the colour may be light red of the flour, while other flours may be white- but ragi has more calcium and iron, good for health)
rice flour 1/2 cup
milk 1 1/2 cups
water 1 cup
jaggery syrup 1/2-3/4 cup strained  OR you can add sugar to taste
fresh coconut grated 3 tbsp
nuts and raisins to decorate
salt wee bit
water to knead the dough
cardamom pdr. 1/2 tsp

METHOD
in a bowl, mix the flours with salt well, then add little water to knead a soft dough.
roll out the dough into small balls
In a heavy pan, add milk and water, once the mixture starts to boil, lower the flame and add the balls one by one, DO NOT STIR,  let it simmer for 5-7 minutes, 
add cardamom pdr., coconut and gur syrup or sugar or sugar substitute whatever you desire
once it gets mixed well, it need not boil if you're adding gur syrup, remove, serve hot garnishing with nuts and raisins which can be roasted in little ghee.

ps- this will be healthy if you add gur syrup, for which you soak gur in water about 1/2 cup gur in 1/4 cup warm water, strain and use. Gur has iron, millets are healthier, has it has more fibre.
Coconut has vitamin E good for skin and hair. Gur has iron, milk calcium.


For my other blogs, I'm giving the links below, feel free to view and comment too.
https://cancersupportindia.blogspot.com. for all cancer and health related topics
https://gscrochetdesignss.blogspot.com. feel free to view for easy, simple crochet designs
https://kneereplacement-stickclub.blogspot.com. for info on knee replacemen


Wednesday, September 5, 2018

Broccoli soup

Ingredients:
  • 2 tablespoons coconut oil
  • 1 medium onion, finely chopped
  • 2 medium stalks celery, finely chopped
  • 2 medium potatoes, peeled and cubed
  • 4 cups fresh broccoli, including stems, set aside florets after steaming
  • 2½ cups  vegetable broth
  • 1 cup coconut milk—optional, if not used then increase broth to 3½ cups
  • Salt and freshly ground black pepper
  • ¼ cup feta cheese (optional)
Instructions:
1. Place the oil in a large pot and heat over a medium heat. Sauté the celery and onion for 4 minutes, until softened.
2. Add the potatoes and broccoli stems and sauté for 2 more minutes.
3. Add the broth and coconut milk, bring to the boil.
4. Add salt and pepper to taste.
5. Reduce heat, cover, and simmer for 20 minutes.
6. When simmered and the vegetables are tender, pour the mixture into a blender and puree until smooth.
7. Serve and garnish with an abundance of feta cheese and broccoli florets - enabling the sulforaphane producing reaction.


ps- how to cook and get the maximum health benefit of broccoli, kindly see my cancersupportindia blog, thanks.

For my other blogs, I'm giving the links below, feel free to view and comment too.
https://cancersupportindia.blogspot.com. for all cancer and health related topics
https://gscrochetdesignss.blogspot.com. feel free to view for easy, simple crochet designs
https://kneereplacement-stickclub.blogspot.com. for info on knee replacemen


Monday, September 3, 2018

Fenugreek pudding !

INGREDIENTS
fenugreek roasted and powdered  2 tbsp
rice flour  4 tbsp
millet pdr.  4 tbsp
jagger powder  1/2 cup or to taste
water 2 cups
ghee 2 tbsp
nuts 1 tbsp chopped
raisins 1 tbsp
cardamom pdr. 1 tsp

METHOD
in a bowl, add the  methi powder, rice flour, miller pdr, mix well adding a pinch of salt
add double the quantity of water of the dry ingredients, mix well, without any lumps
in a pan, add 1 tbsp ghee, roast the nuts and raisins, remove and keep in the serving dish.
now pour the batter in the same pan and keep stirring on medium flame till the mixture thickens, at this stage, you may add powdered jaggery or jaggery syrup and keep stirring till the mixture is thick. Add the remaining 1 tbsp of ghee, mix well adding cardamom pdr and half of the fried nuts and raisins, keeping the remaining for garnishing.
You can grease a tray or plate and spread the pudding sprinkling the remaining nuts and raisins on top. Then cut once it is set, or you may straight away serve in small bowls.

Health benefits- fenugreek lowers the sugar level, it has anti-ageing, anti-cancer, aids digestion, lowers cholesterol, improves kidney and liver functions. Having used jaggery, it is rich in iron, combined with millets, it enhances the good carbs. Ghee is needed to absorb fat soluble vitamins.


For my other blogs, I'm giving the links below, feel free to view and comment too.
https://cancersupportindia.blogspot.com. for all cancer and health related topics
https://gscrochetdesignss.blogspot.com. feel free to view for easy, simple crochet designs
https://kneereplacement-stickclub.blogspot.com. for info on knee replacemen


Flax-seed-onion chutney

INGREDIENTS
flax seeds 2 tbsp
small sambar onion 8-10 or finely chopped onion 4 tbsp
urad dal  1 tbsp
chana dal 1 tbsp
tomato 1-2 finely chopped
curry leaves 3-4 tbsp or mint leaves 1/4 cup
fresh coriander leaves 4 tbsp
ginger finely chopped  1-2 tbsp
salt to taste
dry red chilies 3-4 as per taste
tamarind 1 tsp
garlic pearls finely chopped  1 tsp
oil 1 tbsp
hing little

METHOD
roast the flax seeds and keep it
add oil in a small pan, add the dals, fry till golden, add garlic, ginger, dry red chilies, onion, hing, fry adding wee bit of salt for onion to sweat, fry till light brown
add tomatoes, fry for 3-4 minutes adding curry leaves on low flame, add tamarind, remove cool
Once cool, put the fried ingredients along with flax seeds, salt in a mixer jar and grind adding little water along with coriander leaves.
This chutney is rich is omega 3 fatty acids, which normally vegetarians don't get from many foods. It is also rich in vitamins- as curry leaves are rich in Vitamin E, coriander leaves Vitamin C, if you add green chilies, then you get more Vitamin C along with mint . It is also rich in fibre.

PS- 1) for changes in taste, you may add only more tamarind and no tomato
2) you may add little coconut to grind the chutney
3) in stead of curry leaves, you may add pudina/ mint and coriander leaves for a different taste.

For my other blogs, I'm giving the links below, feel free to view and comment too.
https://cancersupportindia.blogspot.com. for all cancer and health related topics
https://gscrochetdesignss.blogspot.com. feel free to view for easy, simple crochet designs
https://kneereplacement-stickclub.blogspot.com. for info on knee replacemen

Dhalia or Broken Wheat Idli

INGREDIENTS
dhalia  2 cups
sour curd 2 -2 1/2 cups
salt to taste
oil  2 tbsp
mustard seeds  1 tsp
urad dal  1 tbsp
chana dal 1 tbsp
curry leaves finely chopped 1 tbsp
cashew nuts 1 tbsp chopped
pepper-jeera pdr. 1- 1 1/2 tsp or as per taste
fresh coriander leaves finely chopped 1 tbsp
ginger finely chopped 1 tsp

METHOD
roast the dhalia on low flame stirring continuously till light brown, cool.
Once the dhalia is cool, add roughly 2 cups curd, mix well adding salt to taste
After about 30 minutes, check for the consistency, if it is too thick, add little more curd, mix well.
In a small pan, heat oil, add mustard seeds, once it crackles, add the dals, fry well adding ginger, add cashew nuts, curry leaves, fry for another minute, pour this over the prepared mixture, adding coriander leaves and pepper-jeera pdr. mix well.
Steam an idli/ pressure cooker, grease the idli plates well, pour the batter, steam for 12- 15 minutes on medium flame. Check if it is cooked as if you touch with wet hands, it shouldn't stick.
Remove the plates, cool for a minute, then remove the idlis and serve hot with flax seed chutney. For the chutney see my next recipe.

ps- for the idlis to be soft, it is very important the curd is sour. If not, mix it and leave it overnight covered, or if the weather is hot, mix and let it rest for a couple of hours, then proceed as above.

For my other blogs, I'm giving the links below, feel free to view and comment too.
https://cancersupportindia.blogspot.com. for all cancer and health related topics
https://gscrochetdesignss.blogspot.com. feel free to view for easy, simple crochet designs
https://kneereplacement-stickclub.blogspot.com. for info on knee replacemen