Saturday, August 31, 2019

Idli (Maavu) batter Bonda

Ingredients
  • 2 cups idli-dosa batter (preferably old batter)
  • ½ cup maida
  • ½ teaspoon salt
  • a pinch of hing / asafoetida
  • ¼ teaspoon baking soda
  • ½ cup sour curd / yogurt
  • ½ cup onions,finely chopped
  • 4-5 green chilies, finely chopped (adjust to your taste)
  • 1 sprig curry leaves, finely chopped
  • ½ inch piece ginger, finely chopped
  • Vegetable oil to deep fry
Instructions
  1. Take about 2 cups of dosa batter and add it to a bowl.
  2. Add in half a cup of maida and salt. Add in a little hing / asafoetida. Add in a little baking soda too. Add in half a cup of sour curd / yogurt. Add in the veggies.
  3. Mix everything well to combine. If the mixture is thin, then add in a little maida to adjust the consistency. If the mixture is thick, add in a little curd to adjust the consistency. If the batter is too watery, it will absorb a lot of oil while frying and will be very greasy. So make sure the batter is not very thin.
  4. Now, we shall deep fry. When the oil is nice and hot, dip fingers in water and scoop out a teaspoon of batter in your fingers and gently drop them in oil.
  5. Use your thumb finger to just slide the batter into oil. Make sure the balls are small in size. If the balls are big, the inside tends to remain doughy. So always shape small balls for bonda, After adding the balls in oil, do not disturb for a minute. Fry for a couple of minutes turning the bonda.
  6. Bonda needs to be really golden in colour. Crisp bonda texture is what makes this dish irresistible. Remove and drain in paper towels.
  7. Serve hot!                                                             

    those interested in cancer & health related topics are free to see my blog- 
    http://cancersupportindia.blogspot.com/

    for crochet designs, my blog, those who like a particular design are free to mail me
    http://gscrochet designs.blogspot.com

    For info. about knee replacement, be free to view my blog-
    http://knee replacement-stick club.blogspot.com

Left-over roti upma

Ingredients
left-over roti 6
onion 2 big finely chopped
carrots 2 medium finely chopped
potato 1 big finely chopped
peanuts  2-3 tbsp slightly crushed
chana dal 2 tsp
urad dal 2 tsp
mustard seeds  1/2 tsp
hing little
curry leaves 15 finely chopped
coriander leaves finely chopped  2-3 tbsp
salt to taste
oil 2 tbsp
green chilies to taste chopped
ghee  1 tbsp
lime juice 2-3 tsp

Method
cut the rotis into small pieces
Heat a big kadai / non-stick pan, add oil, mustard seeds, once it crackles, add the dals, peanut, curry leaves, green chilies, once the dals turn golden, add hing, onion and wee bit of salt
once the onions are light brown, add potato and carrots mix well, cover and cook till done
add ghee and the roti pieces, toss well along with salt to taste, mix and cover for about 3 minutes adding half of the coriander leaves
remove add lime juice, mix well, garnish with rest of the coriander leaves and serve hot. It will make a healthy breakfast.

ps- you may add peas, cauliflower/ broccoli, mushroom, whatever you like.

those interested in cancer & health related topics are free to see my blog- 
http://cancersupportindia.blogspot.com/

for crochet designs, my blog, those who like a particular design are free to mail me
http://gscrochet designs.blogspot.com

For info. about knee replacement, be free to view my blog-
http://knee replacement-stick club.blogspot.com

How To Make Frozen Yogurt Bark

Raspberry & Pistachio Frozen Yogurt Bark

  • 1 cup Yoplait Greek Vanilla Yogurt
  • 4 Tbsp raspberry puree
  • 1 Tbsp. pure honey, maple syrup or agave
  • 3 tbsp Pistachio, toasted and chopped

Choc Banana & Hazelnut Frozen Yogurt Bark

  • 1 cup Yoplait Greek Vanilla Yogurt
  • 1 Tbsp. pure honey, maple syrup or agave 3 Tbsp Cocoa powder
  • 1 banana
  • 2 tbsp Hazelnuts, toasted and chopped

Peanut Butter & Jelly Frozen Yogurt Bark

  • 1 cup Yoplait Greek Vanilla Yogurt
  • 4 Tbsp natural peanut butter (or any type of nut butter)
  • 1 Tbsp. pure honey, maple syrup or agave
  • 2 Tbsp Strawberry jelly
  • 2 tablespoon Strawberries, diced

Instructions

1. Mix together ingredients in a bowl.
2. Spread yogurt mix on a small baking tray lined with cling wrap.
3. Place tray in freezer for a minimum of 3 hours to harden.
4. Once hard enough, break into pieces and enjoy immediately
5. Store in an airtight container in freezer for up to a month.

Creamy corn dip

Ingredients
•    2 ½ cups corn (frozen or fresh)
•    1 cup grated cheddar cheese
•    ½ cup grated Monterey jack cheese
•    ¼ cup mayonnaise
•    ¼ cup sour cream
•    ½ chopped bell pepper
•    ½ chopped white onion
•    2 minced garlic cloves
•    2 minced green onions
•    1 jalapeno (remove its seeds, and mince)
•    2 tbsp. butter
•    ¼ cayenne pepper
•    Salt & pepper (to taste)
•    Tortilla chips

Directions
1. Preheat your oven to a temperature of 350 F.
2. In a big skillet or pan melt the butter on medium heat. Then sauté both the bell pepper and onion until soft (around 5-7 minutes).
3. Then add the corn, cooking together for 5 minutes longer. Maintain stirring until the mixture is a lovely golden brown.
4. Add salt and pepper for a generous seasoning, and mix with optional cayenne pepper. Stir up with garlic and jalapeno. Cook and stir for approx. 1 minute.
5. Take a separate big bowl, and mix up the cheeses (minus a little bit of cheddar for later) with the mayonnaise and sour cream.
6. Now pour the vegetables into this bowl. Now take everything and transfer to a baking or pie dish (around 8 inches). Sprinkle your left over cheddar on the top.
7. Put in the preheated oven and bake for approx. 15 minutes. After this time the cheese will be melted, delightfully bubbly and somewhat brown.
8. Take it out of the oven and, with the tortilla chips (or fresh vegetables if you prefer), serve to your guests. Enjoy this corn-tastic dip!

ps- see my earlier post how to preserve corn 

those interested in cancer & health related topics are free to see my blog- 
http://cancersupportindia.blogspot.com/

for crochet designs, my blog, those who like a particular design are free to mail me
http://gscrochet designs.blogspot.com

For info. about knee replacement, be free to view my blog-
http://knee replacement-stick club.blogspot.com

2 Methods for Preserving Corn for Later Enjoyment


Corn is such a wonderful staple, and particularly in summer. Yet sometimes my eyes are a bit greedy and I buy too much, so that I often find myself seeing old cobs of corn go bad. It’s such a terrible waste. So these 2 methods for keeping corn are going to save me and you a packet. One method will show you how to keep corn well for the next day, the other will show you how you can store corn for an incredible 6 months. Watch this very useful video so that you too can learn how to preserve corn all the way to winter!


Method 1: To eat the following day  1. Take a wet paper bag, into which place your corn (including the husk).
2. Get a plastic zip-top bag and pop the wet paper bag of corn inside.
3. Now slide into the fridge before eating within the next 24 hours.


corn preservation

Method 2: To eat after many days, weeks or months. 1. Boil up a pan of water. Put the corn cob(s) in the water and blanch it for 5 minutes.
2. Drain the corn, and straight away put it into an ice bath in order to stop it from becoming cooked.
3. Take a clean dish towel, and put your corn on top of it in order to let it dry.
4. After the corn is dry, put it into a plastic zipper bag. Before sealing it up, push and squeeze out all the air.
5. You can now place your bagged corn in the freezer for your future enjoyment. It will be edible for up to 6 months.
for creamy corn dip, see my next post

those interested in cancer & health related topics are free to see my blog- 
http://cancersupportindia.blogspot.com/

for crochet designs, my blog, those who like a particular design are free to mail me
http://gscrochet designs.blogspot.com

For info. about knee replacement, be free to view my blog-
http://knee replacement-stick club.blogspot.com

Here Are 7 Signs a Watermelon is Bad

How many time have your brought a nice-looking watermelon from your local grocery store, only to discover that the fruit is soft, bitter, or lacking in sweetness? This is something that happens to the best of us, but it sure doesn’t have to! Below are 7 traits that indicate that the watermelon that you’re about to buy is bad: 
Buying the Best Watermelon
1. It is Cracking and Has White or Black Spots
A melon that has white and black dots, or has a lot of cracking, could be afflicted with what is known as belly rot, a condition which is known to speed up the molding process. This rot will obviously affect the taste and can even end up making you sick.

2. It Feels Light
While carrying a light watermelon back to the car on a hot summer’s day may sound like an advantage to some, the most informed know that this is a sign of trouble. This is because a lightweight watermelon informs you that there’s not enough water inside the rind, which means that you’ll likely be met with a dehydrated fruit once you cut into it.

3. It Doesn’t Sound Right
When you knock on a watermelon, you’ll want to hear a hollow sound as this is a sure sign that the fruit is juicy and filled with water. On the other hand, if you hear a thud, it’s a dud.

4. The Stem is Green
When buying a watermelon it’s a good idea to take a close look at the stem. While a parched-looking stem might look like a warning, it’s actually a good thing as it means that the fruit is ready to eat. If it has a rich green stem, the fruit definitely needs some more time to ripen. 
Buying the Best Watermelon
5. It’s Too Good Looking
Watermelons that have flawless rinds are not the ones to go for. If a melon is devoid of webbing, then it means that the fruit didn’t receive enough pollination. Though this won’t necessarily result in an inedible watermelon, it could mean that your fruit won’t be as sugary sweet as it should be. Sometimes, ugly is better!

6. It’s Too Long
While watermelons with long bodies are not necessarily bad for eating, rounder ones are generally much sweeter.

7. It Has a Big White Spot
When you turn over your watermelon you should see what is known as a field spot. The sweetest melons have a yellowish color on their underside – the darker, the better. However, keep in mind that a white spot is better than no spot at all.  

those interested in cancer & health related topics are free to see my blog- 
http://cancersupportindia.blogspot.com/

for crochet designs, my blog, those who like a particular design are free to mail me
http://gscrochet designs.blogspot.com

For info. about knee replacement, be free to view my blog-
http://knee replacement-stick club.blogspot.com

Friday, August 30, 2019

Add this one ingredient to paneer bhurji ( scrambled cottage cheese) to increase its protein value

Paneer bhurji is a quick yet healthy recipe that you can easily prepare during the busy morning hours. It doesn’t take more than five minutes to make it and the best part is it is rich in protein and thus perfect for your weight loss. 

Protein rich
Protein fills you up for longer and keeps hunger pangs at bay. And what if we tell you that you can increase the protein-quotient of your already protein-rich meal by adding this one ingredient. Wondering what it is? Green peas.  

Green peas are a powerhouse of nutrition and have the potential to induce satiety. Peas are rich in vitamin K, manganese, vitamin C and folate. The insoluble fibre in peas is good for the gut and also helps in reducing the risk of heart disease and stroke. 

​Adding green peas to paneer bhurji

Adding peas to your paneer bhurji also increases the fibre quotient of the dish and makes it even healthier for our digestive system. And healthy digestion as we all know is the most basic step for losing weight.  

Two ways to add peas to paneer bhurji

You can either add the whole green pods to bhurji or you can make a puree of the peas and add it to the bhurji. It is recommended to add whole pods as the fibre content would be retained and thus make it healthy for our digestion. 

​If you do not like green peas

If you are someone who is not fond of the taste of green peas, adding them in puree form is recommended. You can add some chat masala or some other masala that you like to make it palatable. So, next time you make this super easy bhurji, do not forget to add the peas.

Tip

Peas are easily available in frozen form in the market all year round. You can also take out peas from their pods and freeze them when fresh peas are available in the market. 

those interested in cancer & health related topics are free to see my blog- 
http://cancersupportindia.blogspot.com/

for crochet designs, my blog, those who like a particular design are free to mail me
http://gscrochet designs.blogspot.com

For info. about knee replacement, be free to view my blog-
http://knee replacement-stick club.blogspot.com


Thursday, August 29, 2019

Avoid These 6 Mistakes When Making Pasta

Preparing a mouthwatering plate of pasta does require a few steps. So, for your pasta to attain a smooth, silky and wonderful texture, avoid committing these cardinal pasta-cooking sins. Trust us, if you follow these steps you'll be rewarded with a delicious dish that is worth every creamy bite.
 
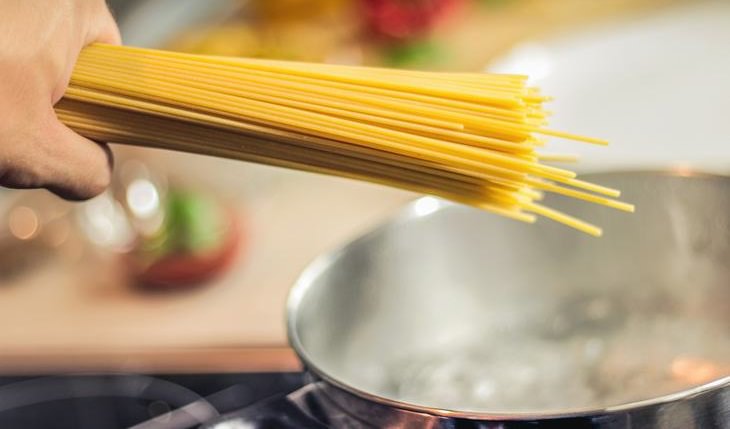
1. DON'T: Use a small potcorr
cooking pasta
As your pasta won't have much water to use up. Pasta needs plenty of water and room to cook evenly and release its starch. So adding your pasta together in a tiny pot will most likely mean that you'll end up with half of your pasta cooked, that's all stuck together. Fill a large stockpot with 5 quarts of water per pound of pasta and be sure that it comes to a boil before you add the pasta to the pan. 
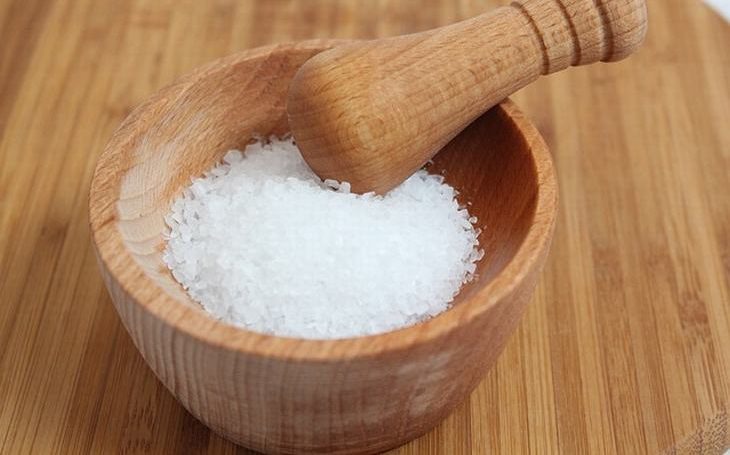
2. DO: Salt Your pasta
cooking pasta
You most likely use salt to season your meals regularly. So why not use salt to season your pasta too? Adding salt to the water will give your pasta a chance to absorb some of it, enhancing its flavor. For every 5 quarts of water, add 1 to 2 tablespoons of salt.
3. DON'T: Add oil to your pasta
While adding oil may keep your pasta from sticking together, it tends to work a little too well. The problem with this is that pasta needs to be a little sticky for the sauce to cling to it. If coated in oil, the sauce will slide right off. 

4. DON'T: Follow the time on the package instructions
That number should be used as a rough guideline, not something you should follow blindly. If you like your pasta al dente, it will likely be ready several minutes sooner than what's written on the label. So, if you're unsure about the time, taste the pasta and see if it is to your liking a couple of minutes before what is marked on the package instructions. 
5. DON'T: Toss the liquid down the drain
As the pasta releases starch into the water while it cooks, the water become thicker and stickier. So, just before you drain the pasta, reserve a cup of water pouring a little bit into the sauce when you add your pasta. It will make the sauce thicker and creamier and it will help the sauce cling to the pasta.
6. DON'T: Rinse your pasta after you've drained it
Running cooked pasta under water will remove all the sticky starch, which means that your sauce will not stick to the pasta as it should. To stop your pasta from clumping up together, drain it and immediately throw it into the sauce.
 

those interested in cancer & health related topics are free to see my blog- 
http://cancersupportindia.blogspot.com/

for crochet designs, my blog, those who like a particular design are free to mail me
http://gscrochet designs.blogspot.com

For info. about knee replacement, be free to view my blog-
http://knee replacement-stick club.blogspot.com